Goals
We are going to build an example with a functioning client registration: a client will log in to the application and enter their registration data. After they submit the data, an employee will review and confirm the data.
We will need the following:
- Custom data type for the registration data
- Roles that represent the client and the employee
- Forms for registration and for confirmation of registration
- Variables that hold the registration data
- Process that will steer through the registration and the approval
Model Structure
When you want to create a Model, you create a structure for your resources:
- GO-BPMN Project: directory in your workspace (workspace is the directory PDS uses to store your projects during a session)
- GO-BPMN Module: special type of directory with resources that can be imported to other modules
- Definition files: files with certain type of data needed by the module
First we need to create the structure that will hold our resources: all GO-BPMN resources in your workspace must be stored in a special directory called GO-BPMN project. Though not uploaded to the server, they are intended for better organization of your sources.
To create a GO-BPMN project, do the following:
- Make sure you are in the Modeling perspective: GO-BPMN Explorer should be displayed on the left: if this is not the case, go to Window > Perspective > Open Perspective > Other on the main menu and select the Modeling perspective in the dialog.
- On the main menu, go to File > New > GO-BPMN Project.
- In the New GO-BPMN Project dialog, enter the HandsOn project name and confirm.
In the dialog, notice the GO-BPMN Libraries section below: these are libraries with useful resources; however, often you will need only a subset of the available libraries: Generally the only library you will need is the Standard Library. Feel free to remove the other libraries to keep your workspace clean.
The GO-BPMN Explorer contains your project directory.
Now you will create GO-BPMN modules: modules serve to organize your model resources, and if they are marked as executable they can become model instances:
- Right-click the project and click New > GO-BPMN Module.
- In the dialog, enter the module name registration: notice the executable module option: if you unselect the option, you will not be able to create a model instance of the module. Non-executable modules serve to hold such resources as data models, role models, etc. If you create a process in this module, you will not be able to execute it by itself. For now, leave the option selected.
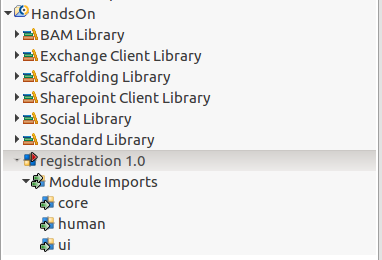
- Click Next: the dialog displays the list of Library modules that you can import to your module: if you left only the Standard Library in your project, only the modules of this library are listed: this is the minimum you need to create models.
- Click Finish. Now the project contains a module: notice the red arrow marker on the module icon: this means it is an executable module. You are ready to create module resources with your business data.
Data Model
Data models allow you to create data structures with internal structure for your business data, such as, your orders, clients, products, etc. For example, you could create an Order with its ID, date when it was placed, the client who placed it, its status. This all is then considered a single data structure called a Record. Records can then be designed to have relationships to other Records: The Order record could have a relationship to a Client record and the Client record could have relationship to an Account, etc.
You can find information on data types and on how to create them here.
Let's define the custom data type we will need to save individual registration applications:
- Create the data type definition file that will hold the custom data types: right-click the module, go to New > Data Type Definition.
- In the dialog, enter the name of the file, registration.datatypes
- Click Finish: in the editor on the right, you will create the data structures. The elements you can use are in the palette on the right: hover the mouse over the icon in the palette to display information about the elements.
- Create a shared Record: click the blue Shared Record icon in the palette and then click into the canvas. Instances of shared Record are automatically persisted in the mapped database entry and their changes are reflected in the mapped unlike common Records (yellow icons in the palette). Note that the Record was automatically created with the id field as its primary key that is automatically generated.
- Name the shared Record to RegistrationData.
- Add a Record Fields into the Record: select the Record and press Insert.
- Set the types of individual Fields in their Properties view or directly in the record
- approved: Boolean
- prefix: String
- firstName: String
- lastName: String
- street: String
- streetNumber: String
- postCode: Integer
- otherInformation: String
- city: String
Organization Model
Organization models serve to stream work to certain groups of people or to group people for other purposes: for example, you want to send your health check results only to HR people. Such groups are primarily represented by Roles, for example, Admin, Engineer, Secretary, Doctor. You create relationships of such Role to Organization Units or other Roles.
Detailed information on how to create Organization Models and work with them is available here.
Let's define the organization model we will need. The elements in the model will represent the groups of people possibly involved in the registration process:
- Create the organization definition file: right-click the module, go to New > Organization Definition. In the editor displayed on the right, you will create the organization structures: again, the elements you can use are in the palette on the right.
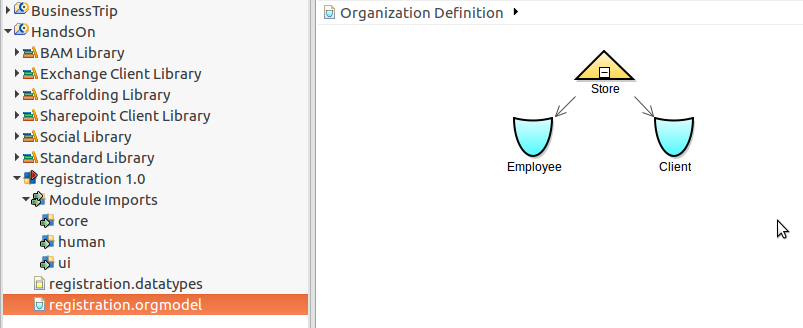
- Create an organization unit and name it Store.
- Decompose the unit into a role: click the quicklinker circle icon next to the unit and pull and release: select Role from the context menu.
- Name the role Employee.
- Decompose the unit into another role and name it Client.
- Save the model.
The organization model you just created allows you to address both the client and the employee as the Store unit. Note that the way you create the organization model should reflect the way you need the users grouped and sorted for your business process: usually it will not reflect your real organization structure.
Variables
Variables serve to store values of a certain type, be it of a built-in type or your Record type. They exist in a particular context, such as, a process context, and might not be accessible from everywhere: to prevent issues with access, we will create a global variable to store registration data since global variables are accessible from the entire module.
Let's define a global variable for the registration data:
- Create the variable definition file: right-click the module, go to New > Variable Definition.
- In the editor displayed on the right, click Add.
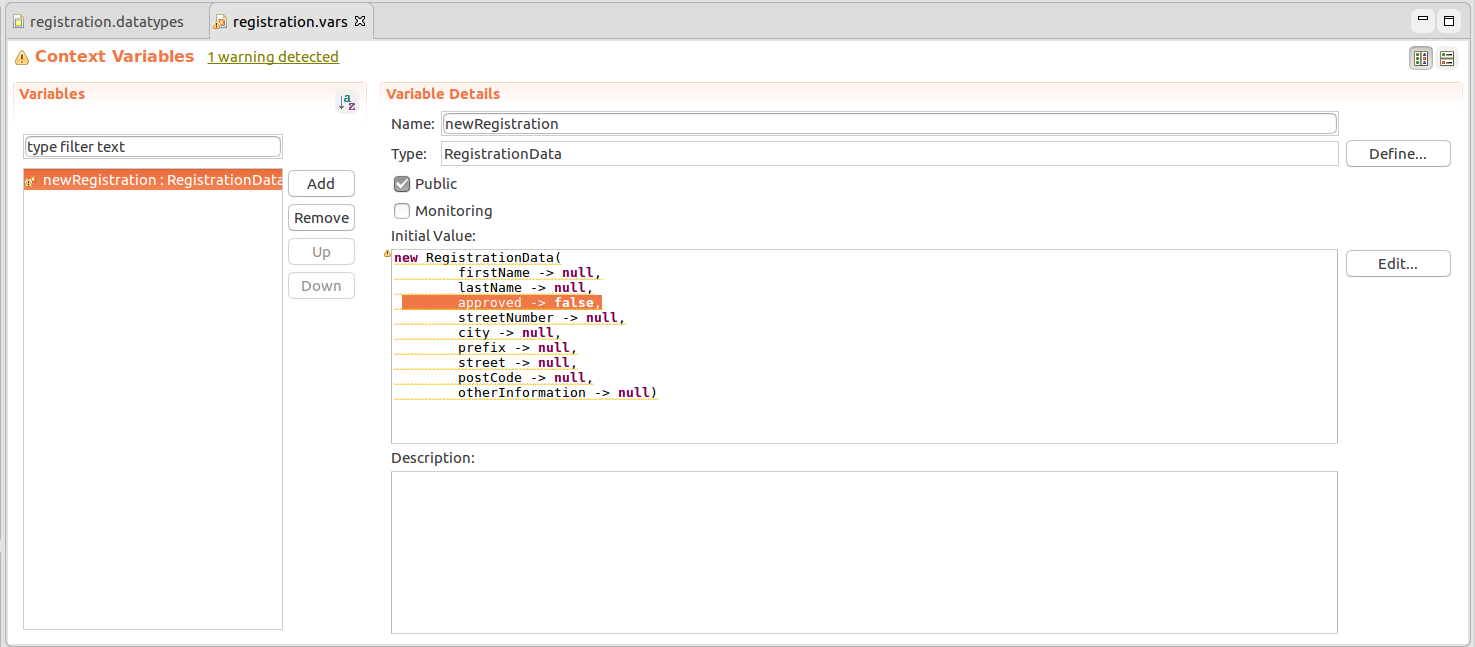
- In the Variable Details section, define the variable name as newRegistration and set its type to Registration Data.
- Initialize the variable value with approved set to false.
The variable will be created at the moment the model will start: since it is an instance of a shared Record (the RegistrationData Record) it will create a record in the database. You will then modify its value via forms.
Process
Now we need to create the process that will get registration data from the user and meets the following requirements: It starts when the model is run.
- It displays to a client a form where they enter their data.
- It stores the data when the user submits the form.
Now we will create the business process for registration: we will use the GO-BPMN process though you could use a BPMN process just as well. The process will navigate the respective users through the form we have created previously and save the data into the database on registration approval. Since we are using a GO-BPMN process, we need to identify our goal: the goal is to register a user. The way to achieve it, is to have the user enter the registration details and another user to approve the registration data.
Let's model the Goal process:
Create the process definition file:
- Right-click the module, go to New > Process Definition.
- In the dialog, enter the name of the process registration, select the Goal-based process as its type and select the Executable option.
If you do not select the Executable option, the process will not be executed automatically: this option is useful if you are using a process in a Sub-Process.
- Now design the Goal hierarchy:
- Right-click into empty space of your canvas and select Achieve Goal in the context menu (this is equivalent to picking it from the palette).
- Name it ClientRegistered so it reflects the target state.
- Decompose the Achieve Goal to a Plan: grab the quicklinker and pull it to an empty spot; select Plan from the context menu.
- Name the Plan Online since the user will register online; the Goal could be decomposed into another Plan called ByEmail for example.
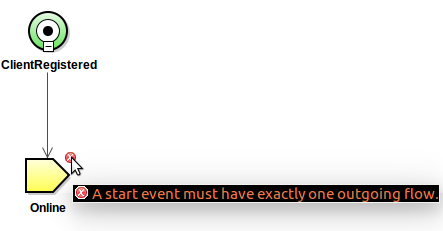
- Save your model: the Plan will be marked with a red error marker: this means that the Plan contains an error: hover over the marker to see what the problem is: in this case, the None Start Event, that is automatically inserted into a Plan and is a standard BPMN element, is missing an outgoing flow: Let's fix this.
- Create the body of the Plan with the actual process workflow that defines how to meet the Plan:
- Click the Plan to open its plan body.
- Drag-and-release the quicklinker of the StartEvent and in the context menu, select the Task, a standard BPMN element. You will be prompted to select the type of the task: in this case, the task should display a registration form: this is performed by the User task type. Therefore, select the User task.
- Define the task properties in the Properties view:
- Define the name of the task on the Details tab as GetClientDataTask.
- You want to display the task only to users, who are clients so performers will be set to the Client role of your organization model. The content will be define by the GetClientData form, which you will create in the next step: Open the Parameters tab in the Properties view of the task and define the parameters:
title /* String */ -> "GetClientData",
performers /* Set */ -> {Client()},
uiDefinition /* UIDefinition */ -> clientRegistration()
- In the next step, we want to display another form to another user: drag-and-release the quicklinker of the GetClientDataTask. Name it GetApproval and set its parameters to
title /* String */ -> "GetApproval",
performers /* Set */ -> {Employee()},
uiDefinition /* UIDefinition */ -> approval()
- Since after the approval, the process should finish, attach the Simple End Event to the GetApproval task.
Forms
Now let's create what the front-end user should see and work with: the clientRegistration and approval forms. First the clientRegistration form:
- Create the form definition file: right-click the module, go to New > Form Definition.
- In the dialog, enter the name of the file clientRegistration.
- Make sure not to select the Use FormComponent-based UI. This flag activates the experimental forms version, in which you can create forms in a more code-like way without event-driven approach.
- Click Finish.
- Design the form as depicted below: insert the respective component in the palette and then click into the respective position in the form.
- For each Text Box and Text Area, do the following in their Properties view:
- Insert its name in the Label field.
Set its Binding to the field of the newRegistration variable, for example, in the prefix field, set the binding to &newRegistration.prefix.
The & operator indicates a reference to the given memory slot and the . operator allows you to navigate through the record structure. With the binding, the values will be stored in the parameter object.
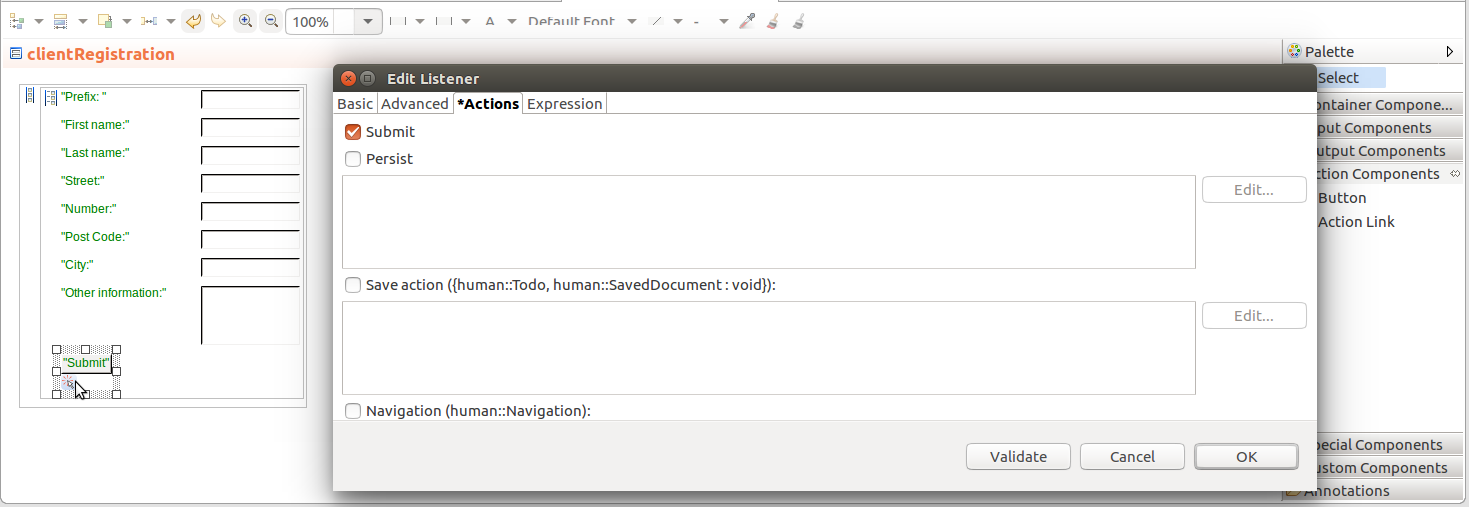
- On the Register button, define what should happen when the user clicks it: in the Properties view, go to the Event Handling tab and click the Add button in the Private Listeners section: this will create a listener object attached to the button: to make the listener listen to a click, it must be an ActionListener: this is default option so you do not need to change it.
- Go the Actions tab and select the Submit option: this will make sure, that the data in the form will be saved and the form discarded when the user clicks the button.
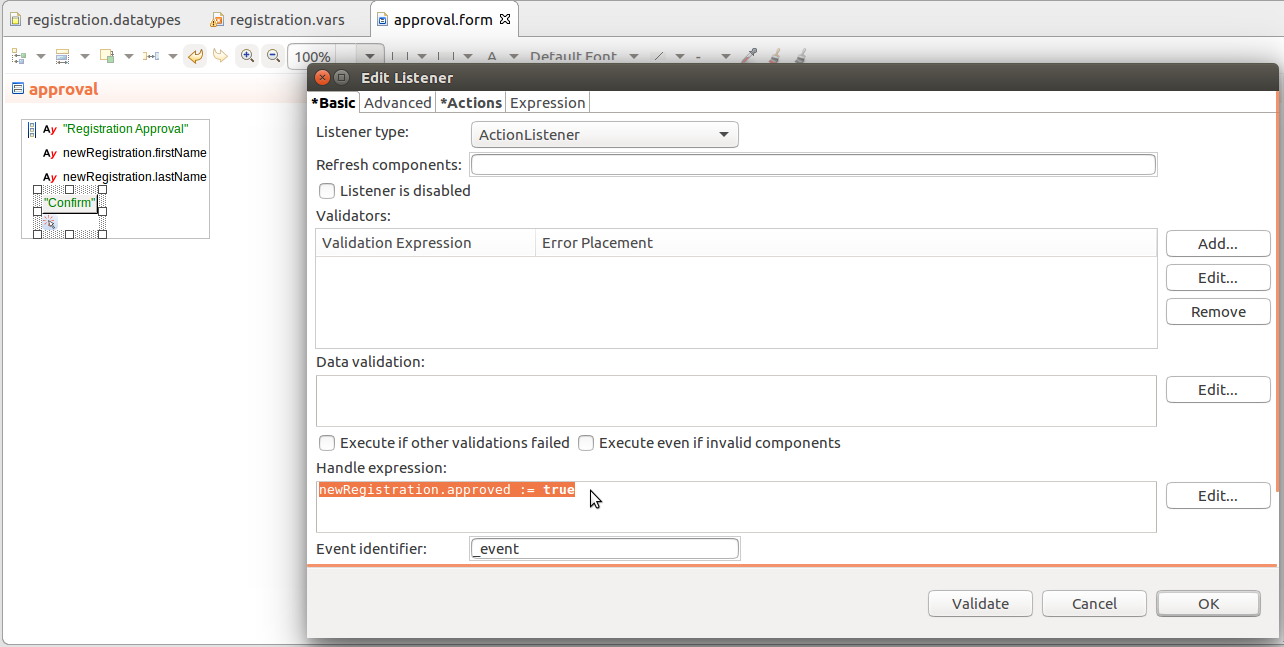
Now the approval form: Proceed analogously. In addition, set the listener on the Approval button to set the approved field to true in its Handle Expression as depicted below.
Running the Model
Now you will upload your model, create its instance, assign the Roles to users and follow the execution.
Before we can run the model, we need to set up a connection: consider using the PDS Embedded Server, which runs locally and is stored in your workspace.
You can check if your PDS is connected to an LSPS server in the status bar at the very bottom of PDS.
To run and manage the model, do the following:
- In the Modeling perspective, right-click the module and select Upload As > Model: now, your module is in the LSPS Server Module repository.
- Switch to Management perspective: click the Management button in the upper-right corner of PDS.
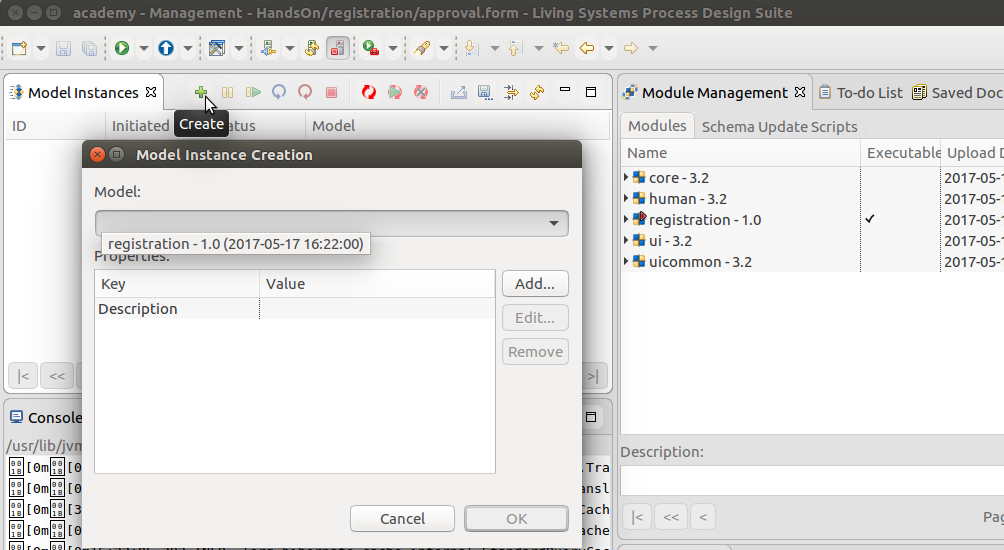
- In the Model Instances view, click the Add button and select the module.
- Click the Refresh button in the view: a new entry appears; this is your model instance.
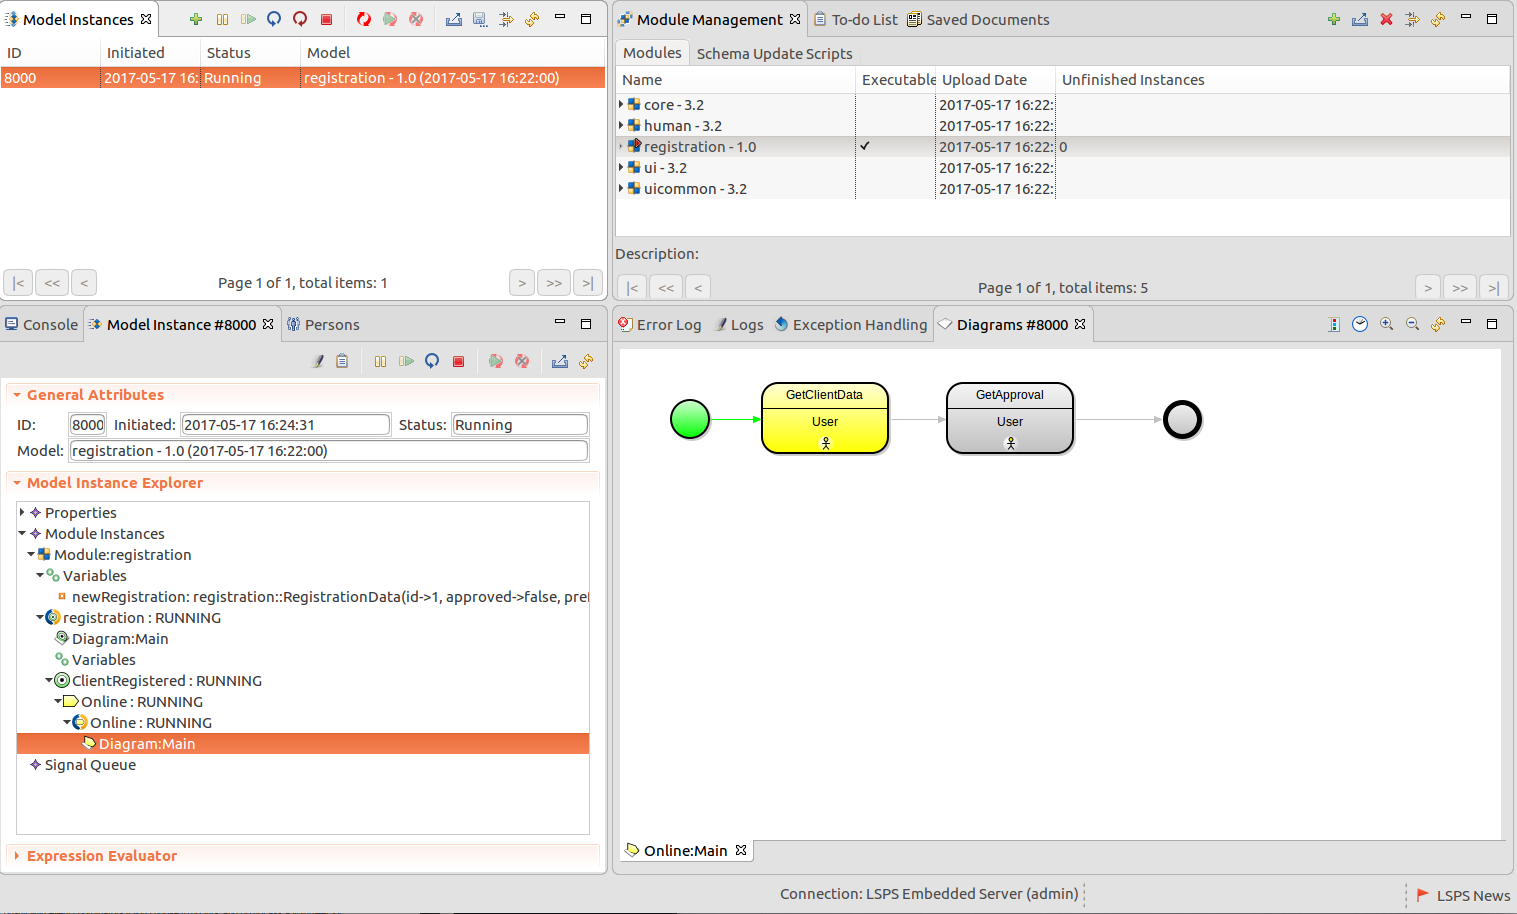
- Double-click the model instance: a detail view appears. In the model Instance Explorer, click the diagram of the process to display its status.
The process instance is stuck on the first User task: the task generated a to-do for an end user with the role Client; however no such user exists:
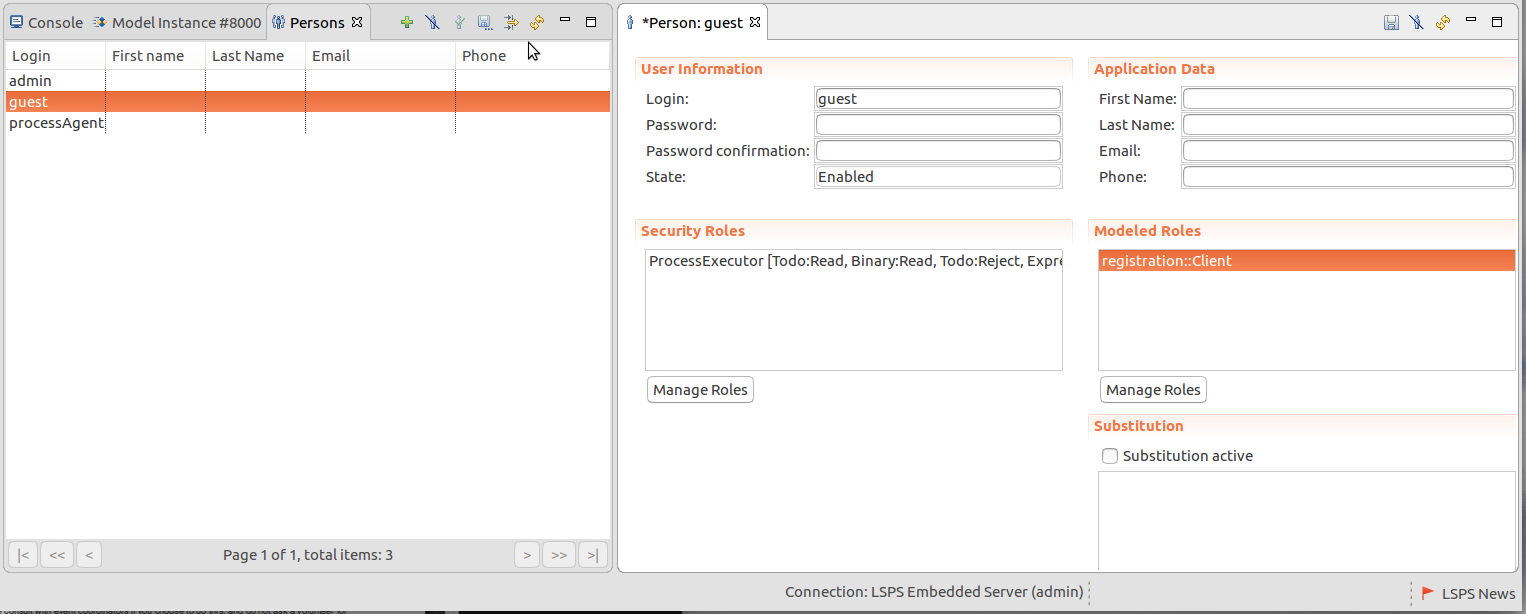
Let's assign the role to the guest user:
- Open the Persons view: Click the Management Views button in the toolbar and select Persons.
- In the displayed view, double-click the guest entry.
- In the displayed guest details, click the Manage Roles button below the Modeled Roles section: in the dialog box, select the Client role.
- Click Save.
- Now add the Employee role to the admin user.
Working with the Application User Interface
Let's submit and approve the registration from the Application User Interface:
- Open the application in your browser and log in as the guest user with the password guest.
Click the To-Do list on the left: a to-do that was produced by the GetRegistration User task should be available in your to-do list: provide the information and click Submit.
You can now go to PDS and in the Management perspective, refresh the diagram of your process instance: it will be now "stuck" on the second User task.
- Log out from the application and log in as the admin user with the password admin.
Click the To-Do list on the left: a to-do that was produced by the GetApproval User task should be available in your to-do list: provide the information and click Submit.
Now you can go to the Management perspective, refresh the diagram of your process instance: the instance finished and since there is not other process instance running, also the entire model instance finished.