LSPS Documentation
A data type model comprises the hierarchy of all Records–user-defined data types with an inner data-type structure–with their relationships and inheritance in a Model.
They are defined in data type definition files of Modules using a graphical editor, the Data Type Editor.
Since a record holds your business data, you want to make sure that the data is valid. You can do so by defining constraints for your record.
Note: Further information on Records, Relationships, and related elements and mechanisms is available in BPMN Modeling Language Guide. The instantiation of Records, accessing a Record instance Fields, and related mechanism are documented in the Expression Language Guide.
To create a Record, do the following:
Read-only: if true, all Fields of the Record are read-only: The Record instance is initialized on model instantiation and can be deleted during runtime; however, neither the Record instance nor instances of its subtype can be modified during runtime.
Read-only Records can only be targets of data relationships, but not their sources. This prevents a possible inconsistency of data.
System: if true, the Record is read-only for the user
A model instance cannot create instances of a system Record or calculate its Field values. However, it can be instantiated from your Application with the createRecord() on your context, possibly from a custom task or function implementation.
Deprecated: flag to denote a deprecated Record
If the attribute is true, the validation displays an information message that the Record is deprecated.
To create a Record Field in a Record, do the following:
Deprecated: flag to denote a deprecated Record field
If the attribute is true, the validation displays an information message that the Field is deprecated.

convertToXML() and parseXML() functions.To define a Record's supertype, open its Properties view and on the Detail tab enter the name of the supertype Record. Alternatively, select the Inheritance connector in the palette and draw the connection on the canvas.
For more information on the inheritance mechanism, refer to the GO-BPMN Modeling Language Guide.
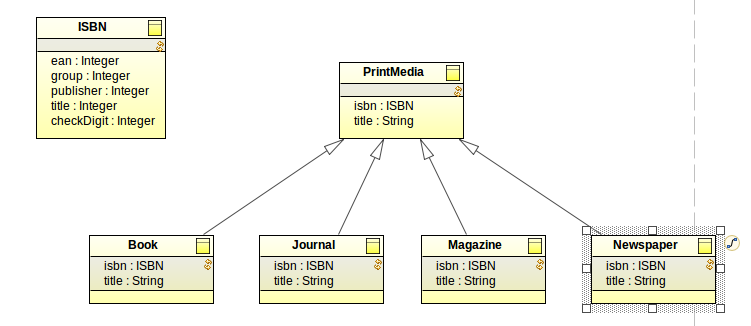
A Relationship serves to establish logical relation between Records. In the case of shared Records, it translates to relation between the Record database tables.
It is symmetrical, that is, set on both ends of the relationship. Therefore it is not necessary to make one of the Record the owner of the relationship.
Further information on the mechanisms, related elements, comparing of records and record properties is available in the GO-BPMN Modeling Language Guide.
To create a Relationship between two Records, do the following:
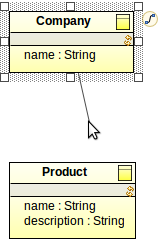
Define the properties of the Relationship ends on the Target and Source tabs.
The ends that represent the Target and Source ends depend on the way you dragged the Relationship line: the Record you started from is considered the source. Information on the Relationship direction is at the top of the Properties view. Define the required properties of individual ends:
Visibility: visibility of the navigation
If set to Public, the relationship direction is accessible from the entire model; if you unselect the option, it is private and accessible only from within its module.
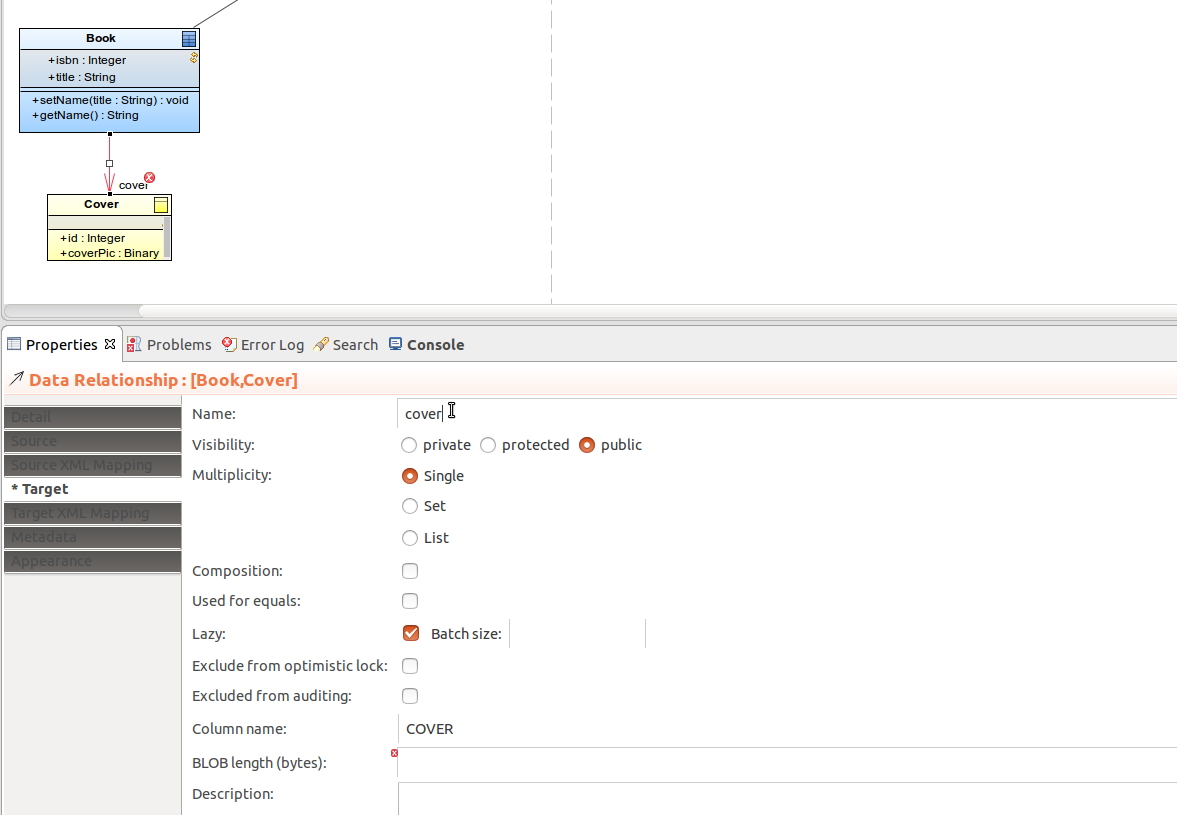
Ends leading to a non-shared Record from a shared Record define the BLOB size.
This is the space reserved for the non-shared Record value since the entire tree of the non-shared Record is serialized and stored as a database entry of the BLOB type.
XML mapping of a data model is used on export to XML when creating webservices, and by the convertToXML() and parseXML() functions, which make use of xml mapping properties defined on the pertinent records, record fields, and relationships.
null its XML instance node is generated with the xsi:nil="true" attribute.To define the XML mapping of a record field or a relationship direction, open the XML Mapping on a field and Source/Target XML Mapping on a relationship Properties view and define the relevant properties:
null, its XML instance node is generated with the xsi:nil="true" attribute.This setting is ignored if the Attribute property is selected.
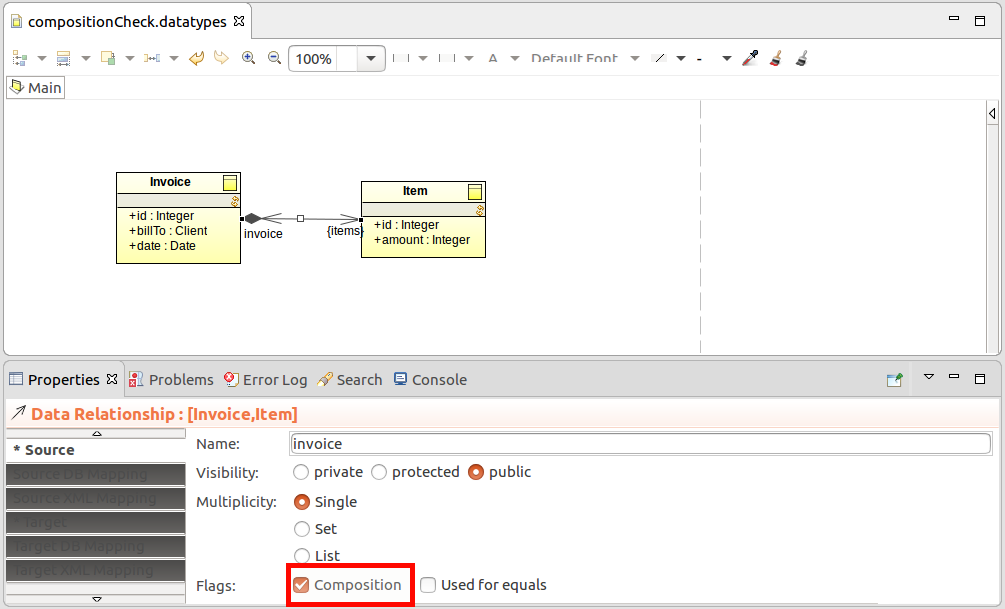
Compositions establish a "fixed" data relationship between records in a direction, where the target record represents a part of the other record. The part cannot exist by itself and must hence always define its source value. It represents a "has-a" relationship.
To define a relationship end as a composition end, select the composition attribute of the data relationship end in its tab of the Properties view. For further information on composition, refer to the GO-BPMN Modeling Language Guide
A Record instance is resolved into an object identity: when you compare records, the system compares the object identities, not the Record field values. If you want to compare Records based on the values of some Fields, you will need to define, which Fields should be used.
Consider two instances r1 and r2 of a Record, which has a String field.
The code returns false by default since it checks whether r1 and r2 are the same record instances, which they are not.
On the other hand, if you compare fields of a basic data type, the system compares the field values to check if the records equal: Hence r1.property == r2.property returns true.
To compare one or multiple properties when comparing record instances instead of the record identities, set the relevant record fields to Used for equals. If you set the flag on the Record String property,r1 == r2 would compare the strings and return true.
If a record has multiple properties with the Used for equals flag, all properties must be evaluated as equal for the record comparison to return true.
Note that the flag is inherited by fields of child records. For records with relationships to other records, you need to set the Used for equals flag on the navigation to allow inheritance of the equals flags.
Important: The Used for equals flag applies only to non-shared records.
To use a Field of a related Record when comparing instance of a Record, select the Used for equals flag on the Relationship end.
To display or hide additional compartments in Record views, such as,
Fields and inherited Fields, right-click the Record view in the Diagram, go to Compartments and select or unselect the compartments.
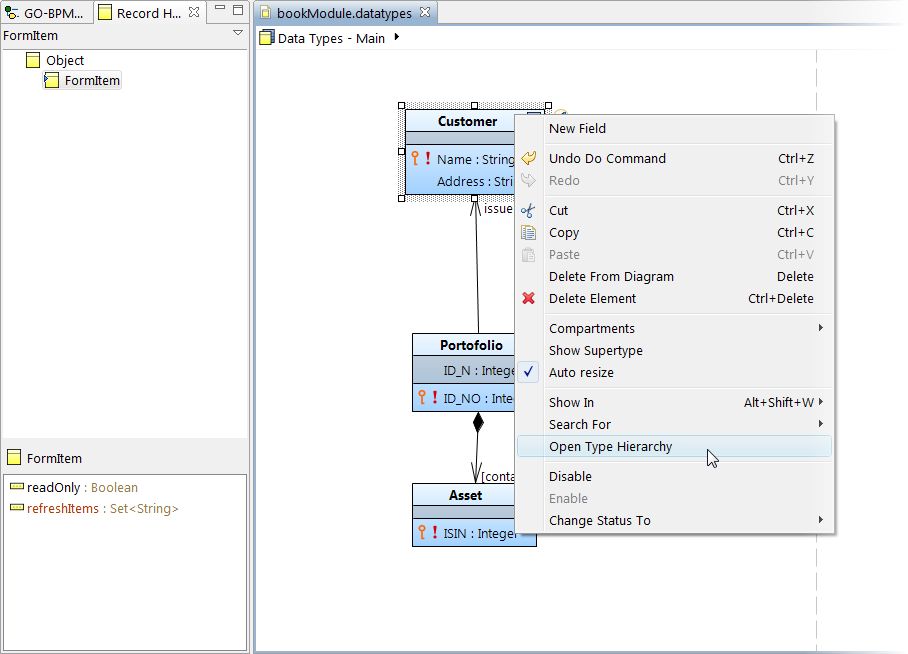
You can view the record hierarchy of the entire workspace in a tree structure in the Record Hierarchy view. The view provides an overview of all data types and their inheritance relationships.
The view is not displayed by default: to display it, go to to Window > Show View, or call the view from the context menu of a data type (either in the GO-BPMN Explorer or the Data Type Editor). Alternatively, right-click a Record view in a diagram and select Open Type Hierarchy.
To import the data type definitions from an XSD file as Records, do the following:
In the Generate Types from Xsd dialog box, select the Xsd file from the file system.
Some mechanisms of the XSD file, such as, reducing the set of the permitted values or allowing a choice of values for several types, are not supported.