LSPS documentation logo
LSPS Documentation
User Management

Users are represented by persons with personal details and access rights to the application, which include appropriate security and modeled Roles. Optionally they can define their substitutes, that is, persons who can act on behalf of the person when the person activates their substitution (stand-ins).

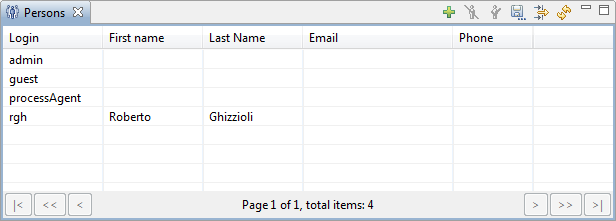
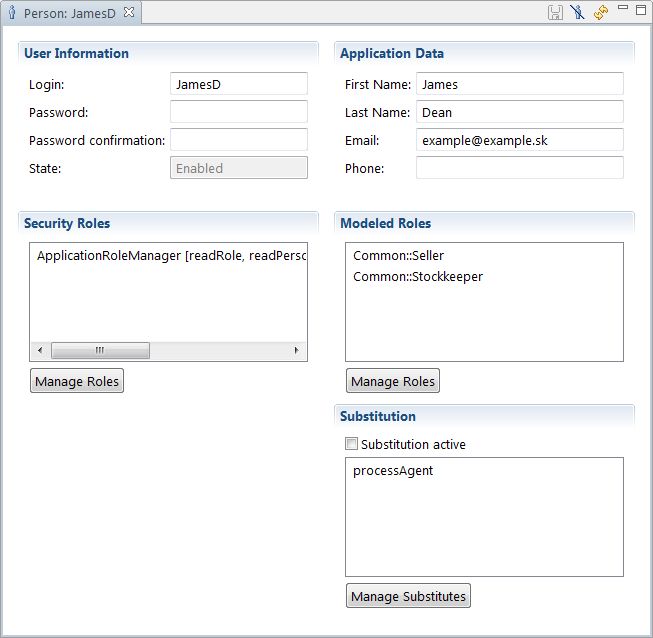
List of available Persons is displayed in the Persons view. By double-clicking a person entry in the Persons view, you can display the person detail view with the person's data and settings.

personsview.png
Persons view

Creating a Person

To create a new person, do the following:

  1. Open the Persons view.
  2. Click the Add button in the view menu.
  3. Enter the data in the displayed person detail.
  4. Click the Save button .
viewpersondetail.png
Person detail view

Disabling and Enabling Persons

Once a person is created, it is not possible to remove them. Instead of removing a person from the system, disable them: A person that was disabled, cannot access the LSPS Server.

When persons are disabled, the following applies:

  • Any assigned security and modeled roles, and substitutes, if defined, are permanently removed.
  • Any locked to-dos are unlocked and released, and assigned to another person with the respective roles. Note that if no such person is available, the to-do becomes orphaned.

A disabled person can be recovered (enabled). However, none of the removed data is retrieved.

Information about person state is shown in the respective person detail view under User Information area. In the Persons view, disabled persons are shown highlighted in red.

To enable or disable a person, do the following:

  1. Open the Persons view.
  2. Select the person.
  3. In the view toolbar, click Disable ( ) or Enable ( ).

Note: The admin and processAgent cannot be disabled. In addition, the admin user is fully read-only.

disabledperson.png
Persons view with the guest person disabled

Exporting Persons List

To create a new person, do the following:

  1. Open the Persons view.
  2. Filter the data so that only the entries you want to export are displayed.
  3. Click the Export Displayed Content to CSV button .

Role Management

Managing Runtime Roles

To assign a runtime role to one or more persons, do the following:

  1. Open the Roles view.
  2. Under Runtime Roles, right-click the respective role and select Manage Persons. If the modeled role was not assigned to any persons yet, it is not available. Go to the respective person detail and assign the person at least one modeled role.
  3. In the Filter box of the Persons dialog box, type the person’s name or its part. To display all available persons, type * (asterisk).
  4. Select a person in the box below Filter and click the right two-headed arrow to add the person to the Resulting selection.
  5. Click OK.

Assigning Parametric Roles

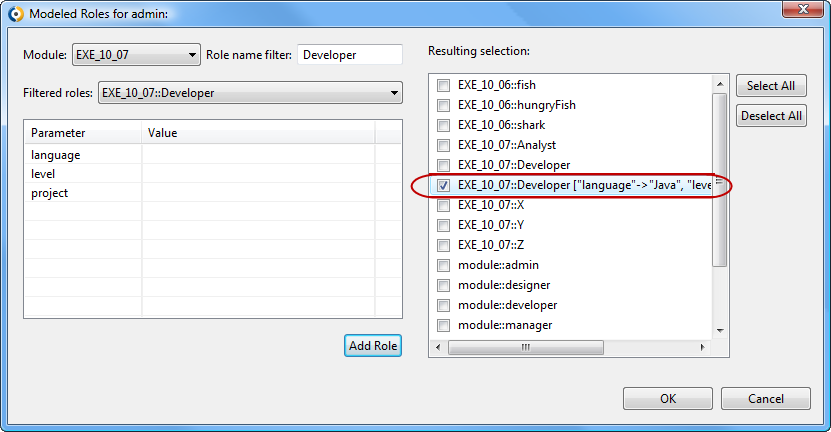
To define a parameter value of a modeled parametric role:

  1. Open the respective person detail view.
  2. Under Modeled Roles, click Manage Roles.
  3. In the Resulting selection area, select the parametric role.
  4. Edit parameter values and click Add Role.

The added parameter value is shown in the Resulting Selection.

AddedParameter.png
A parametric role with a parameter

Security Management

To manage the security rights of a person, you will create or modify a security role if necessary and assign the security role to the person.

securitymanagementview.png
Security Management view

Creating or Editing Security Roles

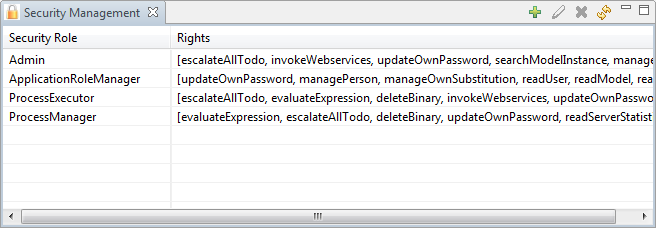
To create a security role, do the following:

  1. Open the Security Management view.
  2. In the Security Management view, click Add ( ) or Edit ( ) in the view toolbar.
  3. In the Role Name text box of the Security Role Definition dialog box, type the security role name.
  4. Select the security rights to assign to the role, and click OK.
    securityroles.png
    Security role definition dialog

Managing Security Roles of a Person

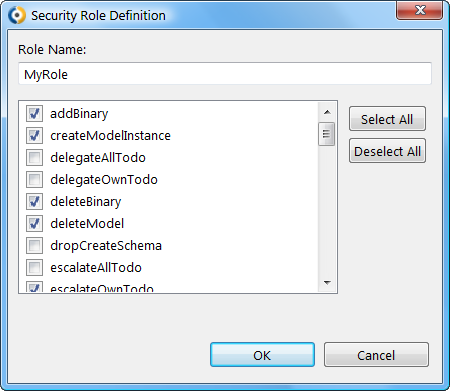
To add or remove person’s security roles, do the following:

  1. Display the respective person detail view.
  2. Under Security Roles, click Manage Roles.
  3. In the displayed dialog box, select the security roles you wish to assign the person, and click OK.

User Management

Defining Substitutes

To define a person's substitutes, open the Person Detail view and in the Substitution section, click Manage Substitutes. In the pop-up define the substitutes.

Check if the Substitution is activated for the person.

Activating and Deactivating Substitution

The Substitution feature can be applied from the front-end application as well as from PDS. To activate or deactivate substitution on a person from PDS, open the Person Detail view and select or unselect the Substitution active option.