LSPS Documentation
To monitor runtime data use the Business Activity Monitor library. The library resources contain dashboards that display widgets with Jasper Reports. The dashboards can be shared among users and users can set the parameters for parametric reports.
Though the library is based on the forms module, its widgets support as their content also forms designed with the ui module.
Important: The BAM library makes use of Vaadin Charts which are developed by Vaadin: make sure to obtain the Vaadin Chart licenses before developing your own charts. Users of the your Application User Interface and Management Console do not require any additional licensing.
When creating data for monitoring, consider using monitoring assignments and monitoring flags.
PDS comes with an example implementation of the Business Activity Monitor so you do not need to develop everything from the beginning. The example application comes with the following reports:
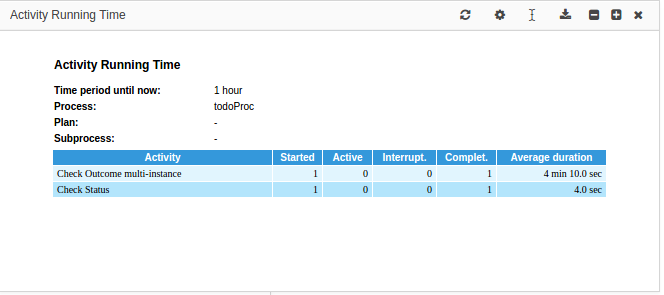
Activity Running Time: how long it takes to complete a task (human or non-human)
Only complete tasks are included: Instances of a looped task are considered part of a single task.
Model Instances by Status: bar chart with models indicating the status of their model instances
Each bar represents all instances of a particular Model and is color-coded to indicate portions of instances in different statuses.
Users Activity Period: bar chart with times of activity of the front-end application users
The widget is only available if the user tracking.
Important: Some BAM reports rely on the data provided by the process logs: The data is available in the LSPS_PROCESS_LOGS table and the logging is governed by the CREATE_PROCESS_LOG server setting. Generally, the process logging should be disabled in production. If you are using BAM reports, consider setting CREATE_PROCESS_LOG to MODULE and disable the setting on all modules where it is not necessary to prevent possible performance issues.
The example Business Activity Monitor application is a document with dashboards that can hold widgets with Jasper Reports. The application is created with the bamLibrary Module.
To generate and deploy the default Business Activity Monitor, do the following:
Create a GO-BPMN Project that will hold the BAM Module.
Make sure the project contains the BAM Library (to add the library, right-click the project and click Add Library, and use the Select built-in library option.)
Select the target project and click Finish.
The system generates the bam Module with the application resources with the following resources:

To define a default dashboard that will be available to every user, do the following:
bam module.DashboardData object with its widgets.DashboardOrder object. //The dashboard is made available to the current user:
def BAMUser bamUser := getOrCreateCurrentBAMUser();
//The dashboard instance with no widgets:
def DashboardData newDashboard :=
new DashboardData(
name -> "DefaultPublicDashboard",
author -> bamUser,
isPublic -> true
);
newDashboard.widgets := [];
def TimePeriodParameter timePeriod := getParameterTimePeriod(1);
def Set<ModelParameter> allModels := findParameterModels().toSet();
def Set<Integer> modelIds := collect(allModels, {model:ModelParameter -> model.id});
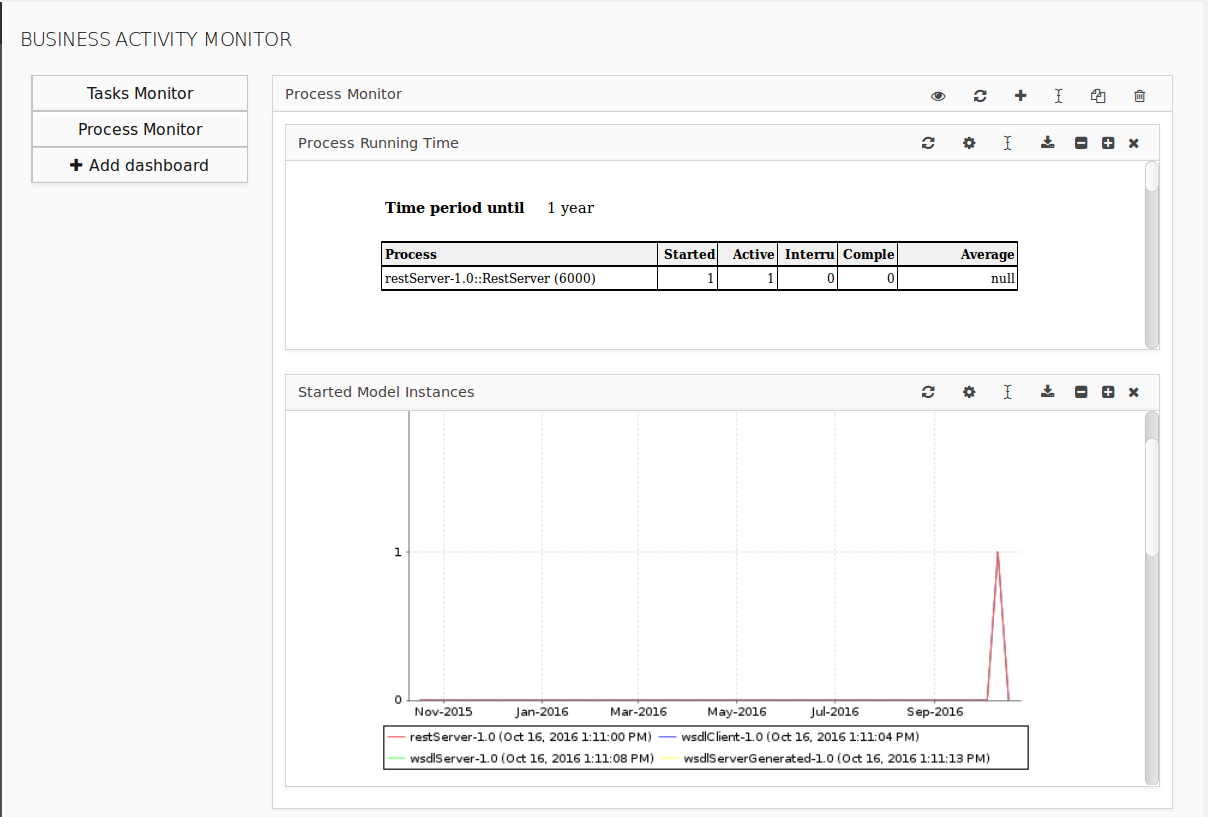
def WidgetData startModelInstancesWidget := new WidgetData(
name -> "Started Model Instances",
moduleName -> "hll-reports",
caption -> "Started Model Instances",
x -> null,
y -> null,
height -> 4,
width -> 3,
state -> null,
parameters -> [PARAM_TIME_PERIOD -> timePeriod.name,
PARAM_TIME_PERIOD_ID -> timePeriod.id,
PARAM_MODEL_IDS -> modelIds]
);
newDashboard.widgets := add(newDashboard.widgets, startModelInstancesWidget);
//Add the dashboard to the list of dashboards:
new DashboardOrder(dashboard -> newDashboard, user -> bamUser)
To create a custom Business Activity Monitor, we recommend to start from the example Business Activity Monitor application. However, you can create your Business Activity Monitor application from scratch as well.
Important: If you are modifying or reusing the example Jasper Reports or creating a new report that will use a template of styles (in the example application it is
LspsStyle.jbtxtemplate), do not use Jaspersoft® Studio 6.3.1 since it remains hanging due to an issue when loading the common style template.
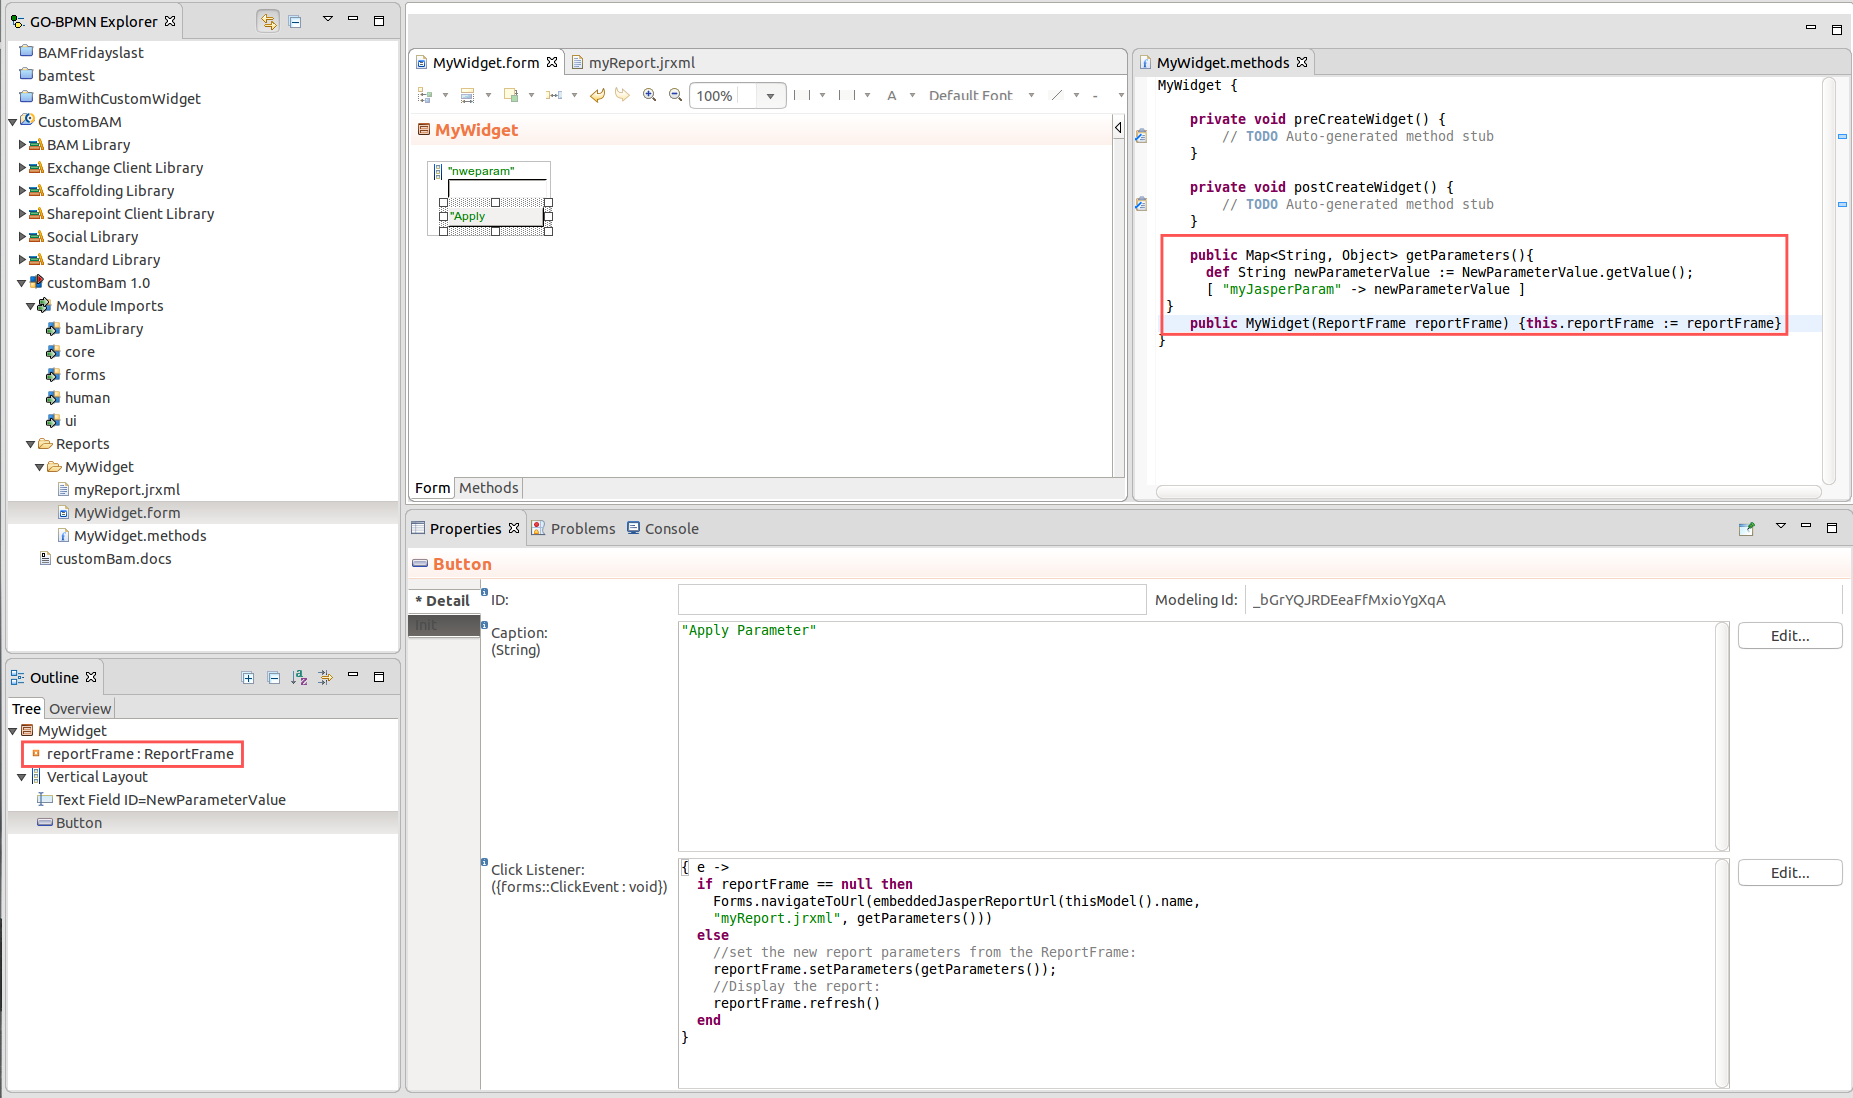
To add a custom widget that will display a Jasper Report to the Business Activity Monitor, do the following:
In the Reports folder of the bam module, create a folder for your widget.
Alternatively create the widget resources in a separate Module and import it into the bam Module.
{ _ ->
  reportFrame.setParameters(getParameters());
  reportFrame.refresh()
}
public MyWidget(ReportFrame reportFrame) {
  this.reportFrame := reportFrame
}
private Map<String, Object> getParameters() {
  //load the value from the input component into a local variable:
  def String newParameterValue := myInputField.getValue();
  //return the values mapped to their report keys:
  [
   "jasperReportParam" -> newParameterValue
  ]
}
private void showReport() {
  Forms.navigateToUrl(embeddedJasperReportUrl(thisModel().name,
  "Reports/myReport.jrxml", getParameters()))
}
new BamApplicationForm(new BamConfiguration(widgets ->[
        new WidgetDefinition(
        name -> "My Widget",
        moduleName -> thisModel().name,
        reportWidget -> new ReportWidget (designPath -> "Reports/MyWidget/myReport.jrxml"),
        parametersForm -> {reportFrame:ReportFrame -> new MyWidget(reportFrame)},
        defaultParameters -> [->],
        width -> 3,
        height -> null
    ),
    ...
To add a custom widget that will display a Form definition as its content, do the following:
In the Reports folder of your bam module, create a folder for your widget.
Alternatively you can create the widget resources in a separate Module and import the Module into the bam Module.
bamLibrary::FormContent. 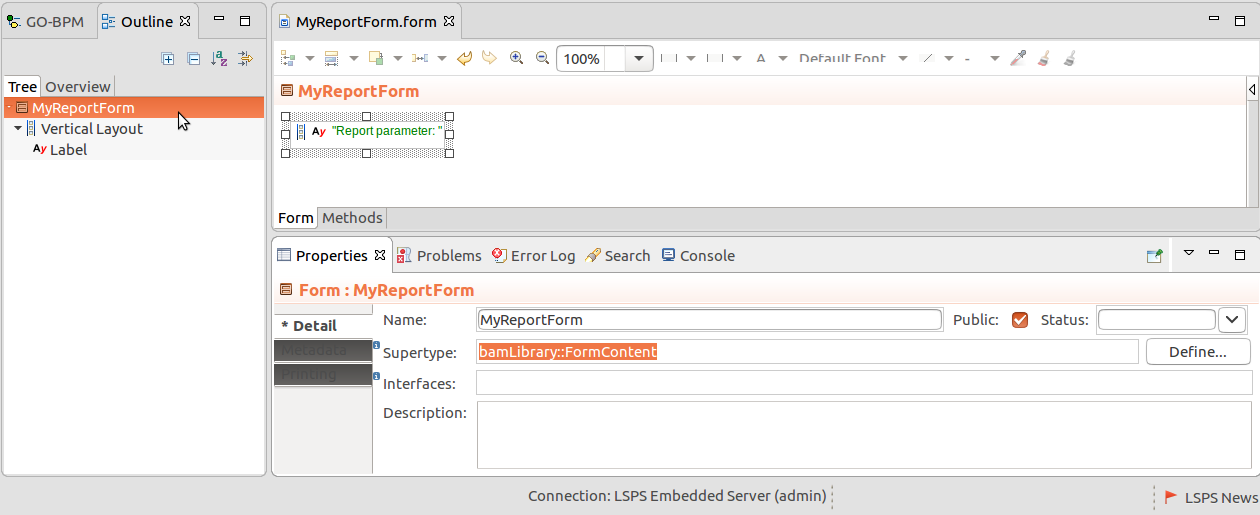
formWidget -> new FormWidget(reportForm -> { widgetData:WidgetData -> new <MYFORM>()})new WidgetDefinition(
name -> #"Simple Widget with a Form",
moduleName -> thisModel().name,
formWidget -> new FormWidget(reportForm -> { widgetData:WidgetData -> new WidgetForm()})
)
To define the default parameters and parameter-input form for a widget with a form, do the following:
new WidgetDefinition(
  name -> #"Simple Widget with a Form",
  moduleName -> thisModel().name,
  defaultParameters -> ["widgetParameter" -> "default param"],
  formWidget ->
     new FormWidget(
       reportForm -> { widgetData:WidgetData -> new EkoForm(defaultParameterValue)}
     )
  )
)
public EkoForm(String defaultParameterValue){
   label.setValue(defaultParameterValue);
}
refresh() method on the form that will refresh any components that depend on the parameters. public void refresh(WidgetDefinition widgetDefinition, WidgetData widgetData, Popup parametersPopup){
this.widgetData := widgetData;
if label != null then
label.refresh();
end
}
public ParameterInputForm(ReportFrame rf){
   reportFrame := rf;
}
reportFrame.widgetData.parameters := ["widgetParameter" -> myParameterValue]
refresh() call on the report frame from your form to apply the parameter values and close the popup with the parameter form.new WidgetDefinition(
name -> #"Simple Widget with a Form",
moduleName -> thisModel().name,
parametersForm -> {reportFrame:ReportFrame -> new ParameterForm(reportFrame)},
defaultParameters -> ["widgetParameter" -> "default param"],
formWidget ->
new FormWidget(reportForm ->
{ widgetData:WidgetData -> new EkoForm(widgetData)}
)
)
To create a Business Activity Monitor from scratch only using the bamLibrary Module, you will need to implement the widgets and then create a document with the Bam application:
getParameter() method later.Declare the constructor of the Form that will take the ReportFrame object as its member variable.
public MyParamForm(ReportFrame reportFrame) {this.reportFrame := reportFrame}
getParameter() method for the parameter form: it must return a Map of the parameters and their new values. public Map<String, Object> getParameters(){
def String newParameterValue := MyParamInput.getValue();
[ "myParam" -> newParameterValue ]
}
{ e ->
  if reportFrame == null then
    Forms.navigateToUrl(
      embeddedJasperReportUrl(
        thisModel().name,
        "myReport.jrxml",
        getParameters()
     )
    )
  else
      //set the new report parameters from the ReportFrame:
    reportFrame.setParameters(getParameters());
    //Display the report:
    reportFrame.refresh()
  end
}
BamApplicationForm() with a BamConfiguration as its parameter.new BamApplicationForm(
new BamConfiguration(
widgets -> [
new WidgetDefinition(
name -> "My BAM Dashboard Widget",
moduleName -> thisModel().name,
//We pass the ReportFrame with data about the Widget to the parameter form:
parametersForm -> {
reportFrame:ReportFrame -> new MyParameterForm(reportFrame)
},
defaultParameters -> [
"myWidgetParam" -> "Default parameter value for my report."
],
designPath -> "myJasperReport.jrxml",
width -> 4,
height -> 4
)
]
)
)
You can now deploy the Module with your custom BAM to the LSPS Server.
By default, reports use data from the LSPS_DS data source. To use data from another data source, do the following:
Create the data source to your database on your server with LSPS: refer to the documentation of your application server.
Example datasource configuration on WildFly
<xa-datasource jndi-name="java:/jdbc/REPORT_DS" pool-name="REPORT_DS" enabled="true" use-java-context="false">
  <xa-datasource-property name="URL">
    <!--For WF 10 and newer: -->
    jdbc:h2:tcp://localhost/./h2/reports;MVCC=TRUE;LOCK_TIMEOUT=60000
    <!--for previous WF: jdbc:h2:tcp://localhost/./h2/reports;MVCC=TRUE;LOCK_TIMEOUT=60000-->
  </xa-datasource-property>
  <driver>h2</driver>
  <transaction-isolation>TRANSACTION_READ_COMMITTED</transaction-isolation>
  <xa-pool>
    <min-pool-size>10</min-pool-size>
    <max-pool-size>20</max-pool-size>
    <prefill>true</prefill>
  </xa-pool>
  <security>
    <user-name>lsps</user-name>
    <password>lsps</password>
  </security>
</xa-datasource>
com.whitestein.lsps.monitoring.datasource-jndi-name to the data source, in the example above, REPORT_DS:....com.whitestein.lsps.monitoring.datasource-jndi-name and the value with the JNDI name of the data source, in the example, java:/jdbc/REPORT_DS.Dashboards are spaces that display widgets with Jasper Reports or forms. By default, a dashboard belongs to the user who created the dashboard and cannot be accessed by other users unless the dashboard is marked as public.
To create a new dashboard, do the following:
The dashboard appears in the list of dashboards above the Add dashboard button.
To change the setting of the public flag on your Dashboard, click the respective button in the Dashboard caption.

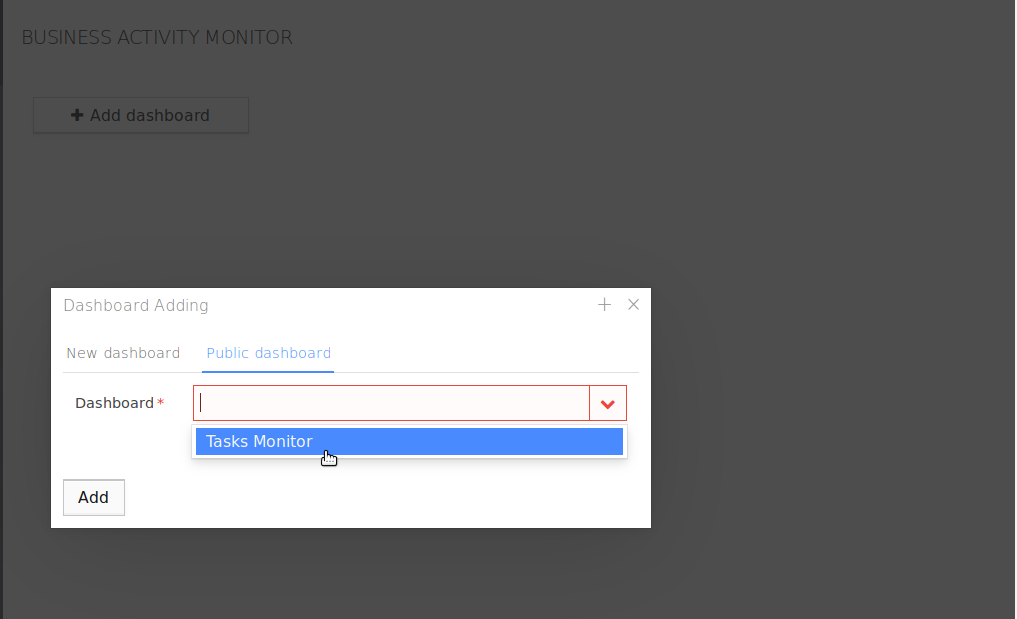
To add a public dashboard created by another user to your BAM, do the following:
The public dashboard appears in the list of dashboards above the Add dashboard button. Note that public dashboards created by other users are read only.
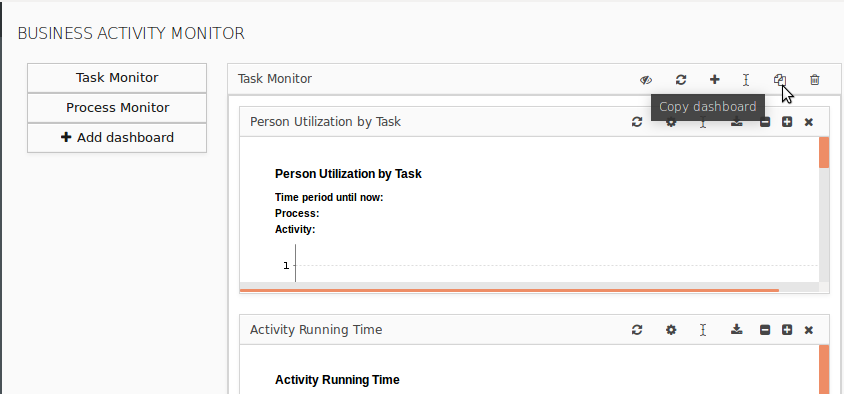
Since the user can edit only the dashboard they created, it is convenient to be able to copy dashboards.
To create a copy of a dashboard, click the Copy button in the caption of the dashboard.
To change the caption of your dashboard, click the Rename button (  ) in the dashboard caption.
Note that you cannot edit public dashboards.
To delete a dashboard, do one of the following:

Note: When you delete your public dashboard, the dashboard will no longer be available to any users.
BAM widgets are components with Jasper Reports that are displayed on a dashboard. Widgets can take parameters that are then used by the Jasper Reports.
To display a widget on a dashboard, do the following:
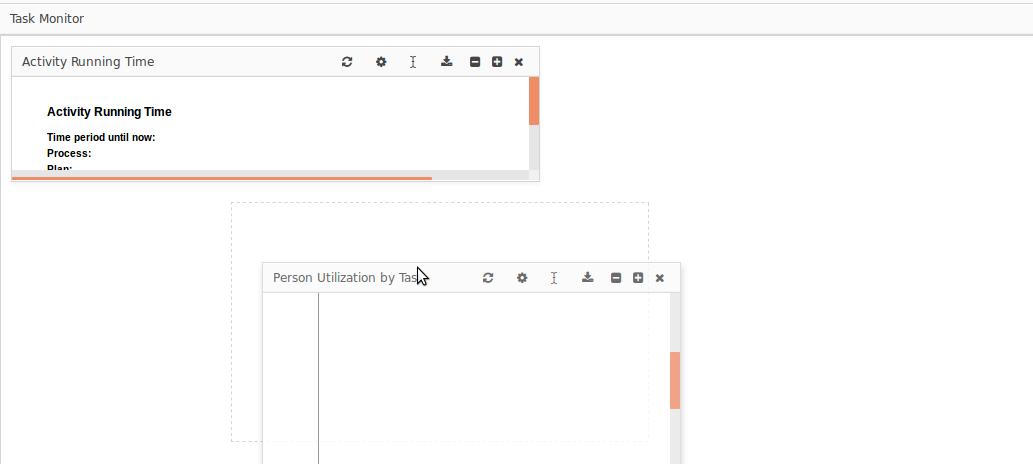
On your dashboards, you can drag-and-drop the widgets and resize them as required. On public dashboards, the positions and dimensions are fixed.
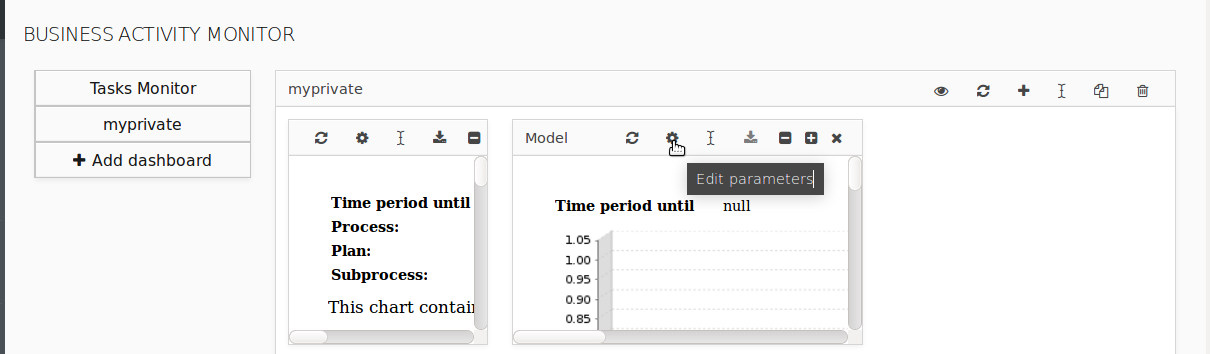
To change parameters used by a widget, click the Settings button in the widget caption and set the parameters in the popup box. If the report does not require any parameters, the button is not available.
To change the caption of a widget displayed on your dashboard, click the Rename button ( ) in the widget caption.
Note that you cannot edit public dashboards.
To export the report displayed in a widget, click the export button  in the caption of the widget and select the target format.