LSPS Documentation
Model instances are execution entities that follow the execution logic defined in their Model and imported Modules.
From the Management Console, you can do the following:
When you run a model, a model instance is created. In the model instance, a module instance of the executable module and module instances of all its imported modules are created. For more details, refer to section Model Instance in the GO-BPMN Language Guide.
To run a model, do the following:
 in the view toolbar.
A model instance is created and its detail appears.
To filter the Model Instances view, do the following:
Define the filtering criteria in the filtering row of the table:
Where applicable, filtering is by default case-sensitive and may contain wildcards (*, ?); for example, search for Task? * returns results containing the word Task followed by any character, a space, and any subsequent characters.
To display a model instance detail, click the model instance ID in the Model Instance view in the Model Instance ID column.
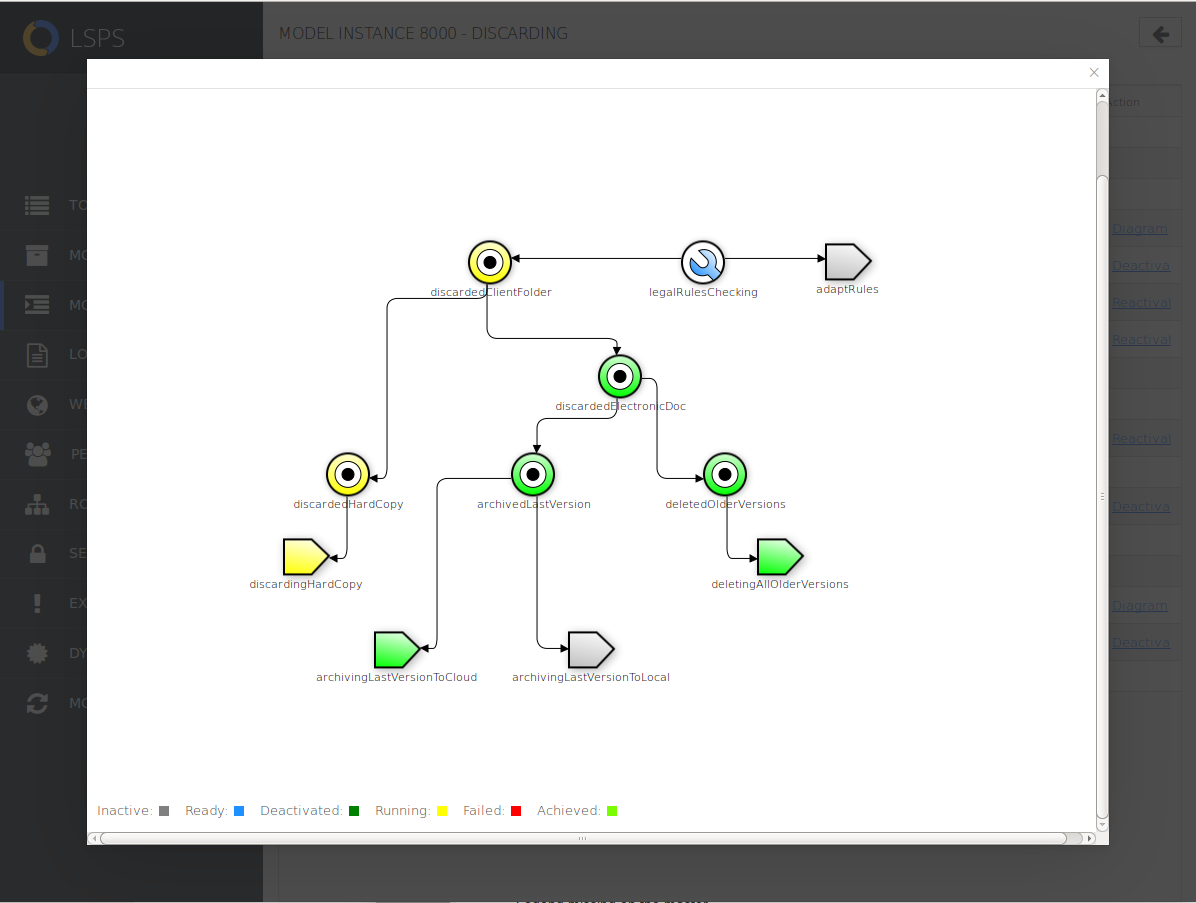
To display a live diagram with the execution, do the following:
Important: The diagrams in the Management console do not display hyperlink and, lane and pool diagram elements.
To change global variable values and goal status of a running model instance, do the following:
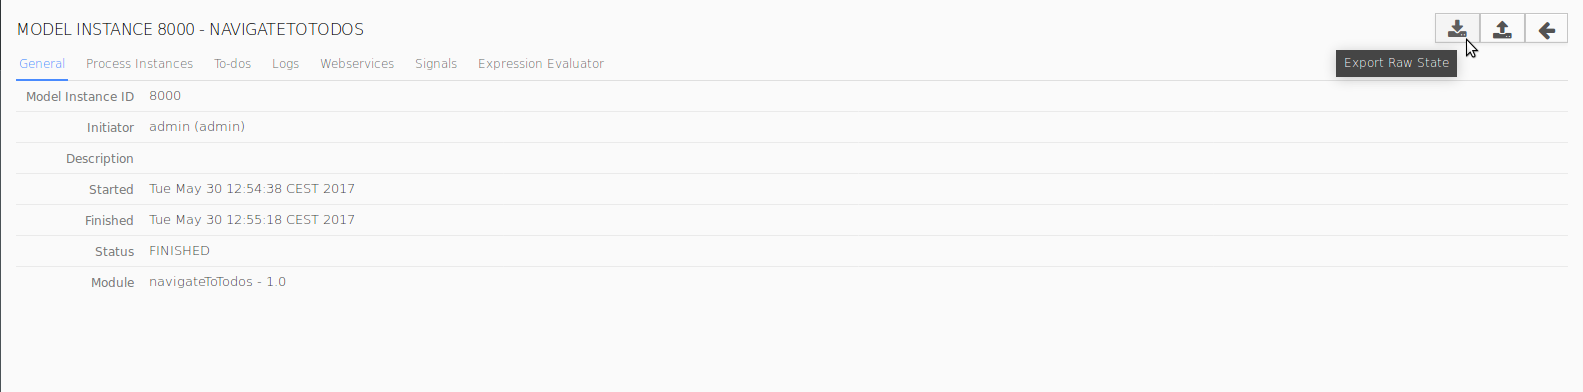
If you want to modify runtime data of a model instance, you can do so directly in its raw XML. Such data includes values of variables, signals, etc. Note that if you modify data that is persisted in the database, the data remains unchanged.
To export a model-instance XML, do the following:
Important: Importing corrupt model-instance data can cause that the system will fail to work with the data.
To evaluate an expression in the context of a model instance:
Unselect Persistent to evaluate the expression without changing of the data in the database.
If the Persistent flag is selected and the expression changes the value of an entity, for example, a global variable, the change is reflected on the runtime data, that is, the variable takes the newly assigned value.
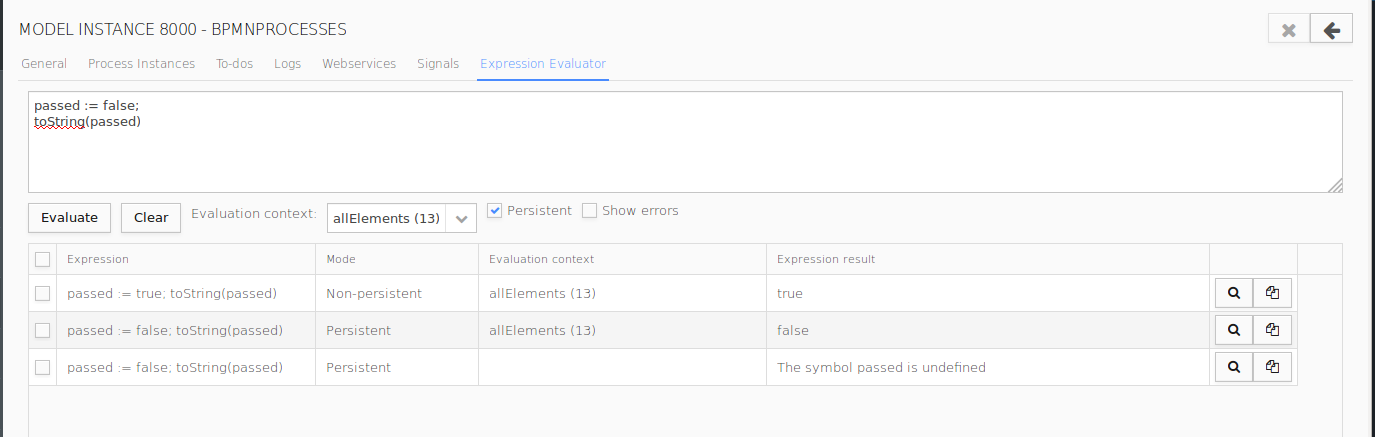
To remove evaluated expressions from the table, select the expressions and click the Remove (X) button in the upper-right corner.
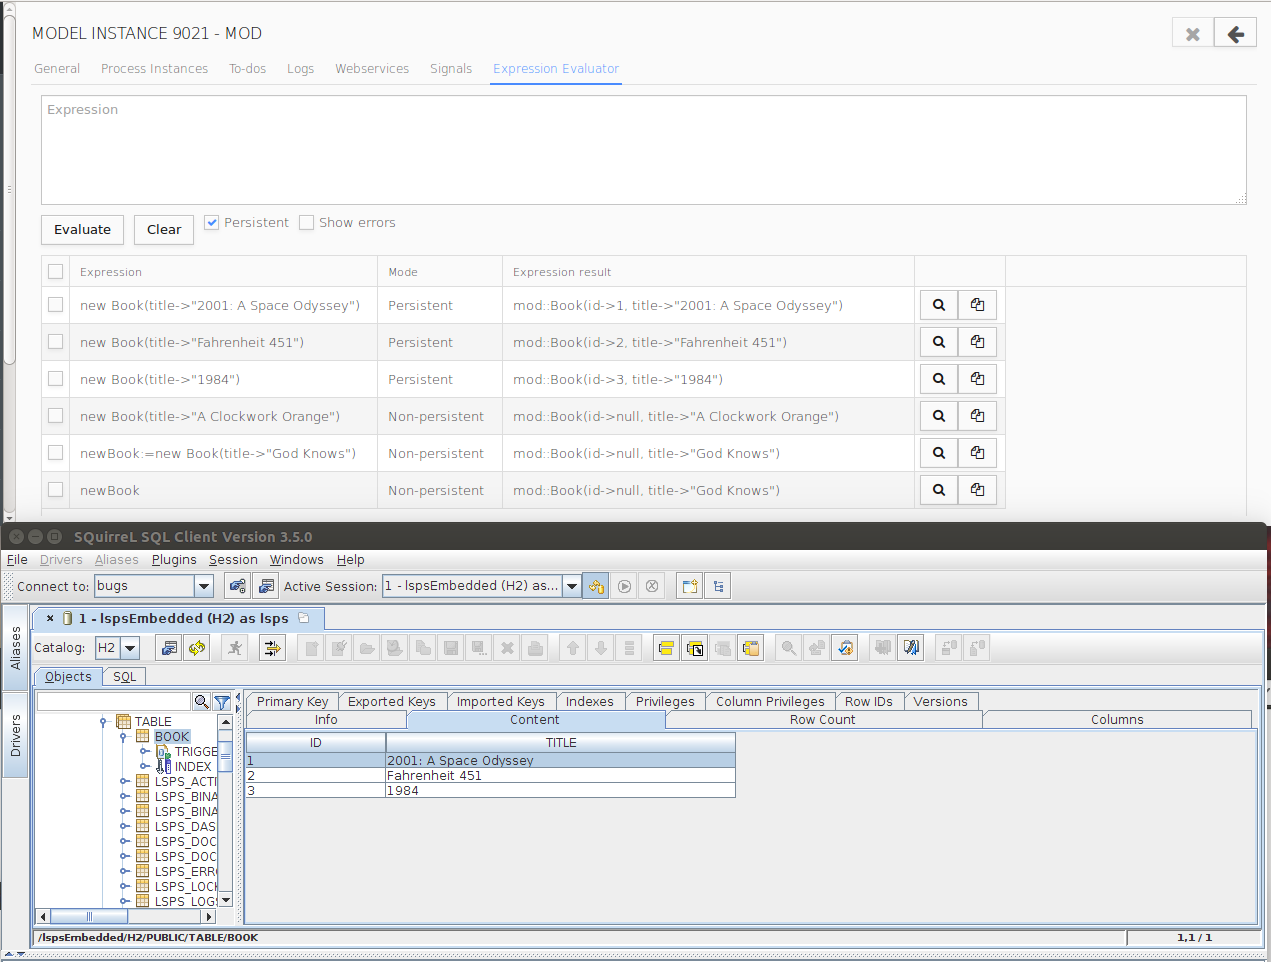
To change persisted data from the Expression Evaluator, do the following:
Click Evaluate.
To display the errors that occurred when attempting to evaluate expressions, select the Show Errors check box below the expression input field.
To remove evaluated expressions from the table, select the expressions and click Remove (X) in the upper right corner.
To remove a waiting signal of a model instance, do the following:
To apply a filter, do the following:
In the filtering row of the table, define the filtering criteria.
Filtering is case-sensitive and supports wildcards (*, ?); for example, filtering Task? * returns results containing the word Task followed by any character, a space, and any subsequent characters.
A suspended model instance stops its execution. On resume, the instance continues from where it was suspended.
To suspend or resume a suspended model instance, do the following:
 or Resume command.
When you finish a model instance, the running elements stop their execution immediately and the status of the model instance becomes finished.
To finish a model instance, do the following:
 button.
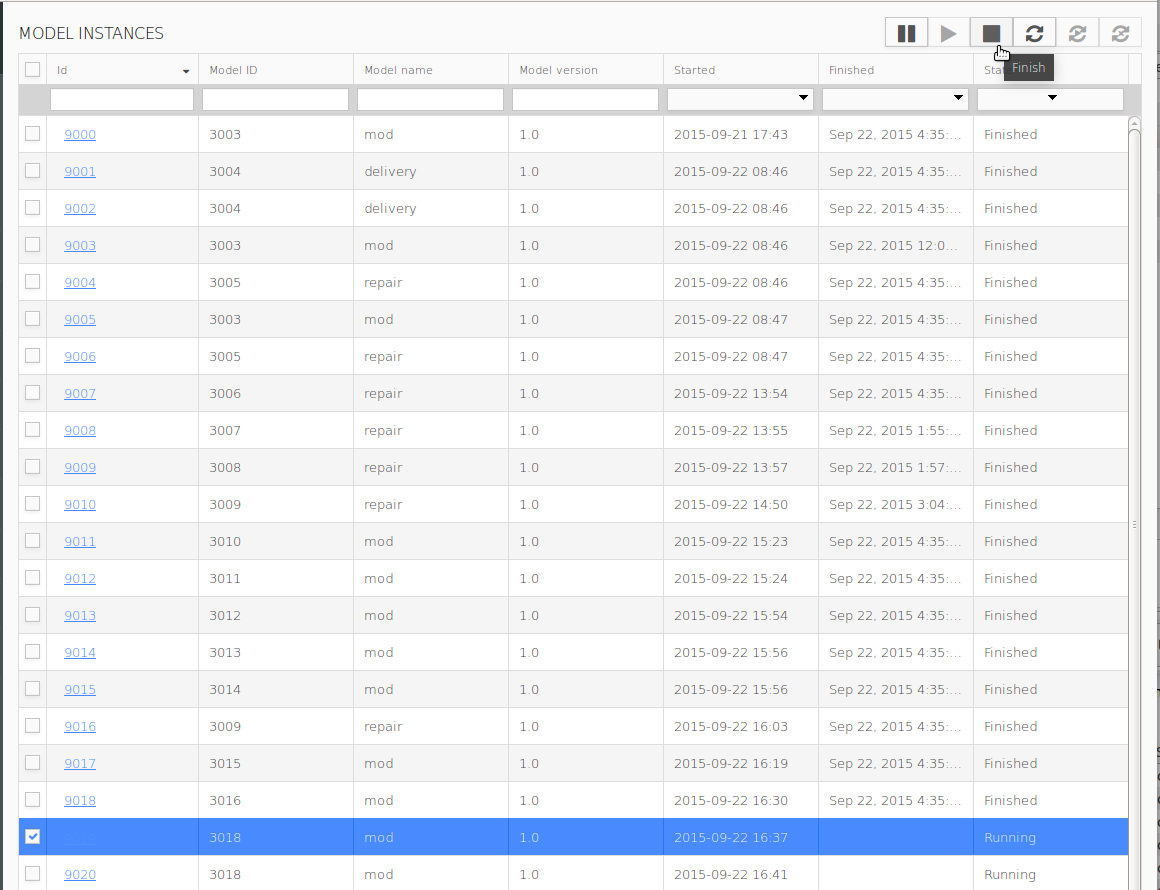
When you restart a running model instance, the module instances of the model instances finish and executable module instances are created within the same model instance. The new module instances run under the same model instance so the ID and other properties of the model instance are preserved. The context of the finished module instances does not have any impact on the context of the new module instances.
To restart one or multiple model instances, do the following:
 in the page toolbar.
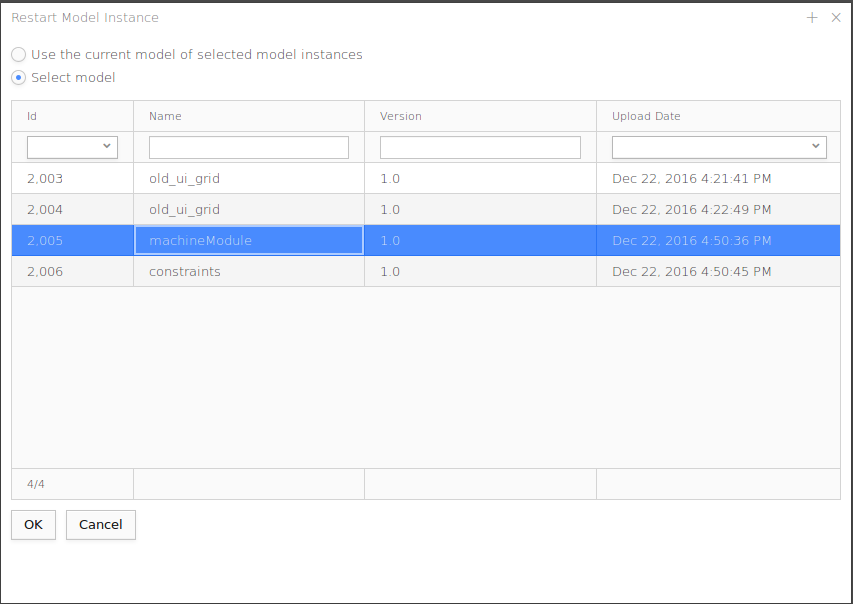
A model instance is created and its detail appears.
Any running or suspended model instances can be updated so their module instance can follow a new model. During model update, the model instance becomes suspended and the underlying model is substituted with a new model; the model update procedure is defined in the model update configuration file, which is created in PDS.
However, if you have a model update configuration at hand, you can perform the update directly from the Management Console.
To update a model instance, do the following:
 button.