LSPS Documentation
Important: This tutorial uses the experimental forms module. To use fully supported charts, use the ui module for your forms.
Required result: The user accesses a Grid with entries of a shared Record type via a document. When they click the Edit column in a row, a Popup with editable data of the row is displayed. They can either save the changes or drop the changes. The Popup is reusable.
Note that this tutorial does not implement optimistic locking so if a record is changed from a different transaction while being edited, the changes are overridden.
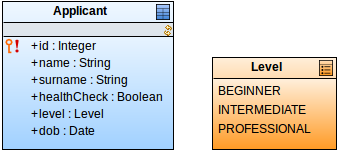
We will use the Applicant shared record displayed below.
First we will create a form for the popup. The form will be used and displayed on two occasions: when the user will be creating a new applicant and when they will be editing an existing applicant.
To create the public popup ApplicantDetailsPopup, do the following:
ApplicantDetailsPopup.forms::Popup and make sure it is public. 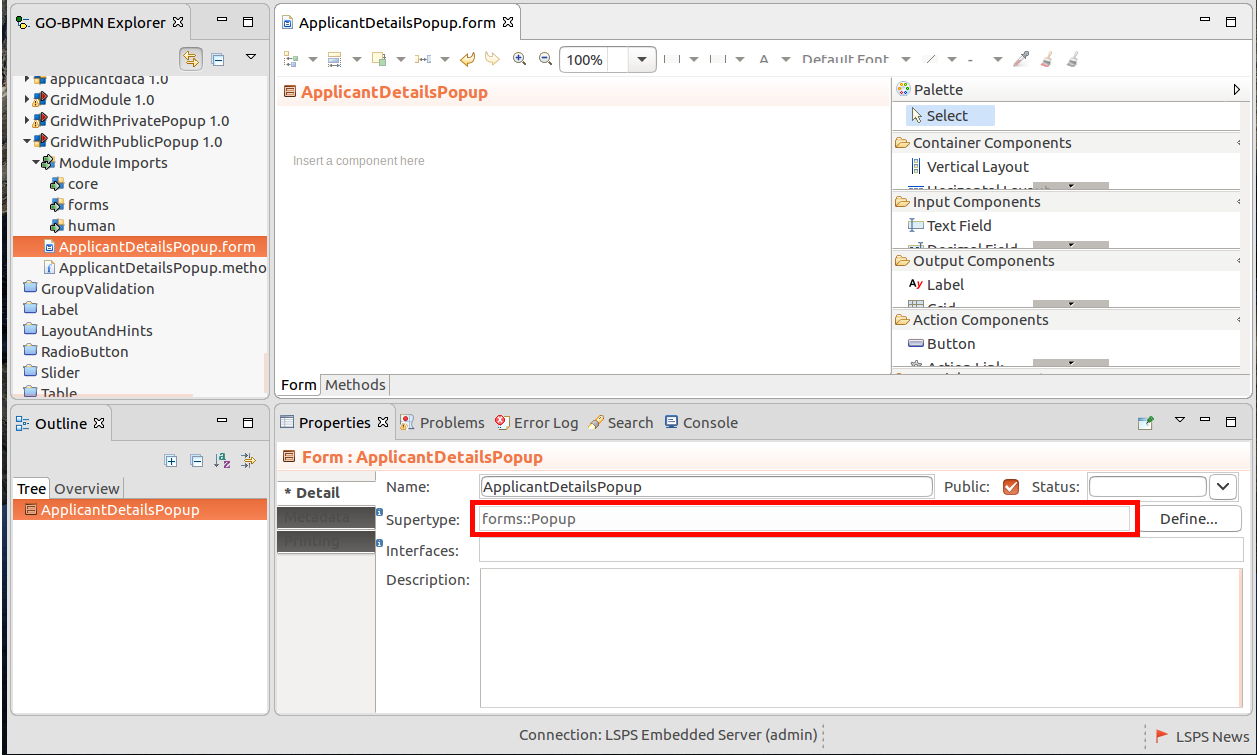
a non-parametric constructor we will use when creating a new applicant:
It initializes the applicant variable to a proxy of the *Applicant** type.
a parametric constructor we will use when editing an existing applicant:
It takes the Applicant parameter and stores its proxy the form variable.
ApplicantDetailsPopup {
   //constructor called for a new applicant:
   public ApplicantDetailsPopup(){
     //change proxy of the Applicant type is assigned
     //so that applicant is created only after the user clicks Save:
     applicant := proxy(Applicant)
   }
   //constructor called for an existing applicant:
   public ApplicantDetailsPopup(Applicant applicant){
     //change proxy of the applicant object is assigned
     //so that changes on the applicant are stored only after the user clicks Save:
     this.applicant := proxy(applicant)
   }
}
{ click:ClickEvent ->
      //apply the changes
      mergeProxies(false, applicant);
      //close the popup:
      this.setVisible(false)
}
{ click:ClickEvent ->
      this.setVisible(false)
}
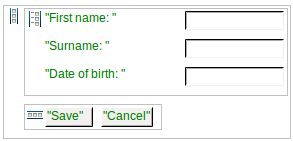
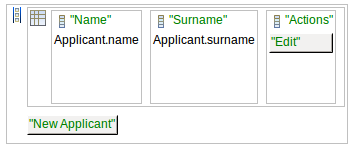
Create the ApplicantList form with the list of applicants with the following components:
applicantListGrid.Applicant.Applicant.name."Edit".{ clickedApplicant:Applicant ->
//create the popup with details:
def ApplicantDetailsPopup appDetailsPopup := new ApplicantDetailsPopup(clickedApplicant);
//display the popup:
appDetailsPopup.setVisible(true);
//set listener on the popup, so the grid with applicants is updated when the popup closes:
appDetailsPopup.setPopupCloseListener({ e->applicantListGrid.refresh()});
}
{ click:ClickEvent ->
    //creates the public popup with the non-parametric constructor:
    def ApplicantDetailsPopup appDetailsPopup := new ApplicantDetailsPopup();
    appDetailsPopup.setVisible(true);
    //refreshes the grid so it contains the new applicant:
    appDetailsPopup.setPopupCloseListener({ e->applicantListGrid.refresh()});
}
You can download the tutorial example here.