In this tutorial, you will:
- create a page that will add an entry to the database and log the event,
- validate values of a record defined as user input in a form, and
- start a process when a user performs some action on a page.
Requirements:
- Create an order based on user input.
- Make sure the user enters all data in the correct format.
- Make sure the order is persisted only after the user submits it.
- Create a structure with an executable order-placing module:
- Open the Modeling perspective.
- Go to File -> New -> GO-BPMN Project.
- In the pop-up enter the project name OrderProcessing and click Next.
- In the Module name field, enter
order-placing and click Next.
- Click OK and Finish.
- Create the data definition with the Order shared record with the following fields:
item of type Stringprice of type Decimal
- Create the form with the content for the Order page:
- Create a form definition; make sure to select Use FormComponent-based UI.
- Create a form variable
order of the type Order for the data of the new order.
- On the Methods tab, define a form constructor that initializes the variable.
public OrderForm(){
  order := new Order();
}
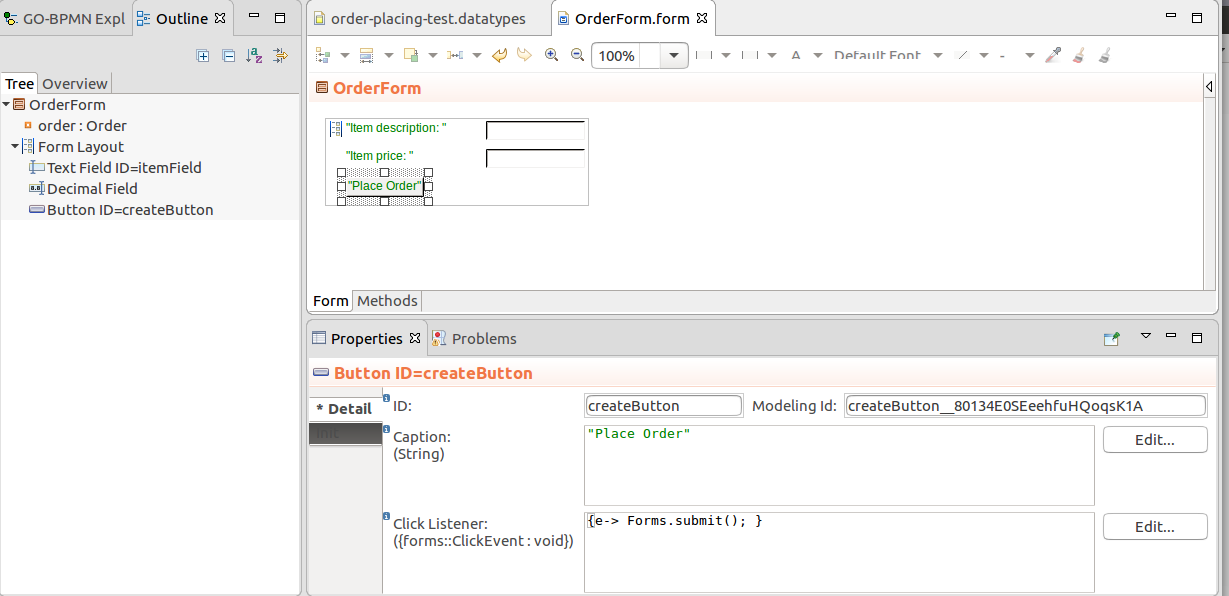
- Insert the following components as displayed below and define the components' properties in their Properties views:
- Form Layout
- Text Field with the properties:
- ID:
itemField
- Caption:
"Item:"
- Binding: Reference to the field of the order variable
&order.item
- Decimal Field with the properties:
- ID:
priceField
- Caption:
"Price:"
- Binding: Reference to field of the order variable
&order.price
- Button:
- ID:
createButton
- Caption:
"Place Order"
- Click Listener: Submit on click
{e-> Forms.submit(); }
- Create a document definition with the Order document: set the UIDefinition to return your form:
At this point, you have a runnable model: if you run it, you will realize that the order entry in the database is created at the moment the model instance is created, that is, at the moment you open the Document and the order variable is instantiated. However, you want to create the entry only after the order data is validated so no bogus data is persisted in the database. This will allow you to put the cancelling mechanism in place: you will be able to leave the document without having persisted any data.
This mechanism can be implemented using change proxies: Change proxies hold preliminary versions of shared Records: the values of change proxies are not reflected in the database. Change proxies exist in sets called proxy sets. To apply values of proxies and create the actual shared record instances, you merge their proxy set.
You can create a change proxy not only for an existing instance of a shared record but also for a shared record type; the shared record instance does not exist when you are creating the proxy. It is created when its proxy set is merged.
- Make the order a proxy:
- Create a form variable recProxySet of type RecordProxySet and initialize it from the form constructor before the order variable.
recProxySet := createProxySet(null);
- Also from the form constructor, adjust the initialization of the order variable to be a change proxy over the order shared-record type:
order := recProxySet.proxy(Order);
- In the Click Listener expression of the createButton, add the merge of the proxy set with the proxy object.
{ e ->
     recProxySet.merge(false);
     Forms.submit()
}
- Add a Cancel button that will navigate away from the screen, for example,
{ e -> Forms.navigateTo(new UrlNavigation(openNewTab -> false, url -> ""))}
- Validate the order data:
- Create a constraint definition and define the constraints for the fields of the Order record.
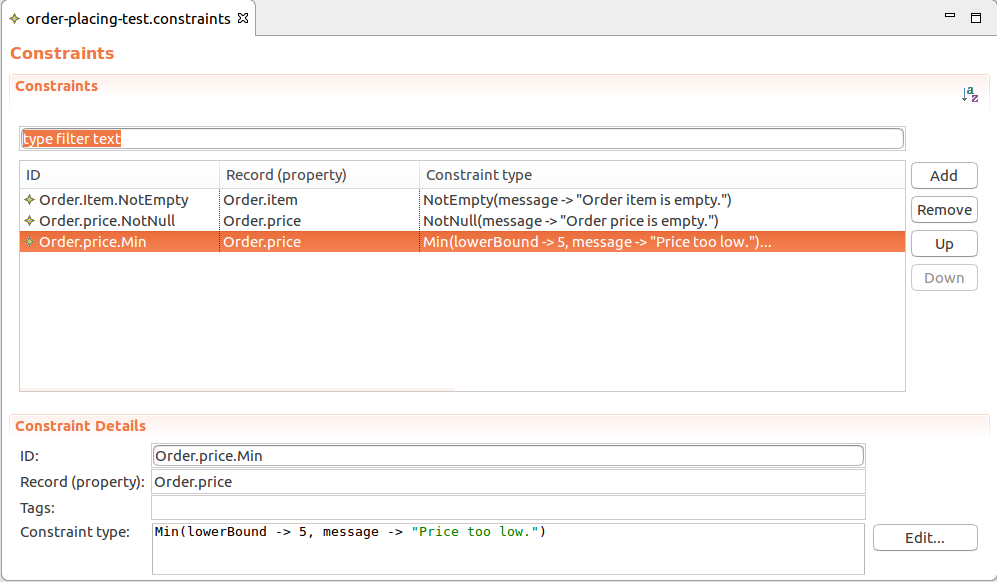
Constraints for the Order Record
- To check if the input meets the defined constraints, trigger validation of the order on click of the createButton: in the Click Listener expression, call the
validate() function on the order variable and handle the returned error messages:
{ e ->
 def List<ConstraintViolation> errors :=  validate(order, null, null, null);
  if errors.isEmpty() then
    recProxySet.merge(false);
    Forms.submit();
  else
    //Displays the errors on the createButton
    //if the user never enters any value in the item
    //and price field:
    showDataErrorMessages(errors, createButton)
  end
}
- Now the messages from constraints are all displayed on the createButton; Enable displaying of the messages on the respective input components by calling
c.inferValidator(null) on the input fields.
- Upload the module and test the document:
- Make sure the server is running.
- Right-click the module and go to Upload As -> Model
- Go to http://localhost:8080/lsps-application and log in.
- Click Documents in the menu on the left.
- Test the Order page.
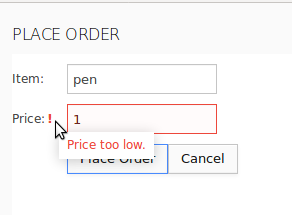
Order page
Log Process
You will now extend the Order page to instantiate a process that will log a message when the user places an order.
Note that you could simply call the log() function from the UI definition when the user performs some action, too. However, for demonstration purposes, you will run a BPMN Process, which could potentially execute other actions.
- Create the logging process:
- Create a logging module with a BPMN process.
- In the graphical editor with the process file, right-click into empty space on the canvas and under New select the None Start Event.
- Drag the quicklinker icon next to the None Start Event to a spot where you want to insert the next process element, the Log task.

Dragging quicklinker
- In the context menu, select Task and then Log task.
- On the Parameters tab in the Properties view of the task, define the message that should be logged and its message level.
- Connect the task to a Simple End Event.
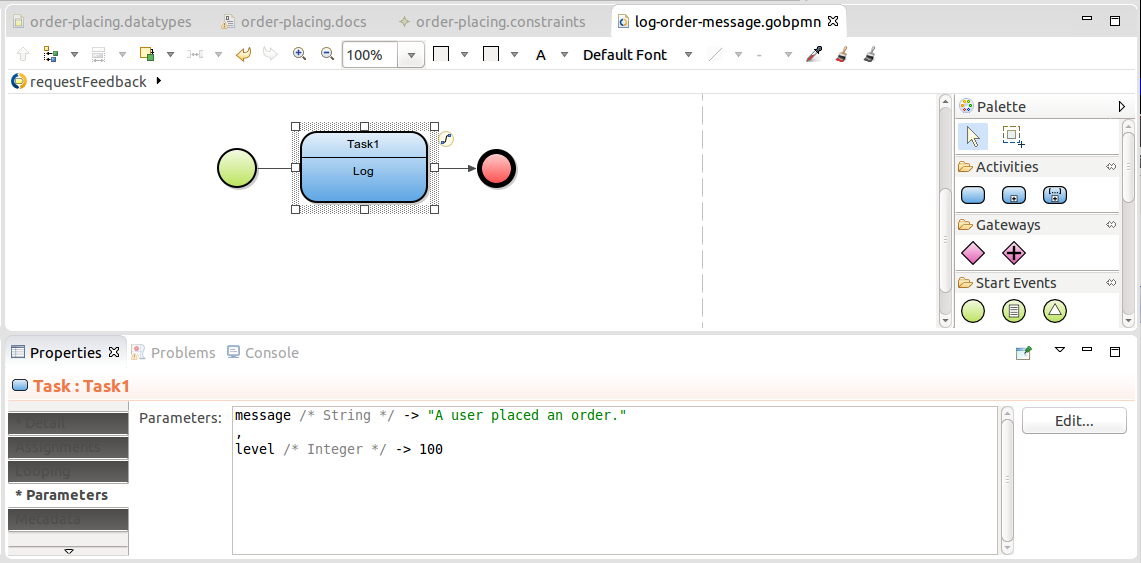
Finished process
- Instantiate the logging model from the createButton: To the Click Listener of the createButton, add the createModelInstance() function call Note that you can pass a process entity from the call if the process needs to work with a shared record from the document, in our case the order.
{ e ->
 def List<ConstraintViolation> errors :=  validate(order, null, null, null);
  if errors.isEmpty() then
   //when the form is valid, the shared record instance is created based on the proxy Order object:
    recProxySet.merge(false);
    //creates a model instance of the order-placing module
    //which instantiates the log Process:
    createModelInstance(true, getModel("logging", "1.0"), order, null);
    Forms.submit();
 else
    showDataErrorMessages(errors, orderButton)
  end;
- Save the definitions and upload the modules.
- To upload the logging module automatically with the order-placing module, import it to the order-placing module.
- Go to the application and create an order from the document.
Let's check that the logging model with the process was instantiated:
- Back in PDS, switch to the Management perspective.
- Refresh the Models view: It now contains an entry of the logging model instance.
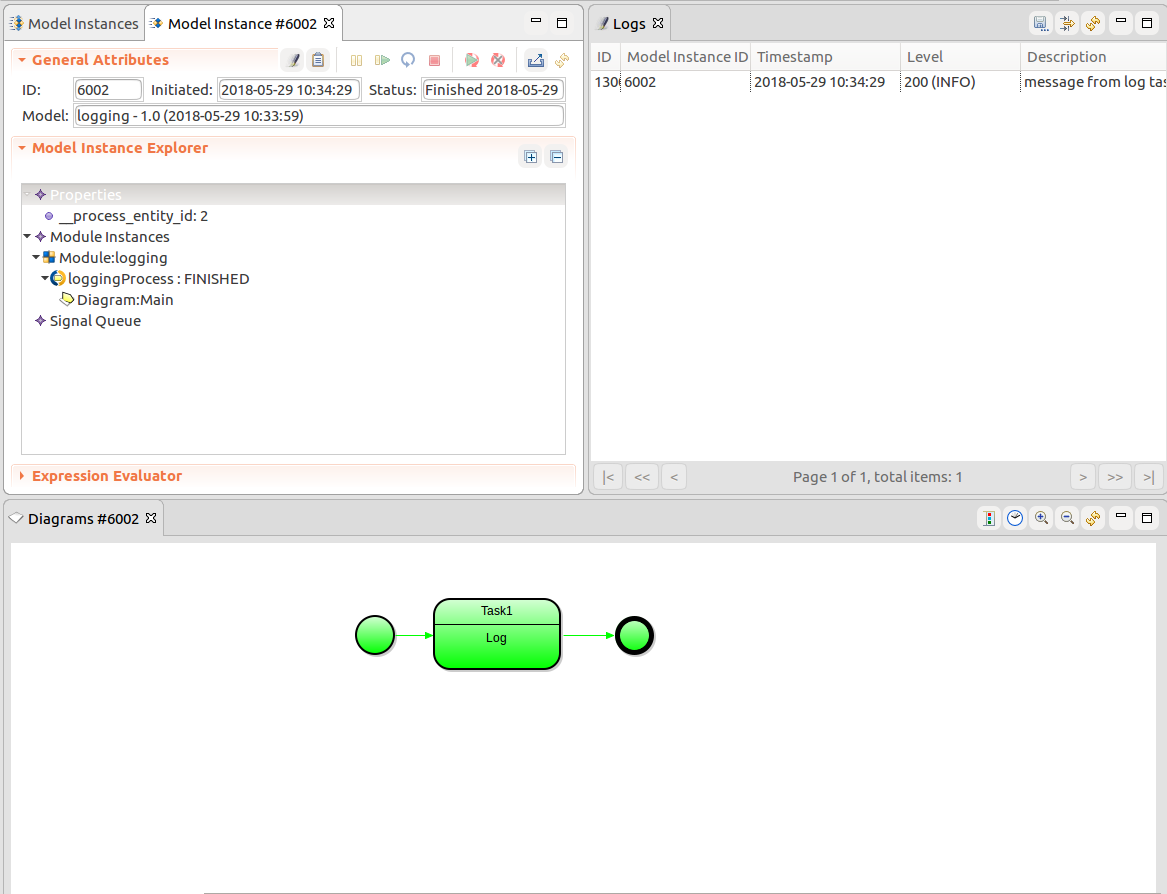
Model Instance details and live diagram\; note the process entity property in the properties tree node.