Required result: Form with a calendar into which you can add entries by selecting days in the calendar: entries details are defined in a pop-up dialog.
Do the following:
- Create or import the shared record for your calendar entries.
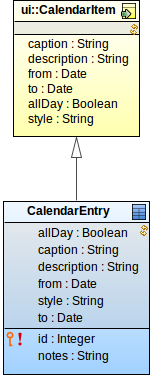
Shared record for calendar entries derived from the CalendarItem record
- Create a form definition, open it and insert a Vertical Layout component.
Create a local variable of the calendar entry type.
The variable will hold the data about a new calendar entry. For the example above, the variable will be of the CalendarEntry type.
- Create the calendar:
- Insert the Calendar component into the vertical layout.

Vertical layout with calendar component
- Define the properties of the calendar:
- Data: closure that returns all calendar entries (The closure is called on calendar initialization and refresh: After you add a new calendar entry to the database, the calendar needs to be refreshed so as to load and render the new calendar entry.)
{ a, b -> (toSet(findAll(type(CustomCalendarItem)))) }
- To item: transformation of the data object to CalendarItem so the Calendar component knows how to display them; in this case, transformation of the CalendarEntry to ui::CalendarItem.
{ calItem:CalendarEntry -> new CalendarItem(caption -> calItem.caption, description -> calItem.description, from -> calItem.from, to -> calItem.to, allDay -> calItem.allDay, style -> calItem.style)}
- Create the popup:
- In the form, insert the pop-up component and define its properties:
- Nest the pop-up component in a View Model: right-click the popup and selects Insert Parent > View Model. Define its ID.
Note: The view model component isolates the data in the pop-up component from the data in the form context: it creates an evaluation context over the screen context. You will initialize the calendar entry variable when the pop-up is displayed and get the dates the user selects in the pop-up, all this will take place in the new evaluation context.
If you don't nest the pop-up in a view model component, the initialization of the variable will create a shared record with incomplete data in the screen context. When nested in the view model, the data is written into the screen context only after it is submitted or persisted by a listener.
- Create the content of the popup: insert the Form Layout component and into it input components so the user to provide the other details for the CalendarEntry. Make sure the input components are bound to the correct field of the
CalendarEntry variable.
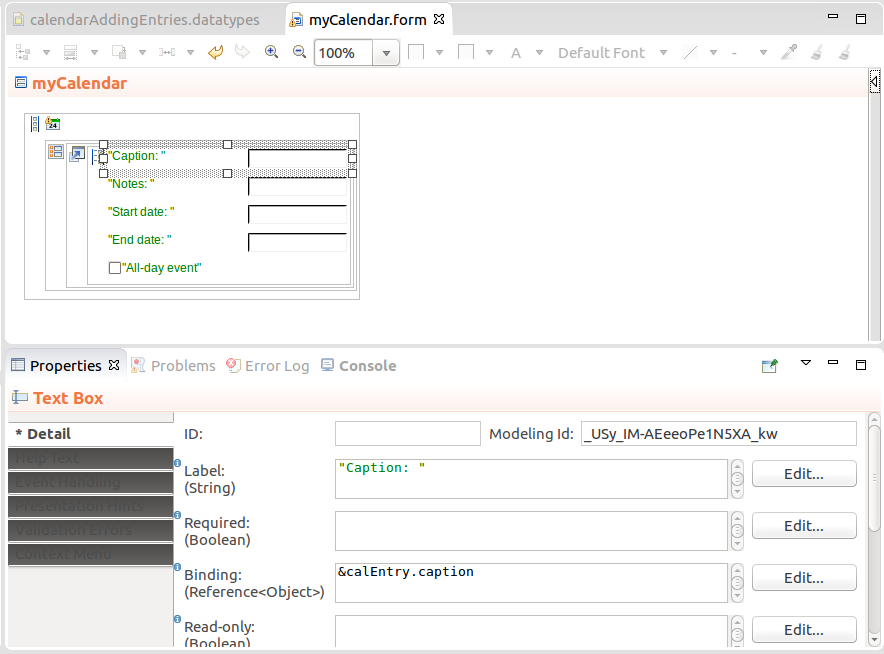
Calendar form
- On the calendar component, create a CalendarCreateListener that will display the popup with the selected dates, when the user selects a time period by clicking and dragging:
- Set its visibility to true and refresh it:
- On the Basic tab, enter the pop-up ID as the Refresh components value.
- On the Basic tab, define the handle expression so it sets the variable with the pop-up visibility to true.
- Initialize calendar entry with the clicked dates: on the Basic tab, in the Handle expression, extract the dates from the event into the CalendarEntry variable:
calEntry:=new CalendarEntry(
from -> _event.from,
to -> _event.to
)
- Define the submit button in the pop-up that will persist the provided data and close the pop-up:
- In the pop-up component of the form, insert the button component and define its properties.
- Create the ActionListener on the button with the following:
- Handle expression hides the pop-up.
- Refresh the pop-up and the calendar.
- Merge the view model (On the Advanced tab, enter the ID of the view model in the Merge view model components property)
- Persist to save the new event in the database so it is picked up by the
findAll() call on calendar refresh.
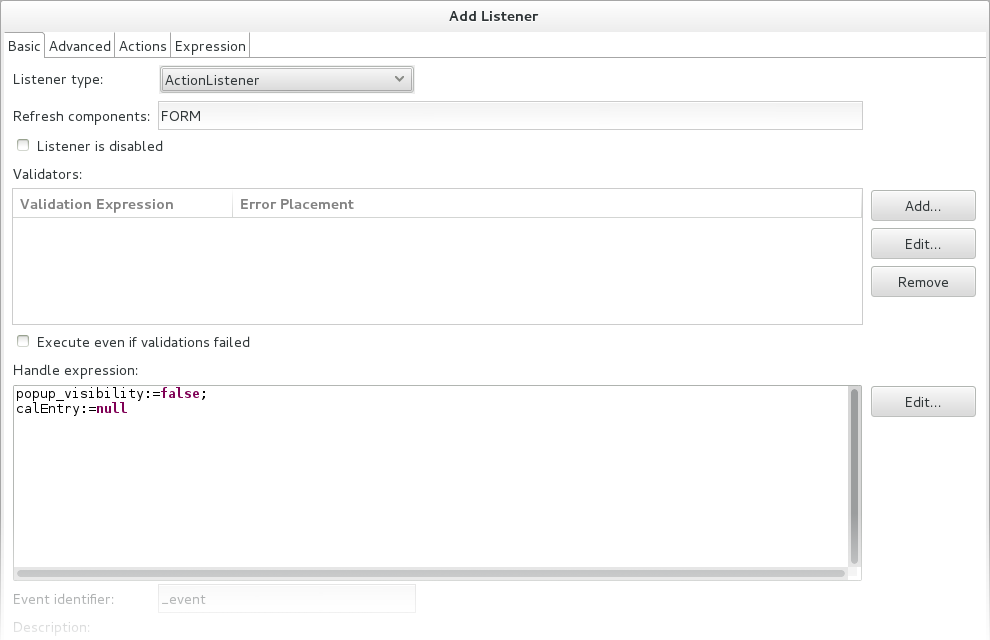
Listener on the submit button