LSPS Documentation
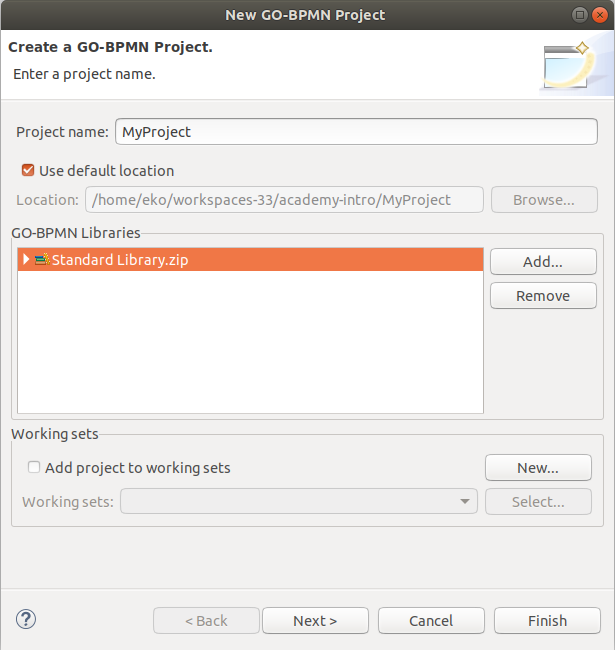
To implement your business process in a model you will need to create a structure that will hold the model resources, allow their reuse, and keep them organized: All your resources must be created in or within a special directory called a GO-BPMN Project. Projects don't do much except holding the modules and some special resources (they are equivalent to Java Projects).
Projects hold modules and modules hold the logic and resources. Modules constitute your business models: They can contain processes, global variables, custom data types, queries, functions, etc. and are reusable: A module can import another module; once a module imports another modules, it can use its resources.
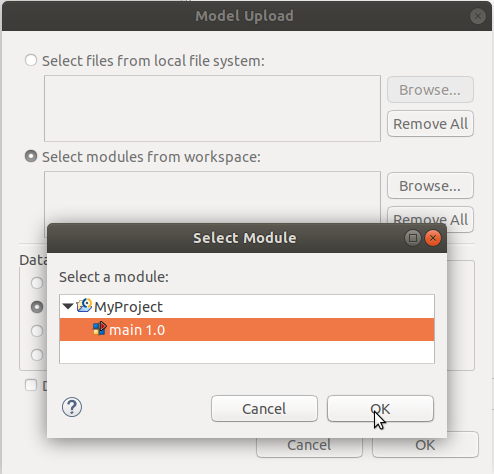
It is the modules that are uploaded to the server, while projects exist merely on design time in your workspace for your convenience.
Typically, at least one of the modules in your project is generally marked as executable: All resources of the module and its imported modules are referred to as a model. Once uploaded, you can create a model instance by running the module: A model instance then hold the context of the executable modules and all its module imports.
Let's create a GO-BPMN project with an executable module and create a model instance over it in Designer Embedded Server:
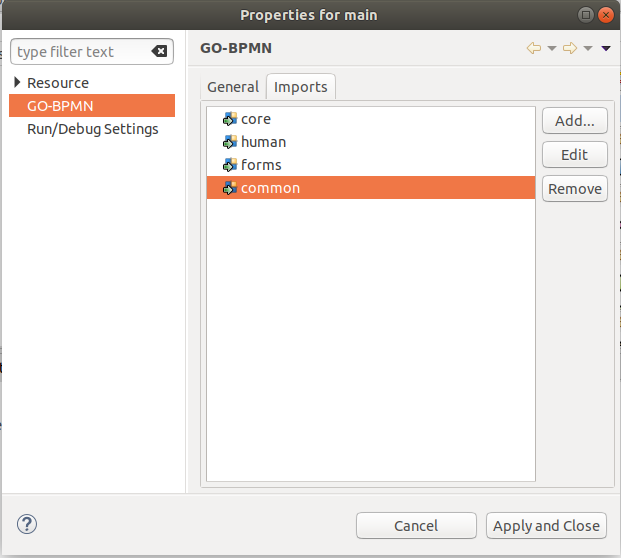
Note: If you created a new project to organize your resource, the project is not able to access resources from another project: to allow a project to use resources of another project, reference it from the project..
 button in the main toolbar: This will generate and start a local server with LSPS Application and connect your Designer to it.
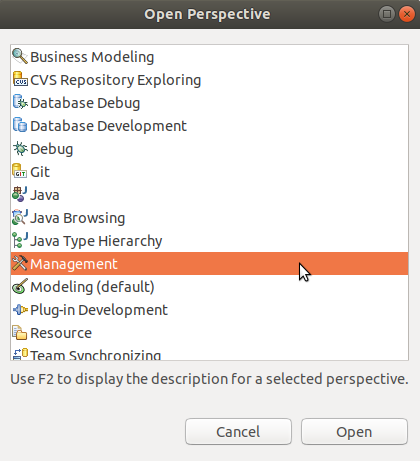
 button
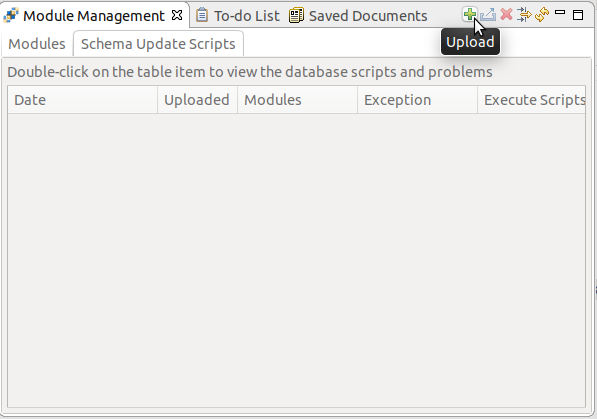
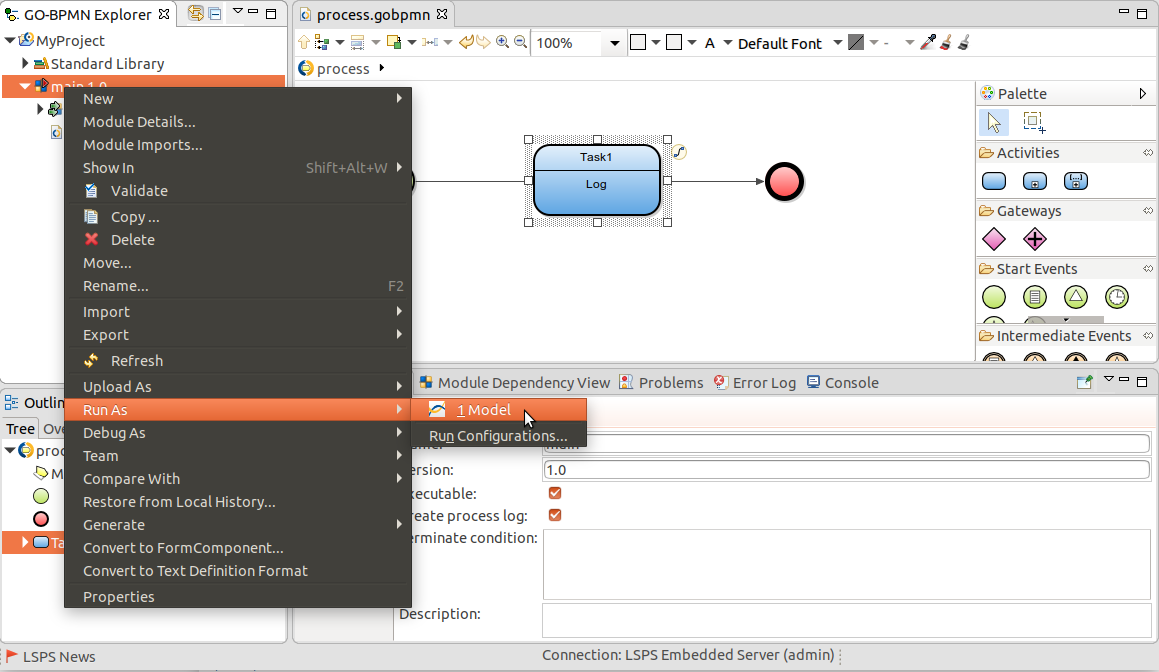
 button.
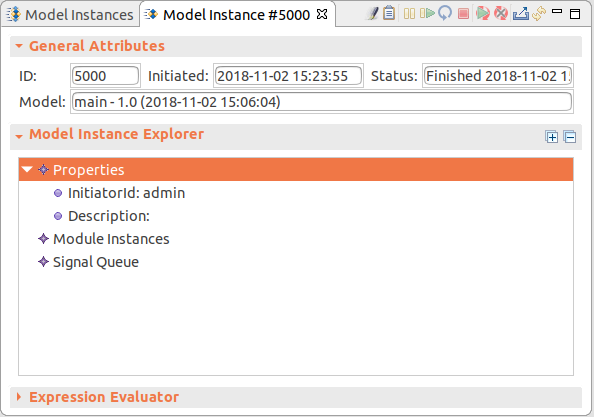
Note that the Model Instances view now contains an entry with the model instance we have just created: double-click it to display its details. There is not much to see, since the underlying module did not contain anything.
Though not much really happened, the server still created a model instance and in the model instance, it created an instance of the module. The underlying module is empty so there was nothing to do so the module instance finished and then the model instance finished.
 button in the view toolbar) and check the detail of the new model instance.
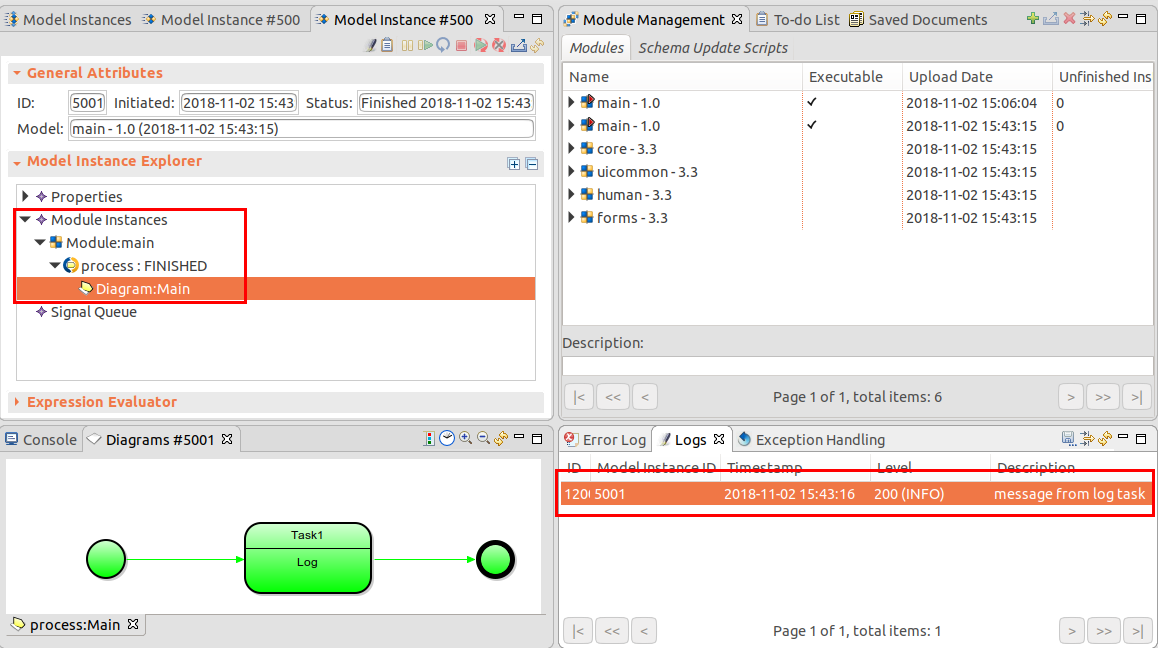
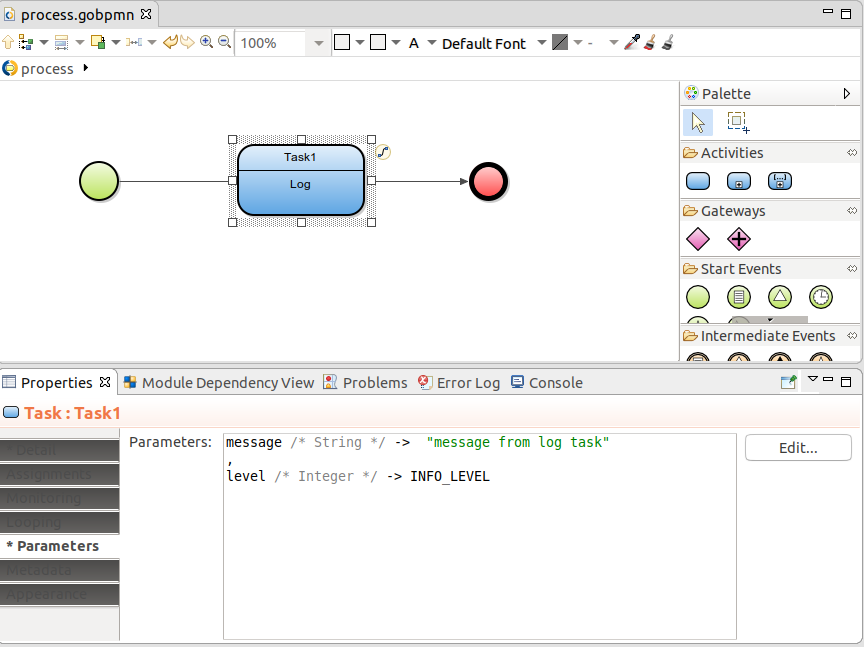
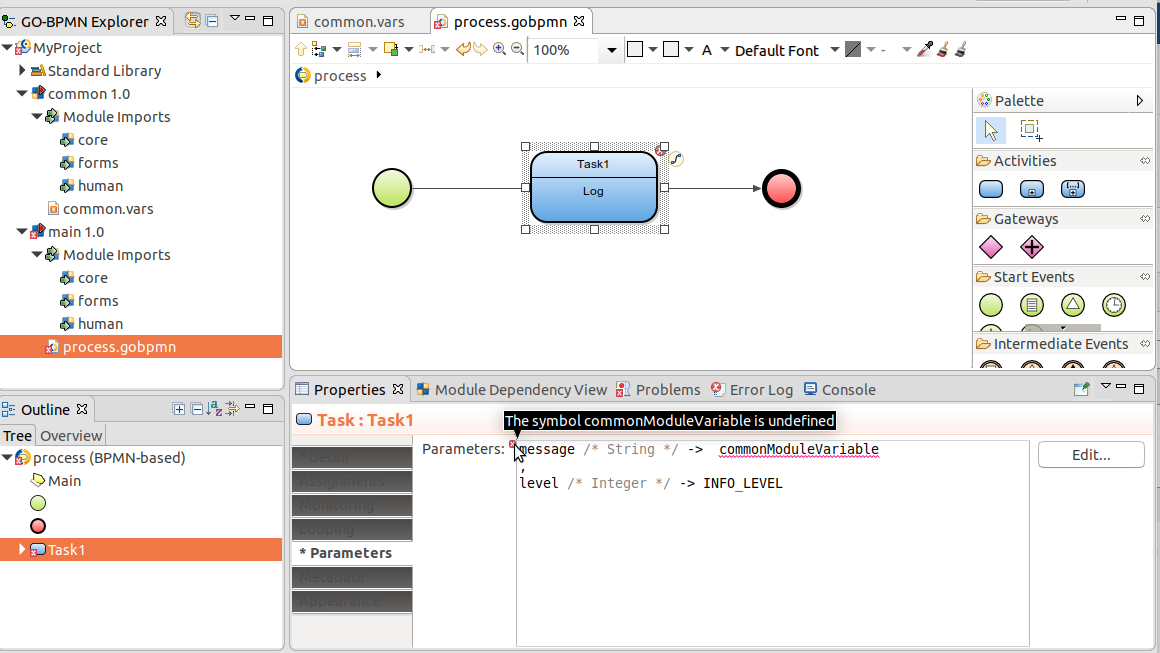
You have designed an executable module with a simple process and instantiated it on Designer Embedded Server: the server created a model instance with the module instance and, in the module instance, the process instance, which got executed and logged a message.
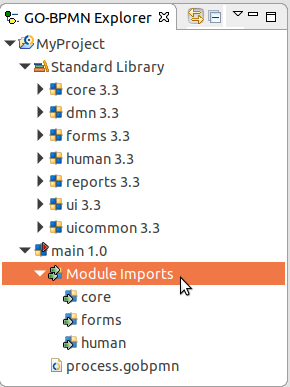
When you uploaded the module for the first time, the modules of the Standard Library have been uploaded as well: these modules were imported into your module when you created it. Module imports appear as part of the module so you can use their content. This allows you to reuse what you or other users have already created, and potential reuse is what you should have in mind when structuring your model.
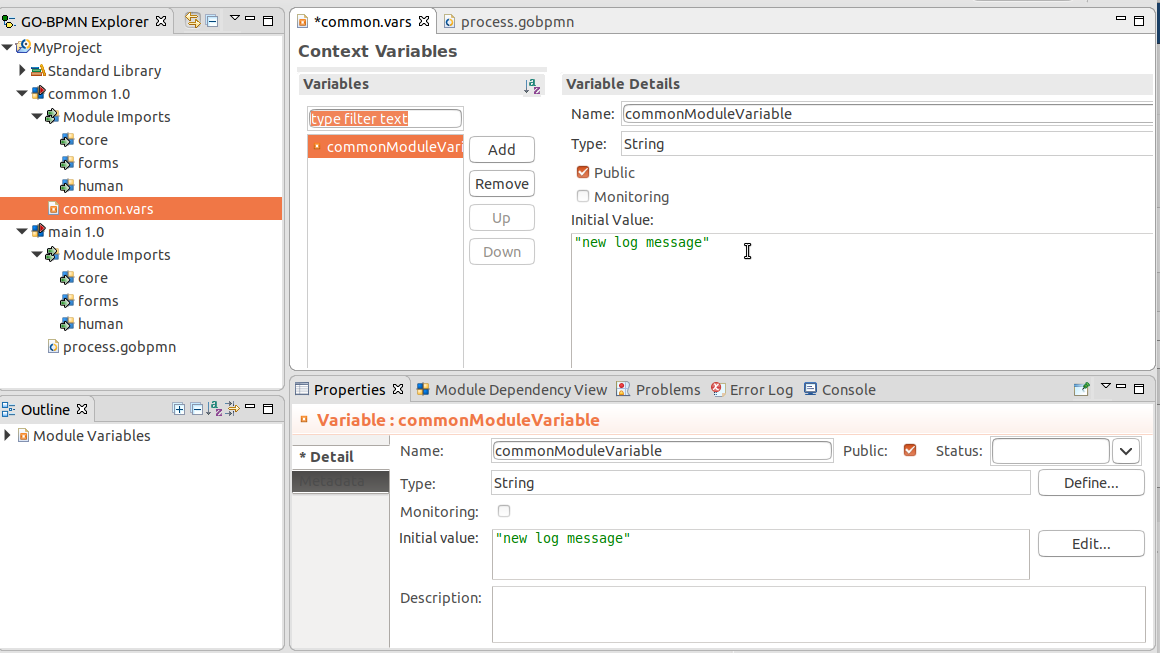
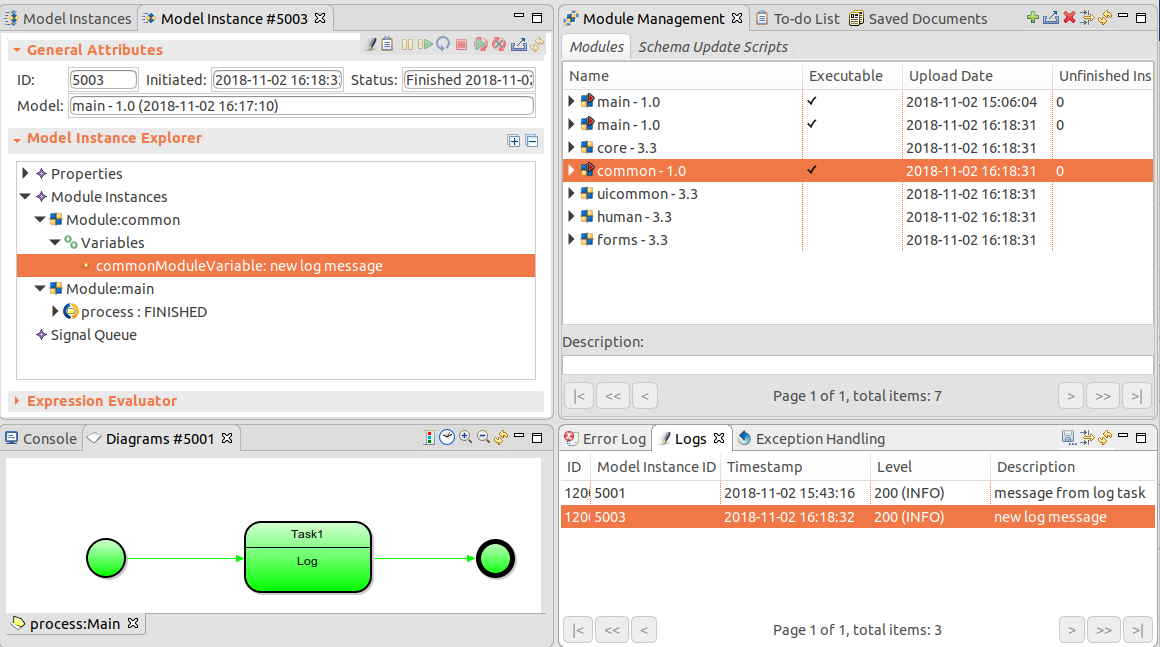
new log message and so is the new log entry value in the Log view.Note: Only if a module is marked as executable can the server create a model instance over the module: this is convenient if you are using a module as a resource for other modules and don't want to use it as a base for model instances by itself: Non-executable modules just sit in the module repository on the server and are used by model instances created based on executable modules. An executable module resembles to marking a method as
main: It signalizes that this module is where your execution starts. Unlike with main, you can have multiple executable modules in one module. However, the other executable modules do not have any impact on the model instance.
Proceed to Business Data