LSPS Documentation
The Living Systems Application User Interface is the default front-end application from which you can create model instances and participate on their execution: You can submit, reject, annotate, and save your to-dos, create model instances, search for model instances, work with documents, and define application and user settings.
Application User Interface is delivered as showcase and can be customized to meet your requirements. For further information refer to the Software Development Kit documentation.
The Application User Interface environment is rendered based on multiple Vaadin components: it shows the navigation menu on the very left. On the right, pages with content are displayed based on the picked navigation menu item (by default the To-do List content is shown).
From the navigation menu you can access the following pages:
To access the Application User Interface, do the following:
Note that once in the application, the actions you can access are restricted by your security rights: Every user of the Application User Interface is assigned a set of security rights, which define the actions the user may perform (not all users can use all features). If the user requests an action he is not allowed to perform, an error notification appears.
To-Dos assigned to the currently logged-in user are displayed in the To-do List view.
A to-do is an entity displayed as a view with specification of work the end user has to accomplish, data they need to provide, etc. A to-do is generated when a process requires intervention from a human user: in the background, the process workflow reaches and runs a user task. This type of task generates a to-do. The to-do is assigned to a user or a set of users, and appears in their to-do list.
The user opens the to-do. On open, a to-do becomes locked and only the user can work on it. The user provides the necessary information or performs the required tasks and submits the to-do once finished: The user task becomes completed and the process workflow proceeds.
To display the content of a to-do, do the following:
Every to-do is shown as a separate row entry with the details arranged in columns:
Auth.: authorization and lock information
The authorization icon indicates what mechanism was used to assign the to-do to the logged-in user:
If the to-do is locked, the column contains a lock icon (see Allocating To-Dos).
Note that the view has two modes: normal mode and select mode. Normal mode is the default mode. In this mode you can display to-do content by clicking the to-do row. In select mode, you can select multiple to-dos and lock, unlock, reject, delegate or escalate them. To activate select mode, click the Select button.
You can hide or display to-do columns by clicking the Filter  arrow on the to-do list table and selecting the column to hide or display.
When a person opens a to-do, the to-do becomes locked and only the user who opened the to-do can see it in their Application User Interface. We can that the to-do is allocated to the given person.
If the person unlocks such a to-do, it re-appears in the to-do lists of the relevant assignees, which are the initial assignees unless delegation or escalation was applied.
To lock or unlock one or multiple to-dos from the Application User Interface, do the following:
arrow.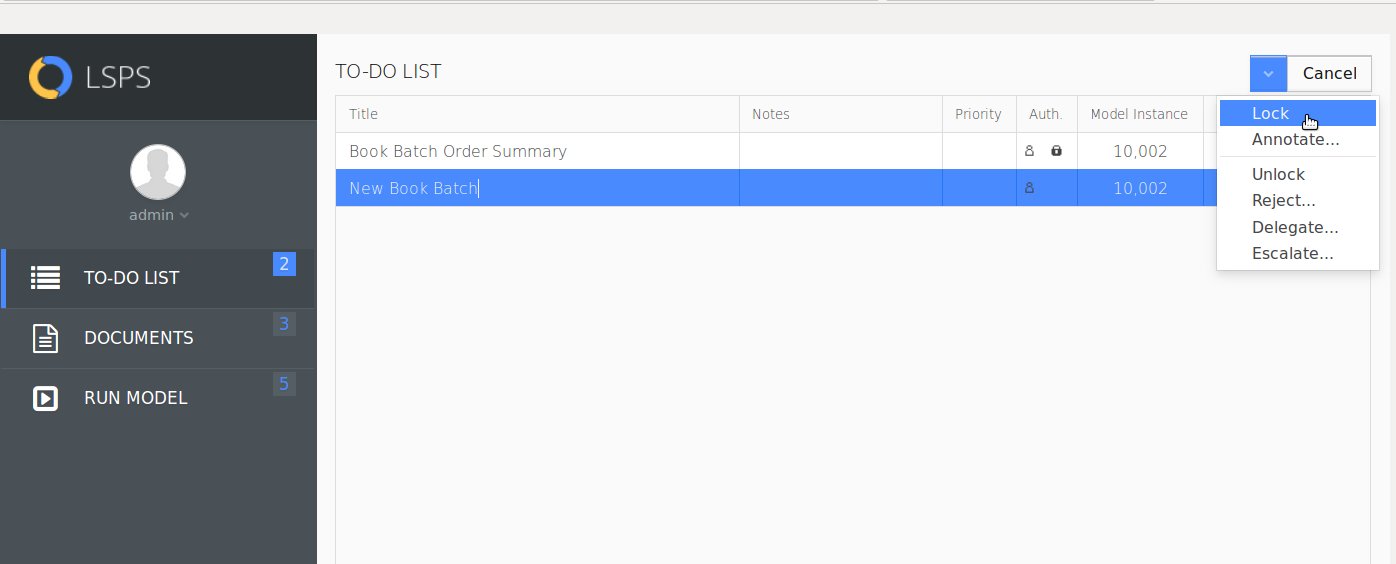
When you reject a to-do, the to-do disappears from your to-do list. The to-do remains in To-do Lists of other to-do assignees.
Note: A system administrator can undo a to-do rejection and reassign the to-do to the same front-end user. Hence a rejected to-do might reappear in your to-do list.
To reject a to-do, do the following:
arrow and in the context menu, click Reject.To reject one or multiple to-dos, do the following:
arrow.When you delegate a to-do, the to-do disappears from your to-do list and to-do lists of all the assignees, and is reassigned to other users defined as your delegates.
To delegate a to-do, do the following:
arrow and in the context menu, click Delegate.To delegate one or multiple to-dos, do the following:
arrow.Important: The escalation mechanism described below is deprecated. Use the GO-BPMN escalation mechanism instead; for example, call the throwEscalation() function on a button component and process the escalation with Catch Escalation elements (refer to GO-BPMN Modeling Language Specification).
When you escalate a to-do, you trigger the escalation on the process. The to-do remains in your to-do list, while the escalation processing takes place. The actions triggered by escalation vary, depending on the underlying process. When a to-do is escalated, a signal with a certain value is sent to the Execution Engine. The signal can be caught and processed. If escalation handling and catching of the signal is not defined in any model instance, escalation takes no effect.
You can provide notes and priority level of your locked to-dos, that is, the to-dos allocated to you, in the to-do annotation. The annotation data is visible in the to-do itself, to-do detail and in the to-do list.
If a locked to-do with notes and priority level is unlocked, the notes remain unchanged. Only the priority level is removed.
To annotate a to-do, do the following:
arrow at the top of the to-do content and in the context menu, click Annotate.The Documents view allows you to work with the available documents. Documents are similar to to-dos; however, they do not depend on a workflow and are available as long as their parent model is on the server.
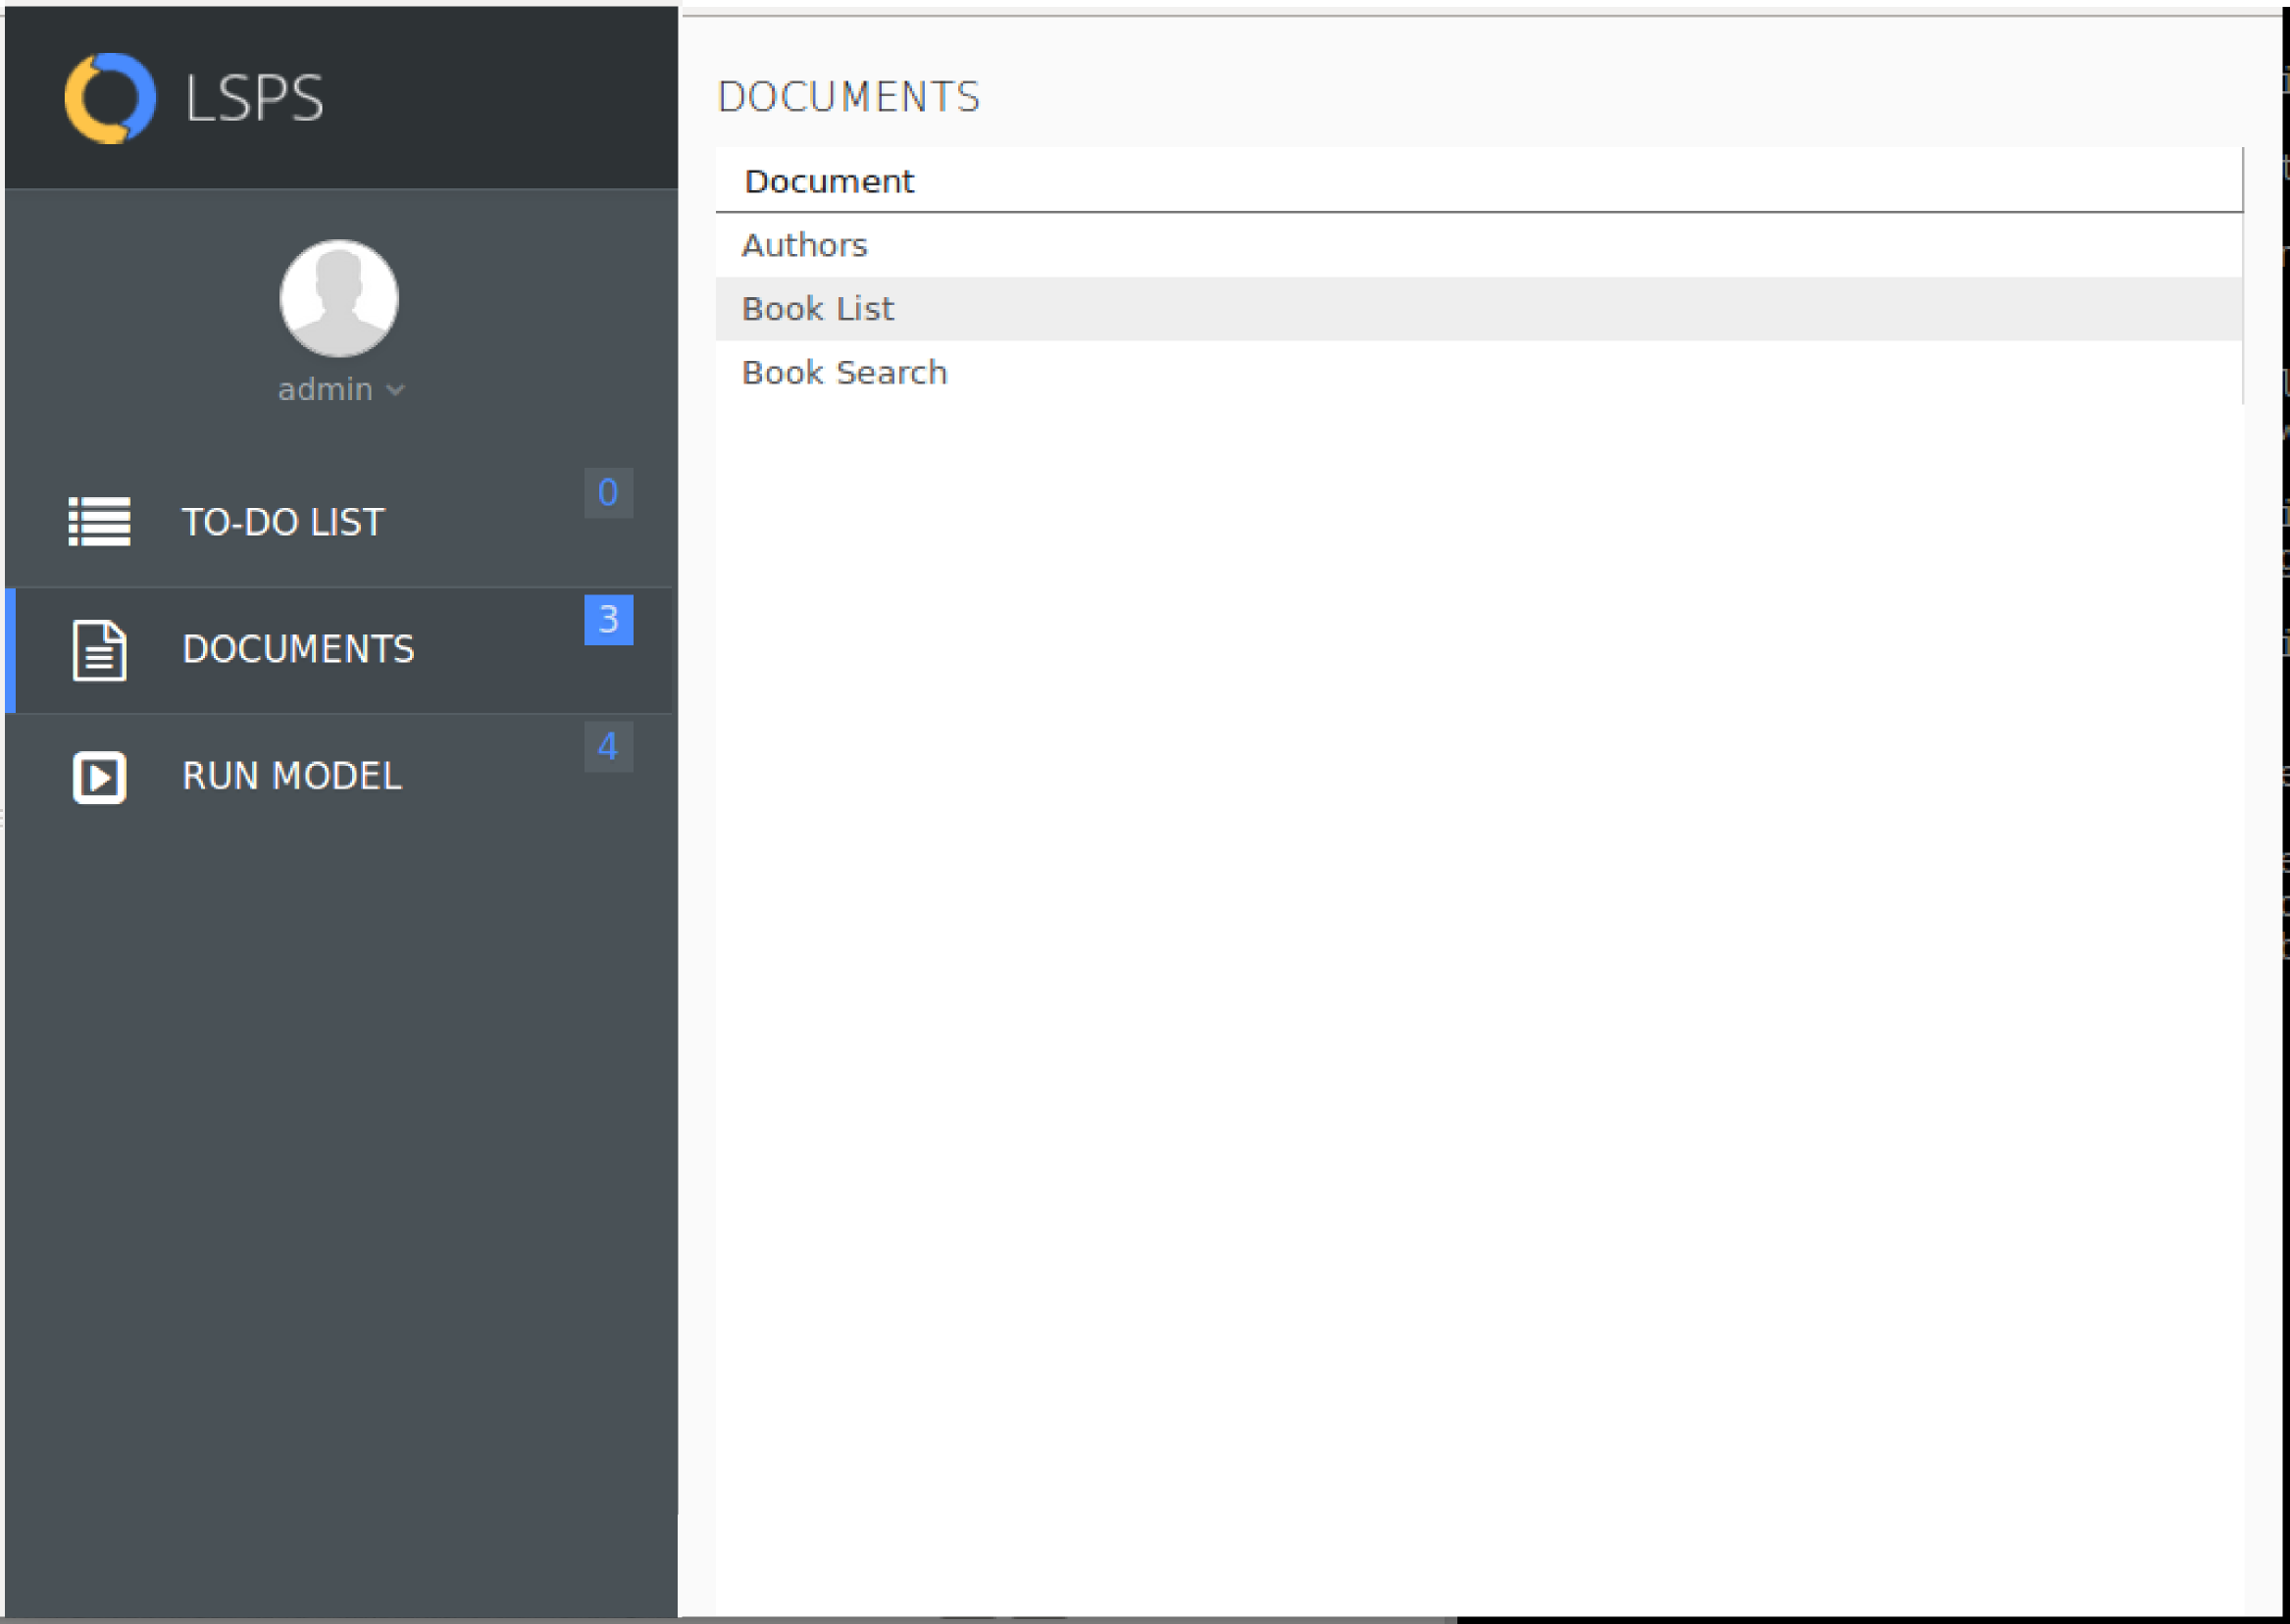
To display a document, do the following:
Every user of the Application User Interface can simultaneously work on up to ten to-dos or documents which are open in different Web Browser tabs.
When a user opens more than ten to-dos or documents in different Web browser tabs, only the last ten documents and to-do remain available. The ones opened before them are invalidated and an error message is shown.
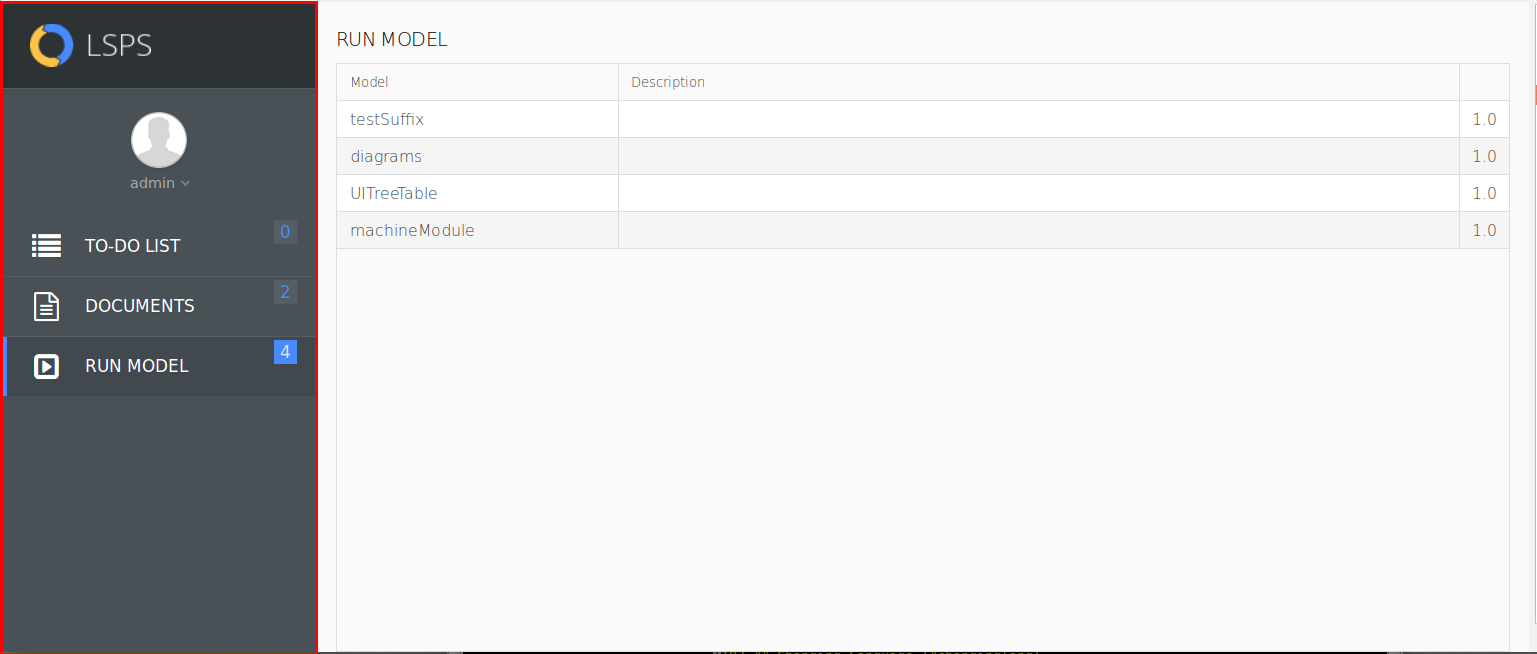
The Run Model page allows you to create a model instance of an GO-BPMN model available on the server.