LSPS Documentation
This guide is the place to start if you are new to the product and need to get familiar with its architecture, environment, and related documentation. It introduces you to Living Systems Process Suite (LSPS) and leads you through the hello-world model scenario.
LSPS is a suite of tools that allow you to develop a flexible process-driven company application that will distribute work to your employees, communicate with external systems and users based on BPMN or GO-BPMN processes and that in a very short time frame. You will be able to manage the processes and any related data, monitor key performance indicators of processes and activities, integrate with social media and much more.
When you install Process Design Suite (PDS) as instructed in the Installation Guide, you installed the IDE for development your models.
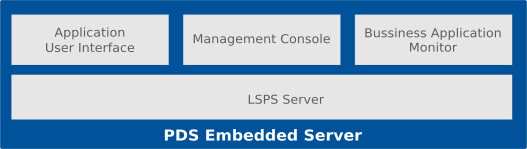
PDS comes with the locally running application server called PDS Embedded Server. It is generated when you first request to run it. It is stored in the .LSPSEmbedded directory of your workspace.
PDS Embedded Server has the LSPS Application deployed: this is a JEE application that allows you to deploy, run, and manage GO-BPMN models. The heart of the application is the LSPS Server, which stores and runs your models, manages model instance execution, their update, etc.
PDS provides also the thick client for management of the LSPS Server in the form of the Management perspective.
Summary:
Note: Apart from the PDS Embedded Server, LSPS comes with yet another embedded Server called the SDK Embedded Server: It is provided by the SDK extension of PDS as part of the Enterprise Edition: its LSPS Application EAR along with the Application User Interface sources are part of your workspace (you generate the server from PDS). While the LSPS Server part of the application cannot be modified, you extend it with custom items and EJBs to implement custom business logic and adapt the thin client Application User Interface. Further instructions and details are available in the development documentation.
To launch the Process Design Suite, do the following:
If the chosen workspace folder does not exist, it will be created: it is simply a folder, where the resources of the session are located.
The Welcome page appears. Click the Modeling Perspective icon or close the Welcome page.
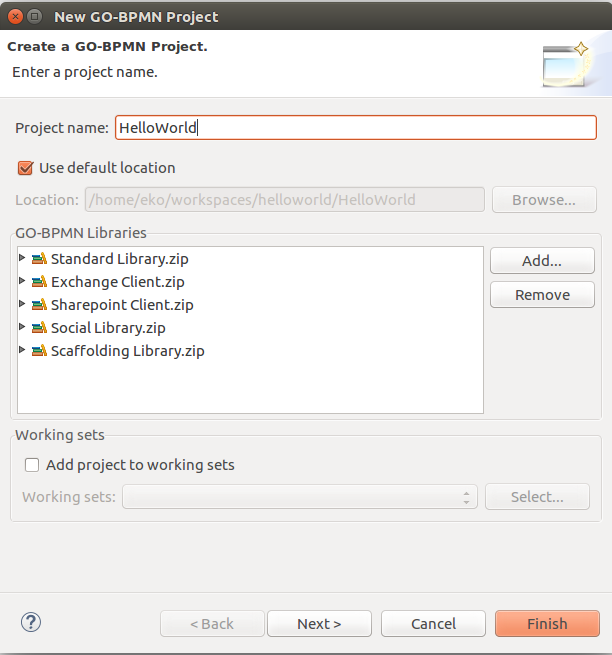
To be able to design valid processes, you need to create your processes as well as other resources in a set structure: First you create projects: they exist only in your workspace and are intended for organization purposes. A GO-BPMN project contains modules, which allow you to organize the resources still further, but also provide the visibility and executability features, similarly to Java packages: a module contains definitions of processes as well as other resources, such as, variables, organization hierarchy of involved people, localization units, etc.
Modules are what you upload to the server. If a module is executable, it can be used to create a model instance. The server then executes the model instance, based on the definitions in the module and its module imports, which are simply imported modules.
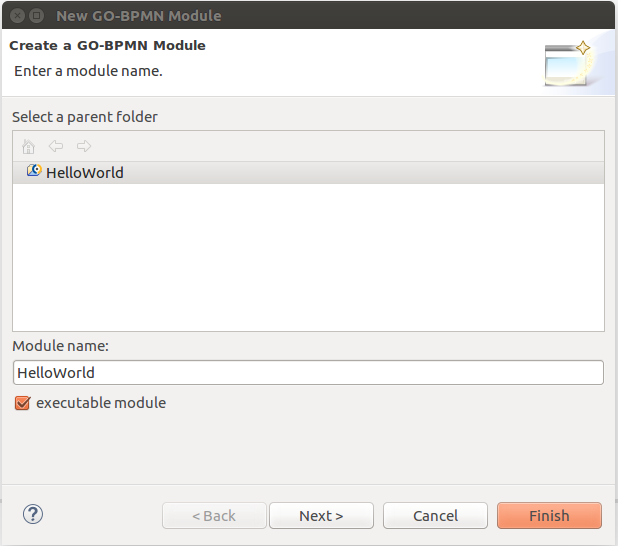
To create the project structure with the module and process, do the following:
Note: Leave the executable module check box selected: an executable module can become a Model instance (the flag somewhat resembles the logic of the main method in Java).
helloWorldProcess as the process name and click Finish. Make sure the Type is set to BPMN-based process. 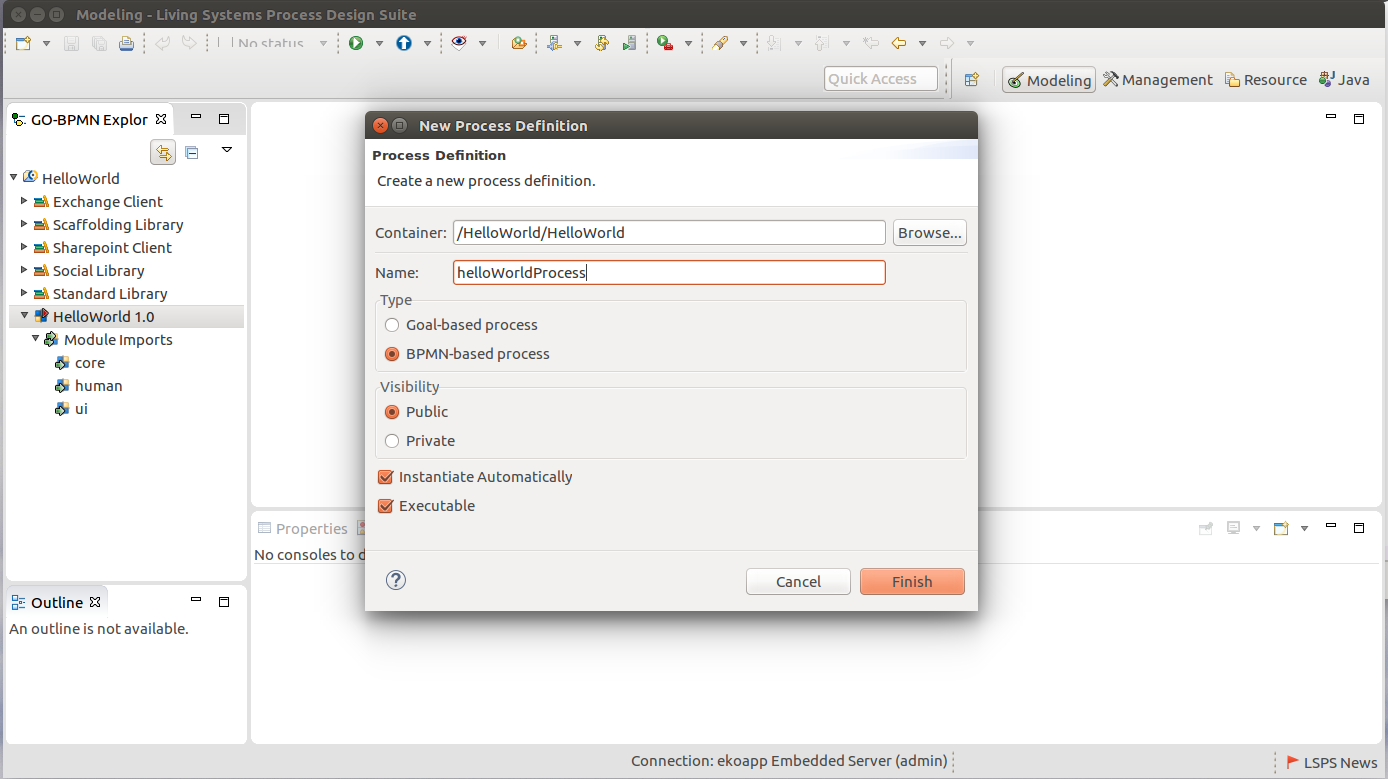
 next to it to the position where you want to place the Simple End Event. In the context menu, select Simple End Event.
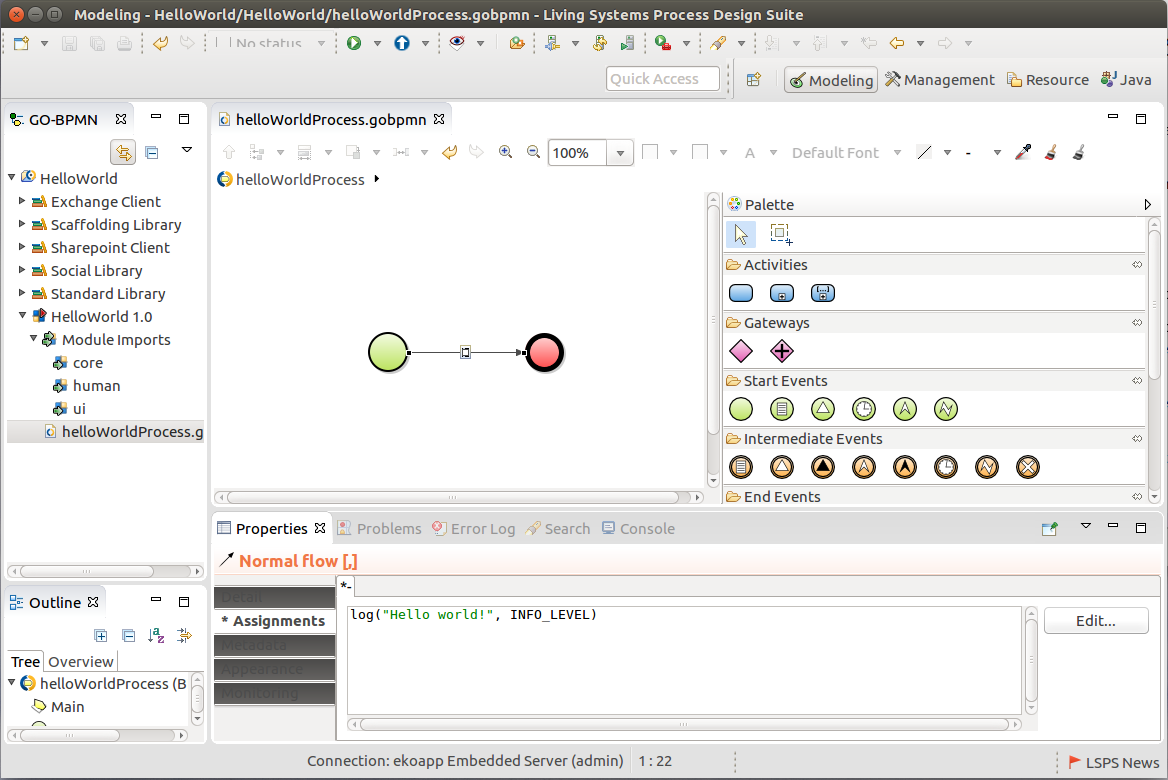
log is a call to the log() function of the Standard Library that logs the specified message with its level to the database log of the application: the Logs can be viewed in the Management perspective.If you have followed the steps as described above, the module should be valid: in case there is something wrong, check the Problems view. If the view contains a problem entry, you will need to solve it. Check the respective instructions above again and remedy any mistakes.
If there are no problems in the view, you can upload the model to the PDS Embedded Server and run it.
To run an instance of the HelloWorld model on the PDS Embedded Server, do the following:
Click  to run the PDS Embedded Server.
PDS creates the .LSPSEmbedded folder in your workspace and generates the resources for the server with the LSPS Server, and runs the server with the LSPS Server deployed.
Upload and instantiate the model: right-click the HelloWorld module and go to Run As > Model.
This uploads the module and its module imports to the LSPS Server and creates its Model instance.
 ) button: The view will display the HelloWorld module and the Standard Library modules. ) button: The view will contain the instance of the HelloWorld model. ) button: The view will contain the log message of the HelloWorld model.
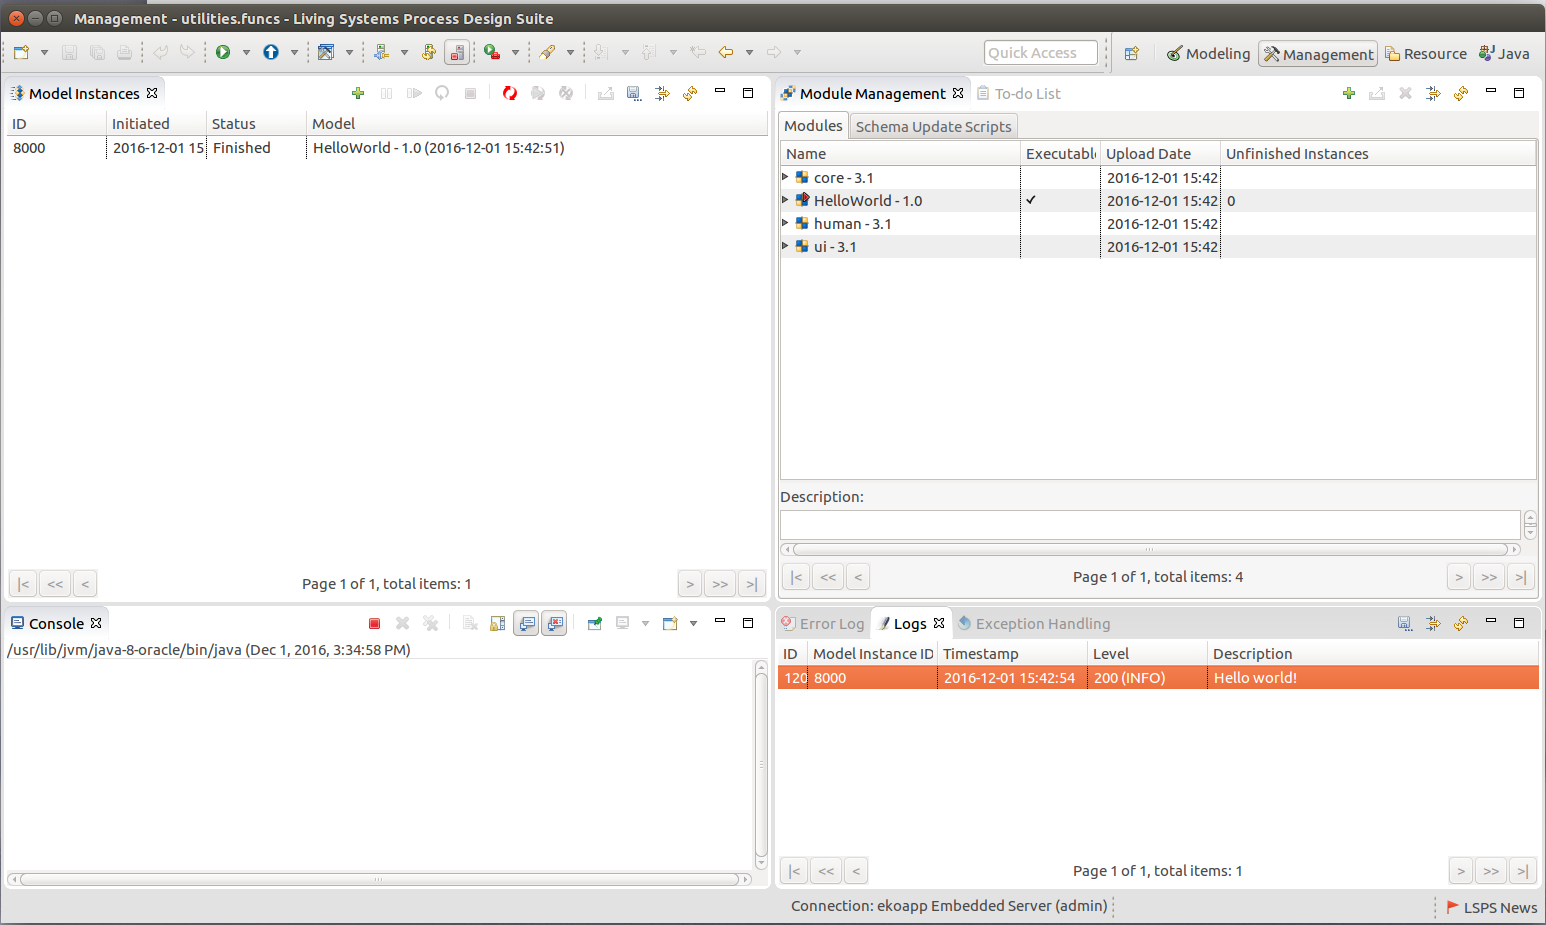
jdbc:h2:tcp://localhost/h2/h2;MVCC=TRUE;LOCK_TIMEOUT=60000 and connect to it with the user lsps and password lsps.When clicked Run As > Model on your executable module, the following happened:
Now that you have a rough overview of how LSPS works, you can refer to one of the following: