LSPS Documentation
Important: To complete this tutorial, you need the enterprise edition of PDS with SDK installed.
Typically, the default To-Do list will not cut it in the real world of business and you will require custom business-related data for a to-do while retaining the related mechanisms, such as, priority of the todo, its allocation, locking, annotations, delegation, substitution, etc.
Since the Todo is represented by the Todo record which is a system record, you cannot simply add a field to it. However, you can create a new Record related to the Todo Record and add the business data to this Record: in this tutorial, we create the TodoItem record with an additional field and a relationship to the Todo record:
issueAction parameter of the User tasks.Note: The pattern of records related to system records can be applied analogously to other system records, for example, to extend the data held by
Person.
Before you start, create a project:
custom_todo_list_model and click Finish.Since Todo is a system record and system records cannot be extended directly, you need to create a record that will represent our todo item with the business data and is related to the Todo system record:
custom_todo_list_model project.custom_todo_list_data.TodoItem:TodoItem.priority of type Integer into the TodoItem record.todo) and click OK. 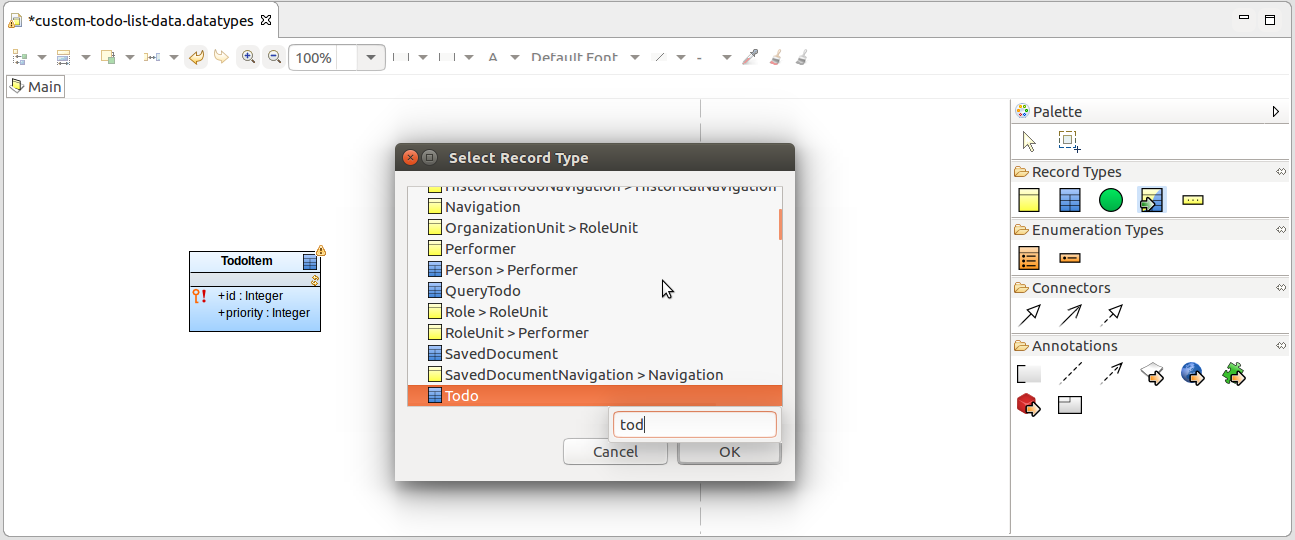
 from TodoItem to Todo.
todoSingle (one TodoItem relates to one Todo) 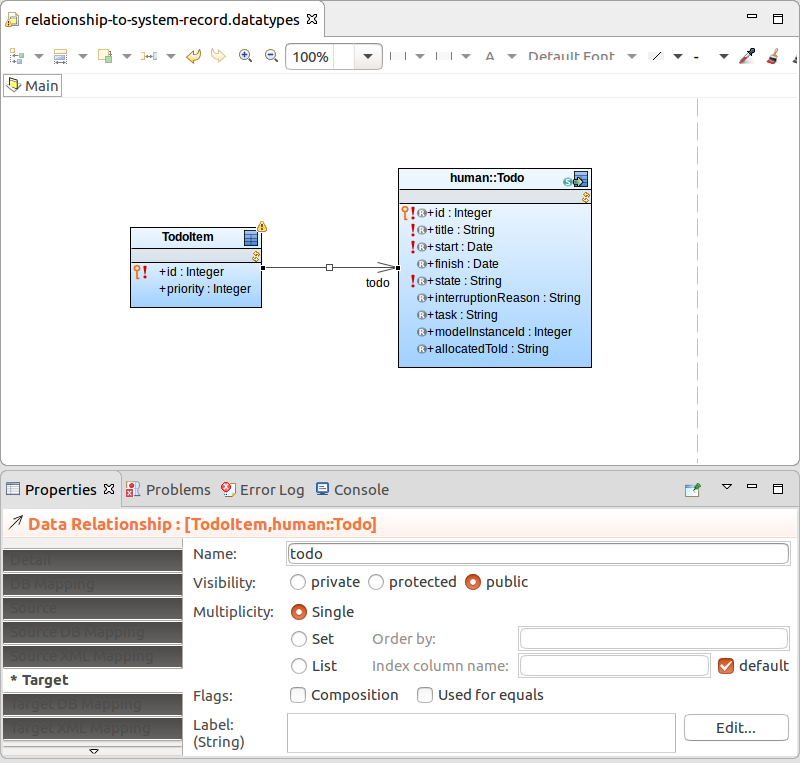
Note: To display the fields and methods of the imported Todo record, right-click the record and under Compartments select the required items.
Todos are created when a User Task of a process instance is executed: to create the todo item related to the todo, create it in the issueAction closure of the User Task: issueAction is executed right after a todo is created and has the todo created by the User Task as its input parameter.
Let's create a process that will create a Todo and its TodoItem:
custom_todo_list_process and click Finish.CreateTodoItem and select the BPMN-based process option.newTodoItem of the TodoItem type (in the Outline view of the process definition, right-click the root node and select New > Variable). It will hold the new todo item, so we can pass it to the todo form where we will edit its priority field.issueAction parameter, create the TodoItem record over the to-do: title /* String */ -> "Dummy Submit for Guest",
performers /* Set<Performer> */ -> {getPerson("guest")},
uiDefinition /* UIDefinition */ -> submitForm(newTodoItem) ,
issueAction /* {Todo:void} */ -> { t:Todo -> newTodoItem := new TodoItem(todo -> t)}
submitForm does not exist yet; we will create it in the next step.Note: If you attempted to change the value of the related to-do directly, for example, on a flow assignment with
newTodoItem.todo.title := "";, you will get a validation error since Todo is a system record and fields of system records cannot be accessed directly.
Create the form that will be used to gather the priority data for the TodoItem and submit the todo:
custom_todo_list_process module and go to New -> Form Definition.submitForm as the name of your form and make sure the Use FormComponent-based UI is not selected. Note: The Use FormComponent-based UI setting defines which module of the Standard Library is used to create the form: when not selected the ui module is used. Forms of the ui module are event driven. When the option is selected, the forms module is used: the forms are created more like in Vaadin. Generally the latter option is more powerful but requires more programming skills and is considered experimental in this version.
TodoItem (in the Outline view of the form definition, right-click the root node and select New > Parameter)."Priority:"&newTodoItemParam.priority"Submit"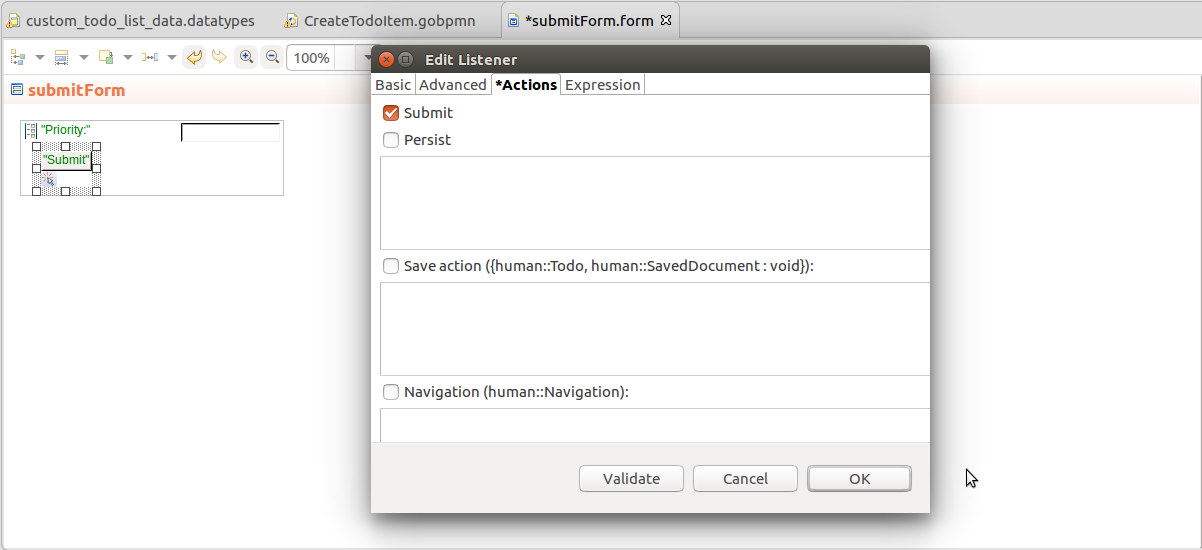
Now we will create a page that will display the list of the todo items that have not been submitted yet (their todo is alive) and are assigned to the current user.
First, create a query that will retrieve todo items:
getTodoItems, set TodoItem as the record type, and set an iterator name, for example ti.t.//returns todos of the current person:
new TodoListCriteria(person -> getCurrentPerson(),
//exclude interrupted, accomplished, suspended todos:
includeAllStates -> false,
//exclude rejected todos:
includeRejected -> false,
//exclude to-dos allocated by other persons:
includeAllocatedByOthers -> false,
//exclude to-dos of substitutes:
includeSubstituted -> false)
ti.todo.id == t.id
The query is ready and you can create a document with a form that will display the todo items:
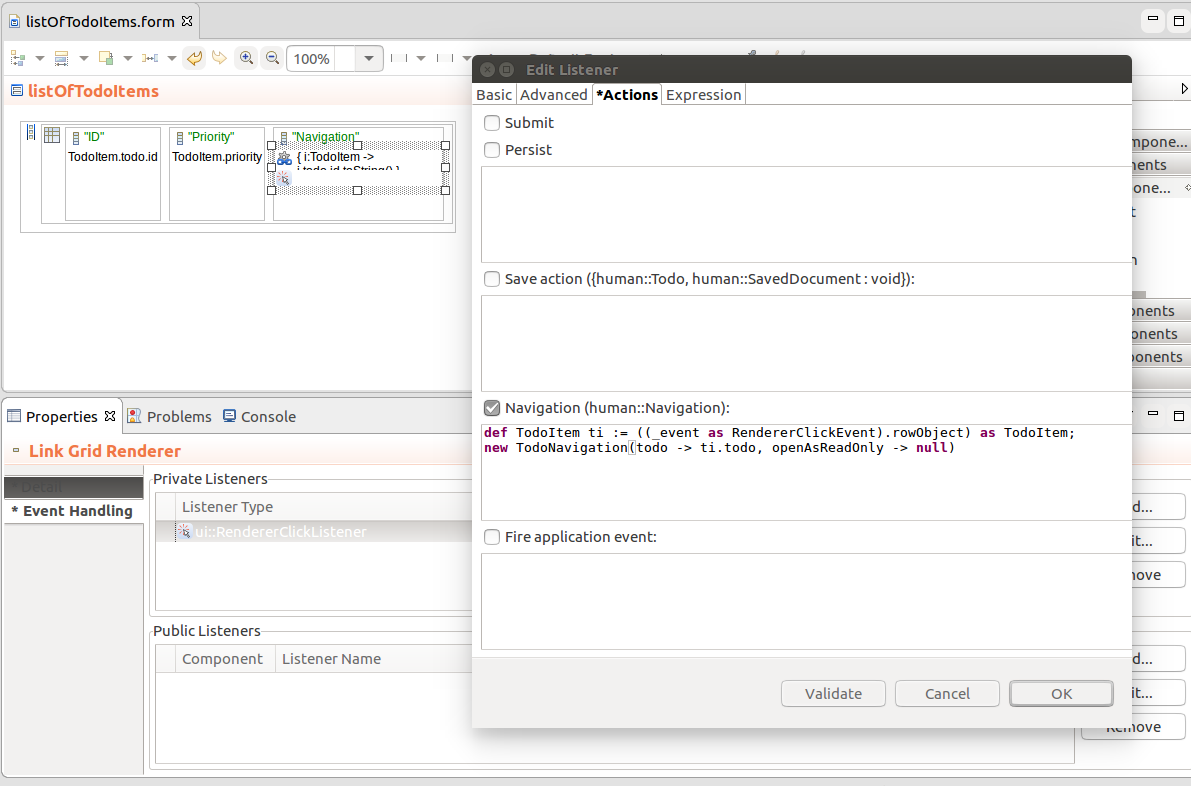
custom_todo_list_ui non-executable module that will hold the document.todoItemsList"My Todo Items"listOfTodoItems()listOfTodoItems and click Finish.getTodoItems()TodoItem.todo.id.{ i:TodoItem -> i.todo.id.toString() }
def TodoItem ti := ((_event as RendererClickEvent).rowObject) as TodoItem;
new TodoNavigation(todo -> ti.todo, openAsReadOnly -> null)
 .
.http://localhost:8080/lsps-application and check the Documents of the guest user. .Now this is all nice and neat but the user can still access the default To-do List page: generally you want to substitute the To-Do List in the Application User Interface with our to-do item list.
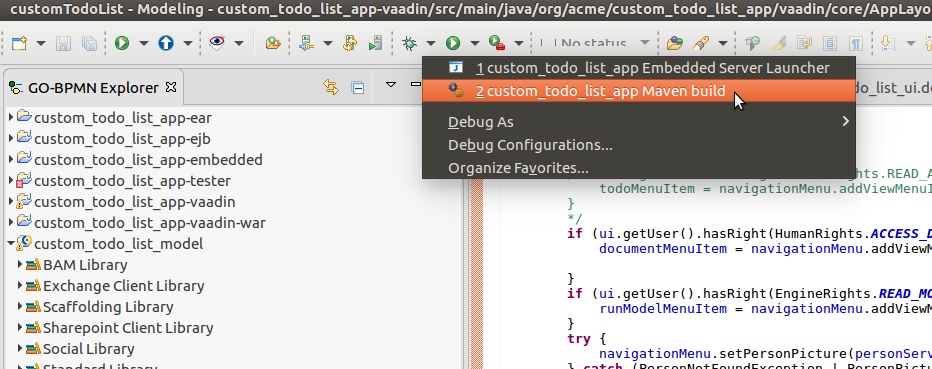
To be able to do this, you need to modify the Application User Interface and deploy it to your server:
This will generate the sources of the Application User Interface. For more details, refer to documentation on development of Custom Application User Interface.
Let us remove the default To-Do List item and add our list item to the navigation menu:
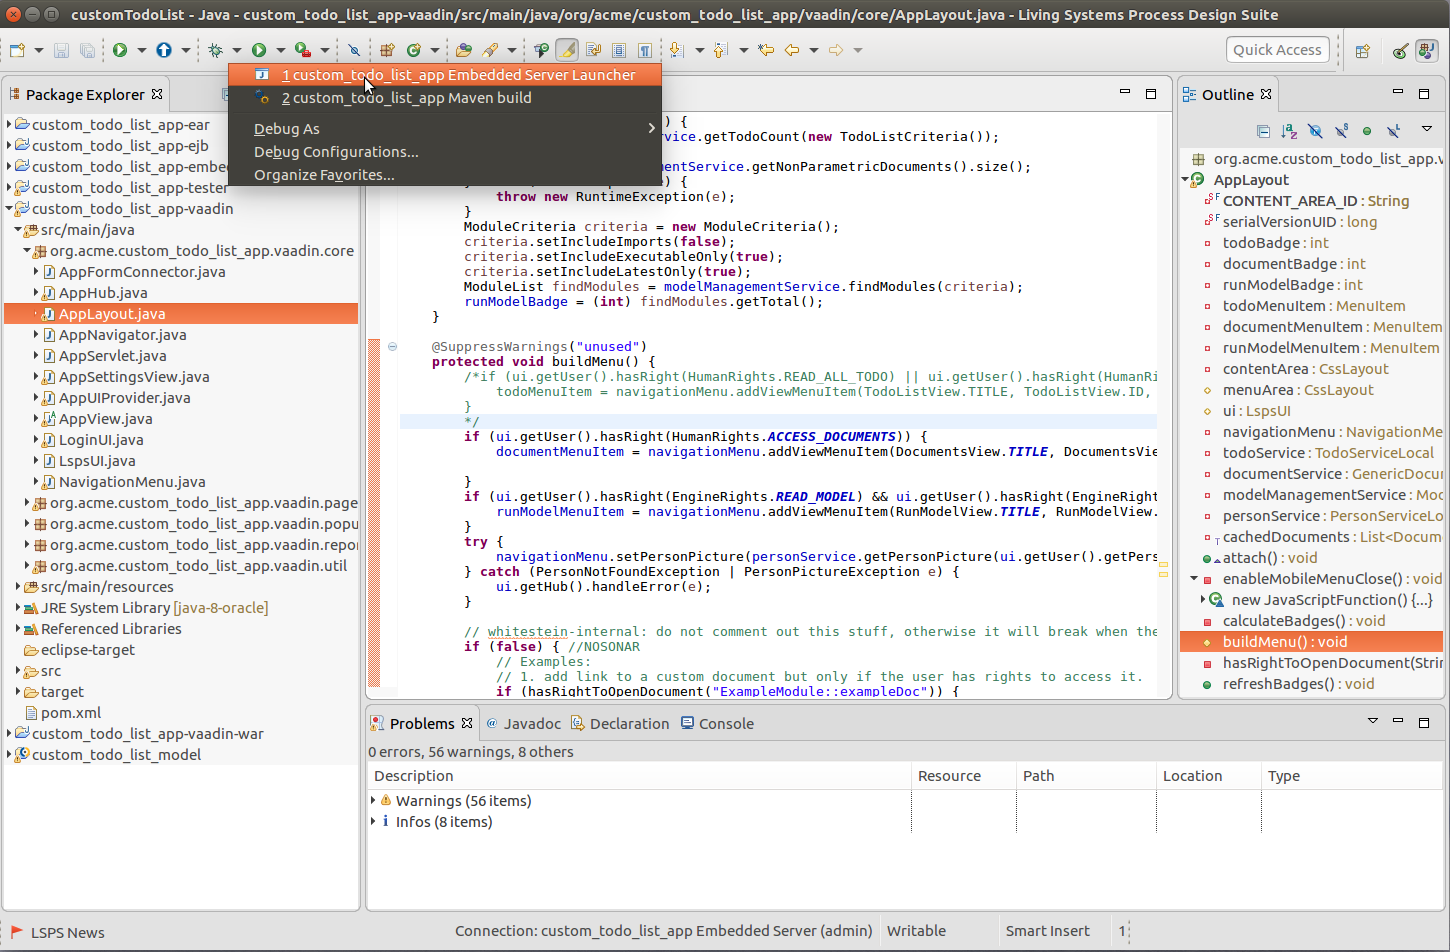
<YOUR_APP>.vaadin.core.AppLayout.java file.buildMenu() method. @SuppressWarnings("unused")
protected void buildMenu() {
/*if (ui.getUser().hasRight(HumanRights.READ_ALL_TODO) || ui.getUser().hasRight(HumanRights.READ_OWN_TODO)) {
todoMenuItem = navigationMenu.addViewMenuItem(TodoListView.TITLE, TodoListView.ID, FontAwesome.LIST, todoBadge, null);
}*/
if (ui.getUser().hasRight(HumanRights.ACCESS_DOCUMENTS)) {
documentMenuItem = navigationMenu.addViewMenuItem(DocumentsView.TITLE, DocumentsView.ID, FontAwesome.FILE_TEXT_O, documentBadge, null);
}
Important: Note that this is a different server from PDS Embedded Server and has your application hot-deployed.
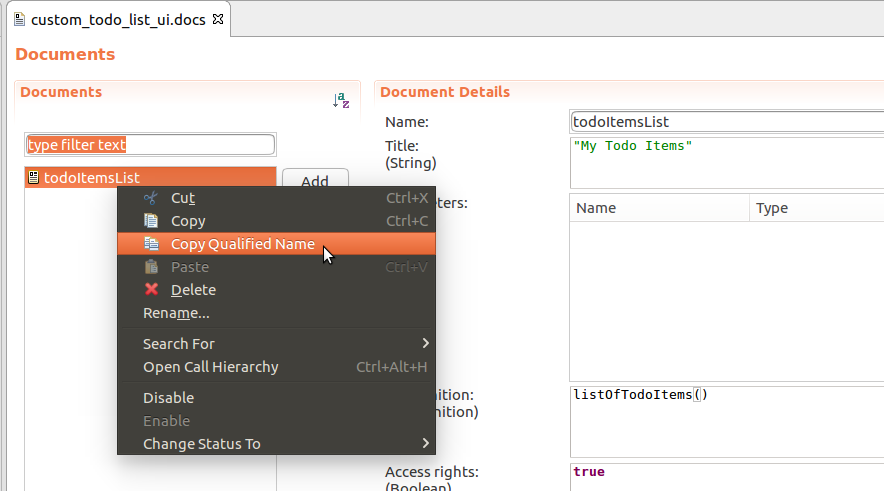
buildMenu() of <YOUR_APP>.vaadin.core.AppLayout.java: paste the qualified name of the document to prevent typos. Do not forget to remove the if statement around or set its condition to true and the other example items as applicable. if (hasRightToOpenDocument("custom_todo_list_ui::todoItemsList")) {
navigationMenu.addDocumentItem(
"My Todo Items",
"custom_todo_list_ui::todoItemsList",
null,
FontAwesome.ADN,
null,
null
);
}
You can now access the document directly from the navigation menu, but it contains the ??? characters: these signalize that the system failed to find the localization string. Let's create the string:
com.whitestein.lsps.vaadin.webapp package (<YOUR_APP>-vaadin project), for example, the localization.properties file with the default localizations.# navigation menu items
nav.todoitems = To-do List
nav.documents = Documents
nav.runProcess = Run Model
# This is the new key:
nav.itemsList = My Todo Items
addDocumentItem() call: navigationMenu.addDocumentItem("nav.todoitems", "custom_todo_list_ui::listOfTodoItems", null, FontAwesome.ADN, null, null);Right now the document is accessible from the dedicated navigation menu plus it is available as a document in the Documents menu. To remove it, open the DocumentsView class and adapt the load() method; for example:
private void load() {
    try {
      List<DocumentInfo> documents = genericDocumentService.getNonParametricDocuments();

      for (DocumentInfo document : documents) {
        //Added this to exclude the document from the table:
        if (!"custom_todo_list_ui::todoItemsList".equals(document.getId())) {
          container.addBean(document);
        }
      }
Note that you will need to adapt the calculation of documentBadge on documentMenuItem with the number of available documents.
Simple example of badge calculation
//constant with the document name:
private static final String DOCUMENT_IN_MENU = "custom_todo_list_ui::todoItemsList";

  private void calculateBadges() {
    try {
      todoBadge = (int) todoService.getTodoCount(new TodoListCriteria());
      try {
        List<DocumentInfo> nonParametricDocuments = documentService.getNonParametricDocuments();
        //exclude of the document from the count:
        documentBadge = 0;
        for (DocumentInfo documentInfo : nonParametricDocuments) {
          if (!DOCUMENT_IN_MENU.equals(documentInfo.getId())) {
            documentBadge++;
          }
        }

      } catch (ErrorException e) {
        throw new RuntimeException(e);
      }
      ModuleCriteria criteria = new ModuleCriteria();
      criteria.setIncludeImports(false);
      criteria.setIncludeExecutableOnly(true);
      criteria.setIncludeLatestOnly(true);
      ModuleList findModules = modelManagementService.findModules(criteria);
      runModelBadge = (int) findModules.getTotal();
    } catch (RuntimeException ex) {
      LspsUI.getCurrent().error(ex);
    }
  }