LSPS Documentation
The LSPS Application User Interface supports switching of locales so that the GUI can be displayed in another language. To display also the texts that originate from your Models in the correct language, use localization identifiers in the underlying expressions: Localization identifiers are special functions that return the localization of the string in the current locale. They support position text parameters so you can pass values to the localization text on runtime.
Note: In the Default Application User Interface, you can switch locales, on the Settings page. Note that the default application supports the English, German, and Slovak locale and localization identifiers in other languages will not be used unless you add a new locale to the application. For instructions on how to add a new locale to the application, refer to the Developing a Custom Application guide.
You can define a localization identifiers in the Localization Editor or from the Expression Editor.
To create a localization identifier with the Localization Editor, do the following:
Important: It is considered good practice to define localization definitions with all identifiers used by the given module to keep modules self-contained.
In the editor, select the Default Language in the Default Language combo box.
Localization in this language will be used if the localization version requested by the application is not available.
%<position_number> to insert values of the parameters. 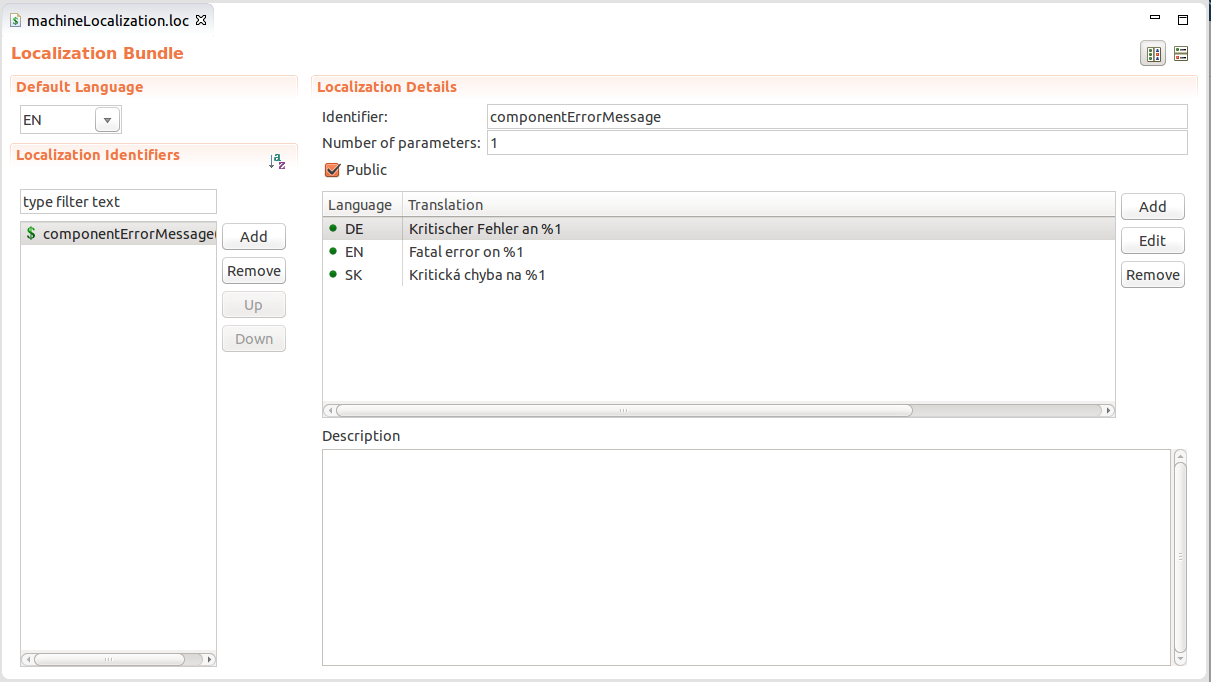
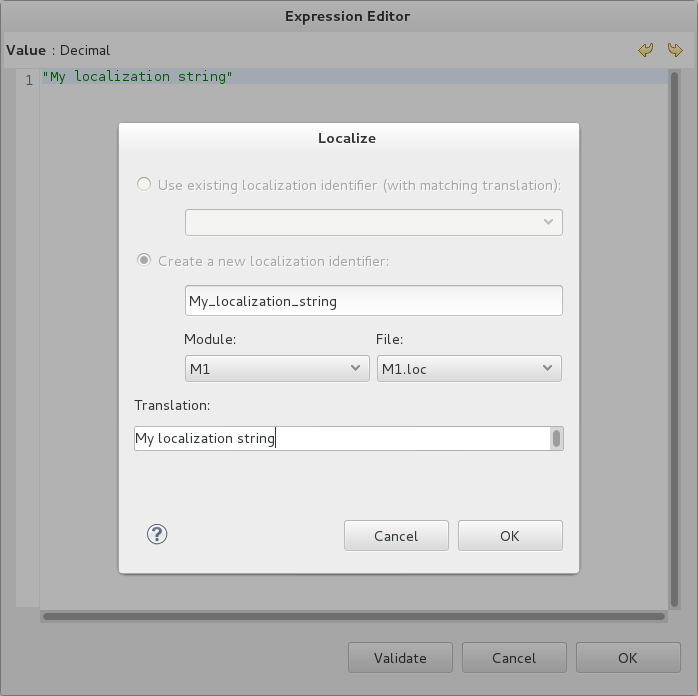
To define a localization identifier directly from the Expression Editor, do the following:
In the Expression Editor, type the name of the identifier as a String value and select it.
To create an identifier with parameters, define the entire value with concatenation, such as, "You requested the following book " + getBookName() and select the entire expression: any concatenation elements that are not string literals will be interpreted as position parameters.
Press Shift + Alt + L.
To change the shortcut, go to Window > Preferences, then General > Keys, search for Localize and set the new shortcut in the Binding field.
To call a localization identifier from your expressions, use the syntax:
For example, to call the identifier deviceAdjust with two parameters, enter $deviceAdjust("#123", sectorA).
To force a localization in a locale, call the localize() function, for example:
To search for usages of a localization identifier, right-click the definition of the localization identifier in the Localization Editor and go to Search For -> Usages or select the identifier definition and press Ctrl+ALT+g.
If you are using localization identifiers and you want to make sure that everything is localized, you can set the validation feature to detect unlocalized Strings. Note that you can explicitly mark a String as non-localizable with the hashtag sign (#): such Strings are excluded from the validation check.
To have unlocalized Strings detected on validation, do the following: