You are going to create an example model that will register clients: A client will log in to the application, enter their registration data, and submit the data. An agent will accept or reject the registration data.
You have to consider the following:
Data structure: The specific business data involved is the registration data of the user. The data must remain available once provided: you will it as a shared Record.
People involved: Two types of users, the client and the agent, are involved in the process. You will need two roles that will represent these user types.
Processes:
The registration must be available to clients at all times and does not involve any decision-making logic or work distribution; no BPMN process is required. You will implement the registration as a Document available to all client users.
The approval request requires distribution of work to a group of users: the request should be available to agents after a client submits their data at first. You will implement the approval as a process triggered when a client submits the registration.
Prerequisites
First, create a GO-BPMN project with a module:
Make sure you are in the Modeling perspective: GO-BPMN Explorer should be displayed on the left.
If this is not the case, go to Window > Perspective > Open Perspective > Other and select the Modeling perspective in the dialog.
Create a GO-BPMN project:
Go to File > New > GO-BPMN Project.
In the New GO-BPMN Project dialog, enter ClientRegistration as the project name and click Finish.
Create a GO-BPMN module in the project:
Right-click the ClientRegistration project and go to New > GO-BPMN Module.
In the dialog, enter the module name clientregistration.
Click Finish.
Data
The business data, the client's registration data, must be persisted so they remain available after the business-process finishes. Therefore, they must be store the data as a shared record:
Right-click the clientregistration module and go to New > Data Type Definition
In the dialog, enter the module name common and unselect the executable module option (it makes no sense to create a model instance over a module with a data model).
Click Finish.
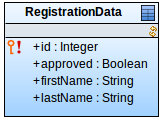
In the displayed editor, create the RegistrationData shared Record with the following fields:
approved: Boolean
firstName: String
lastName: String
RegistrationData record
Users
The registration involves two types of users:
The client who enters new registration data and
the agent who approves the registration. To distinguish the users, you will use roles of an organization model. When you run the model, you will assign the roles to users.
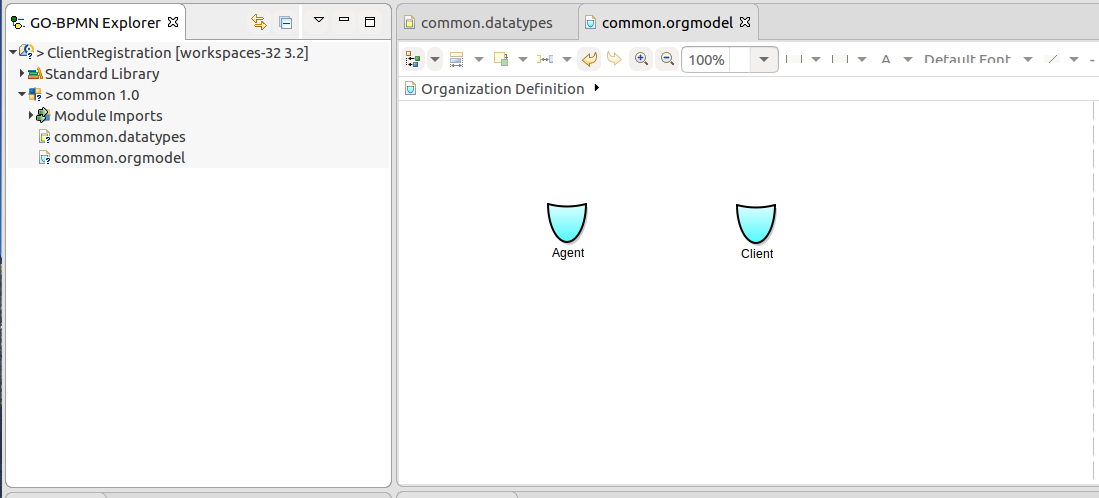
Let's create the organization model:
In the common module, create the organization definition file: right-click the common module, go to New > Organization Definition.
Create the roles Agent and Client.
Save.
Now you can use calls Agent() and Client() to get all users with the given role.
Detailed information on how to design and use organization models is available here.
Processes
The registration comprises the entering of the registration data and the data approval approval.
Registration
You want a client wants to register, they open the registration form, fill it out, and submit it whenever they want. All occurs on a single page and no further immediate execution logic takes place: no timer or event triggering of actions, no involvement of other users, etc. Therefore, you can implement it as a document.
Create a document definition with a registrationDocument document with the following properties:
Note that you haven't created the ClientRegistration UI definition, yet: There is an error reported on the UI Definition expression.
Let's create it:
Create the form definition file: right-click the registration module, go to New > Form Definition.
In the dialog, enter the name of the file ClientRegistration.
Make sure the Use FormComponent-based UI option is selected (The checkbox allows you to select the implementation to be used by the form definition. Two implementations are available: forms and ui. This option selects the forms implementation, in which you define behavior of components in the ui definition by primarily writing code as opposed to the ui implementation, which requires less coding but are more restrictive).
Click Finish.
In the form editor, design the form:
Insert a vertical layout.
Insert a form layout into the vertical layout.
Into the form layout, insert Text Fields for the first name and last name.
In the Properties views of the Text Fields:
Enter the IDs, firstNameField and lastNameField.
Enter the caption, for example "First name:".
Set Binding to Value: this simply sets the value of the field to the literal value, which will not be recalculated on refresh.
Insert the Register button.
Define the expression that will be executed when the user clicks the Register button: Open the button properties, and in the Click Listener property define an expression which creates a new RegistrationData record with the values in the form fields and submits the form:
Now you will create the approval process for the agent, which will behave as follows:
It starts when the client clicks the Register button.
It displays a form with the user data and the Approve and Reject buttons.
It stores the data when the agent clicks one of the buttons.
Adjust the click listener of the Register button In the ClientRegistration form so it triggers this model when clicked (in the next step you will create an approval process that will be triggered by this call):
{ click ->
       def RegistrationData registration :=
           new RegistrationData(
              firstName -> firstNameField.getValue(),
              lastName -> lastNameField.getValue()
           );
       createModelInstance(
          synchronous -> true,
          model -> thisModel(),
          //passing the new registration to the model instance:
          processEntity -> registration,
          properties -> null);
       Forms.submit()
}
Create the process definition file for the approval process:
Right-click the module, go to New > Process Definition.
In the dialog, enter the name of the process approval, select the BPMN-based process.
Leave the Executable selected.
If you unselect the Executable option, the process cannot be executed: this option is useful for processes which are meant for documentation purposes.
Leave the Instantiate Automatically option selected.
You want to instantiate the process automatically when you create the model instance. If you unselect the Instantiate automatically option the process instance will not be created and triggered when the model instance is created; such processes are useful when they act as reusable subprocesses.
Now design the process:
Insert the None Start Event from the palette.
Drag-and-release the quicklinker of the None Start Event and in the context menu, select the Task.
Select the type of the task: our task requires a user action: select the User task.
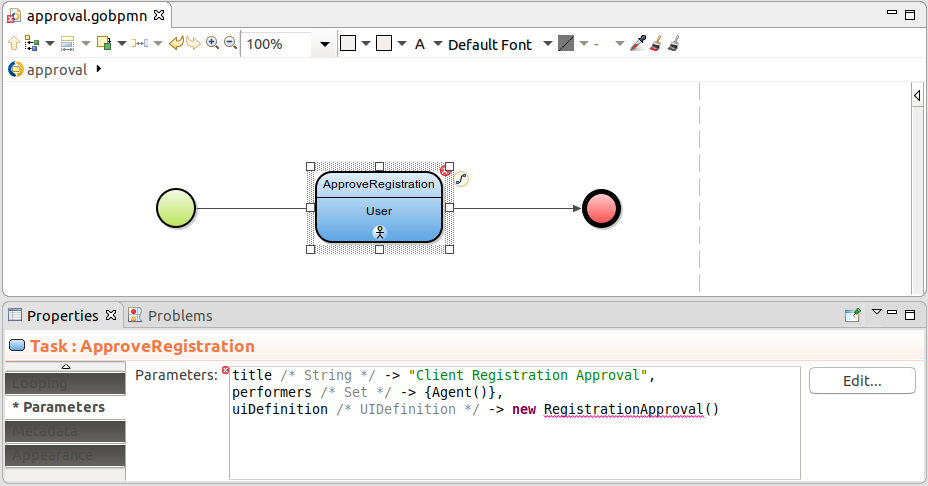
Define the task parameters on the Parameters tab of its Properties view:
title /* String */ -> "Client Registration Approval",
performers /* Set */ -> {Agent()},
uiDefinition /* UIDefinition */ -> new RegistrationApproval()
Attach the Simple End Event to the task so the process finishes when the user submits the approval.
Create the RegistrationApproval form:
Create a form variable approvalRegistrationData of type RegistrationData.
In the methods file of the form, create a form constructor that initializes the variable the value of the model entity (you are passing the entity in the createModelInstance() call of the Register button):
RegistrationApproval {
  public RegistrationApproval() {
        approvalRegistrationData :=
           getProcessEntity(RegistrationData)
    }
}
Design the form content:
Insert a Vertical Layout component.
Insert Labels for firstName and lastName values into the Vertical Layout.
Set their Binding to Reference to the field of the approvalRegistrationRequest variable.
Insert the Accept button and implement the approve logic in its Click Listener expression:
Now upload your model, assign the Roles to users and follow the execution:
Connect Designer to an LSPS Server to which you want to upload your model: Consider using the Designer Embedded Server, which runs locally and is stored in your workspace.
You can check if your Designer is connected to an LSPS Server in the status bar at the very bottom of Designer.
Upload the model to the module repository: In the GO-BPMN Explorer, right-click the clientregistration module and select Upload As > Model.
Assign the Client role to the admin user.
Log in to the Application User Interface as admin and submit the Registration document.
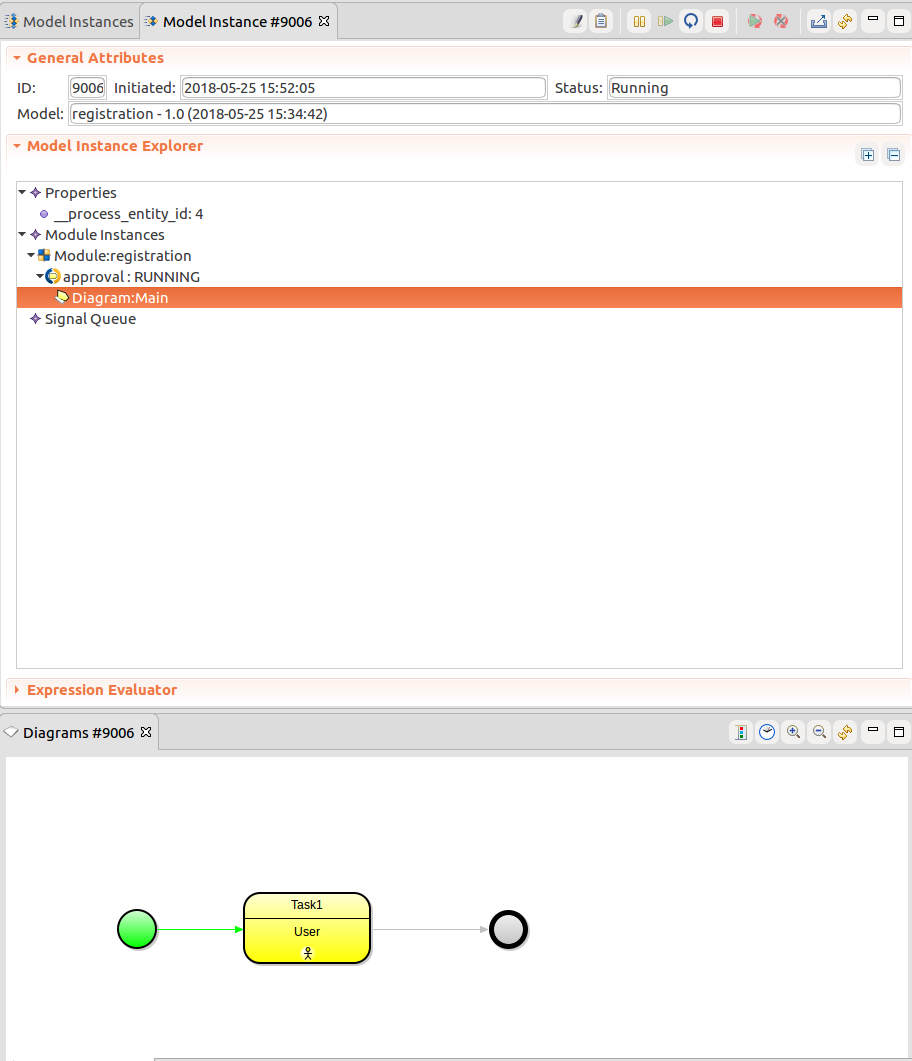
Back in the Management perspective, refresh the Model Instances view: a new model instance of registration appears. This was triggered by the createModelInstance() of the Register button.
Double-click the model instance: in the detail view, expand the model tree and double click the approval process diagram. Note that the id of the process entity is visible under the Properties node.
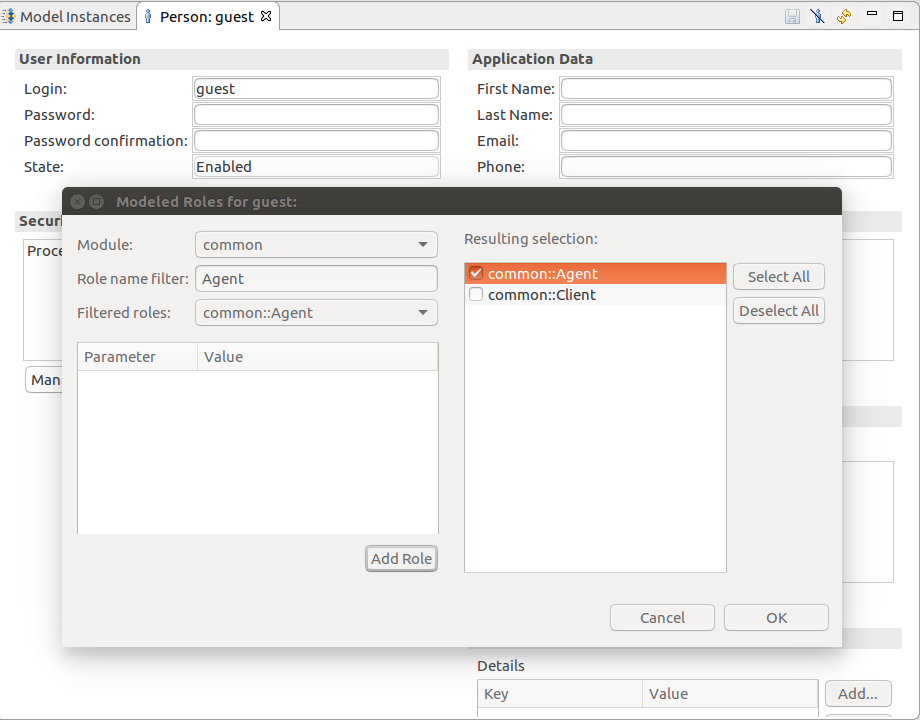
The process instance is stuck on the user task: the task generated a to-do for an end user with the role Agent; however there is no such user. Create a new guest user and assign the Agent role to the guest user.
Log in to the Application User Interface as guest and submit the approval todo under the Todo menu.
Now go to the Management perspective, refresh the diagram of your process instance: the instance finished and, since there is not other process instance running, also the entire model instance finished. Note that the registration data remained persisted in the system database and you could use it in another model instance.

 of the None Start Event and in the context menu, select the Task.