LSPS Documentation
At some point you will want to work with data of model instances from your application. When manipulating a model instance, make sure to take into consideration:
An execution context can exist on different execution levels so one context element can have different values in context versions on different levels.
This mechanism serves to separate possibly transient data from the "real" data: the real data exist in the contexts on the base level or 0 level, the execution level where model instances are created. Consequently, for example, changes on shared records in contexts on this level are reflected instantly in the database.
From a custom object, you can create contexts on sublevels: on the sublevel context you work with copies of the contexts and their data. Once happy with the changes, you can merge your changes into its super contexts. Sublevels are designated with an additional digit added to the original level digit separated by a colon, for example 0:1, 0:1:1, 0:1:2 etc.
Note: The GUI mechanism provided by the ui module makes use of execution-level mechanism:
- Each form is created on the so-called screen level
- Contexts of View Models are created on sublevels referred to as evaluation levels.
Restrictions
createModelInstance() and sendSignal().To create an execution level, call com.whitestein.lsps.engine.state.xml.EvaluationLevelUtils.nextSublevel(String level, ModelInstance modelInstance).
Note that the level does not contain any data when created: the data of non-base levels are loaded when you request an entity that is not present on that level. The system attempts to load it from the immediate parent context and, if not available, it continues to request higher context levels until it reaches the base level. It is when you change the context data that a context on a non-base level stores data.
To merge all changes from a non-base context into the context on the parent level, use the com.whitestein.lsps.engine.lang.EvaluationLevelMerger.mergeLevel(String level).
On merge, the system checks for data conflicts. For example, if a variable is changed in two contexts on the second level (the one above the base level) and both context are merged to the base-level context, a conflict is detected. In the case of records, the conflict check is performed on each property: If the property P1 of a record R is changed in one context and property P2 of the same record R is changed in another context no conflict is detected during merge.
To clean changes in a level, call one of the com.whitestein.lsps.engine.state.xml.EvaluationLevelUtils methods:
cleanDataOfEvaluationLevel(ModelInstance modelInstance, String level)cleanDataOfLevelAndSublevels(ModelInstance, String).Note that the cleanDataOfLevelAndSublevels(ModelInstance, String) method cleans changes in the given level and in all child levels.
removeDataOfEvaluationLevel(ModelInstance, String level)removeDataFromLevelAndSublevels(ModelInstance, String level): removes all entities that belong to the execution level and its sub-levelsTo check if there are changes in the non-base levels, call com.whitestein.lsps.engine.state.xml.ModelInstance.isDirty().
To create a record instance in the execution context of your custom object, use the createRecord() method of the namespace.
//custom task and function:
factory.createRecord(
  "GoogleCalendar::GoogleCalendarEvent",
  new HashMap<String, Object>() {
    { put("title", event.getTitle().getPlainText());
      put("content", event.getTextContent().getContent().getPlainText());
      put("date", new Date(event.getTimes().get(0).getStartTime().getValue()));
    }
  }
);
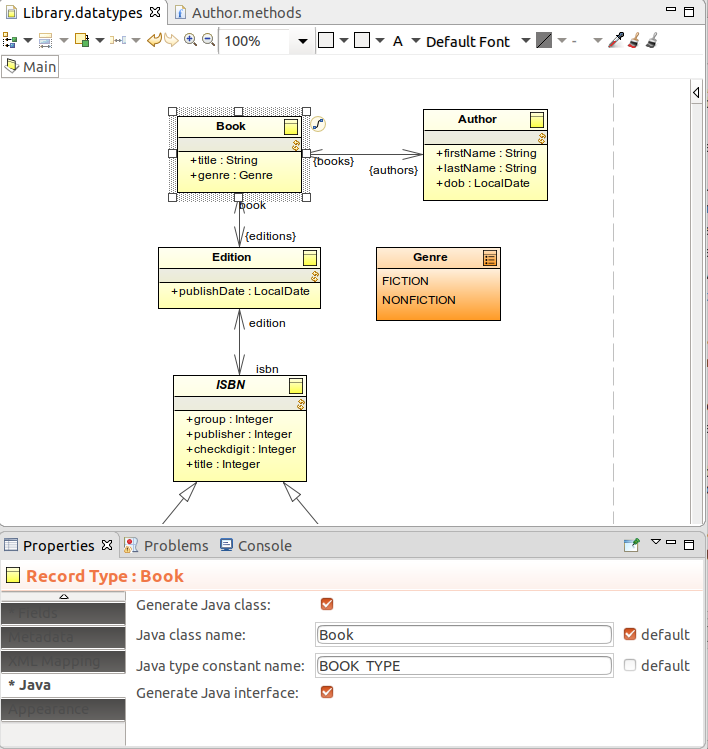
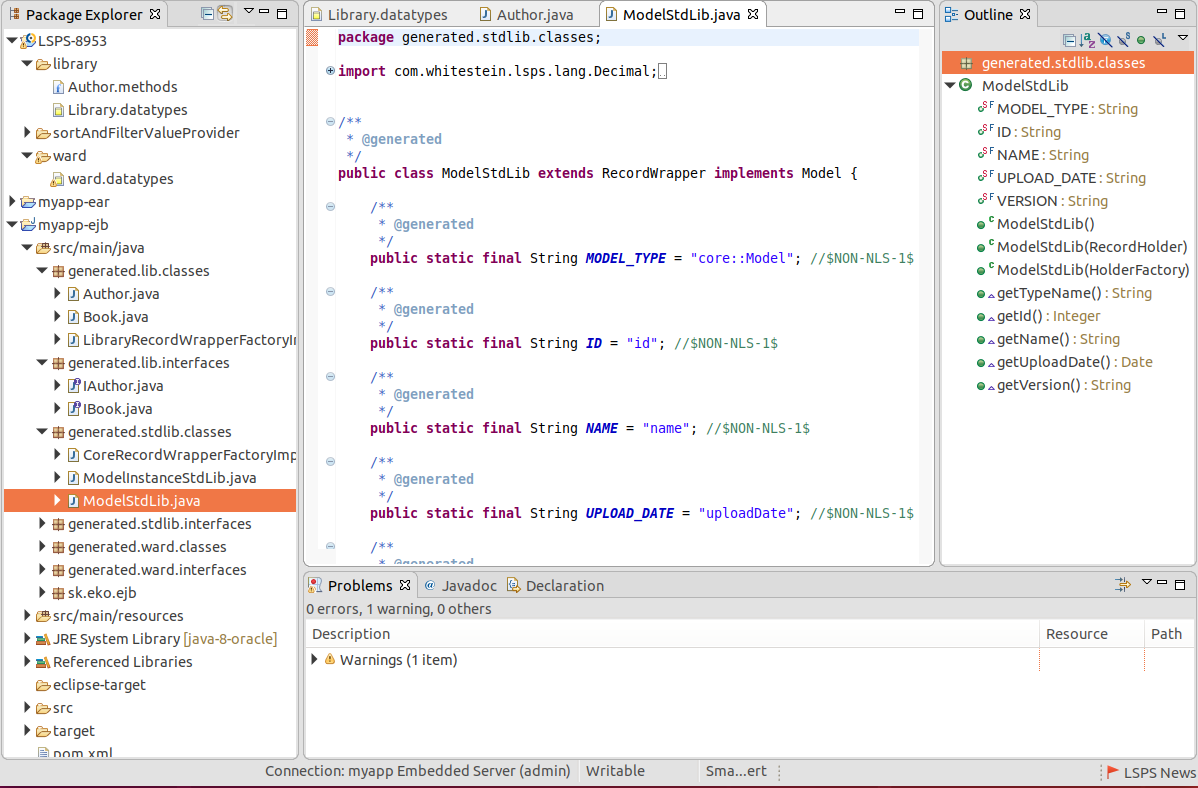
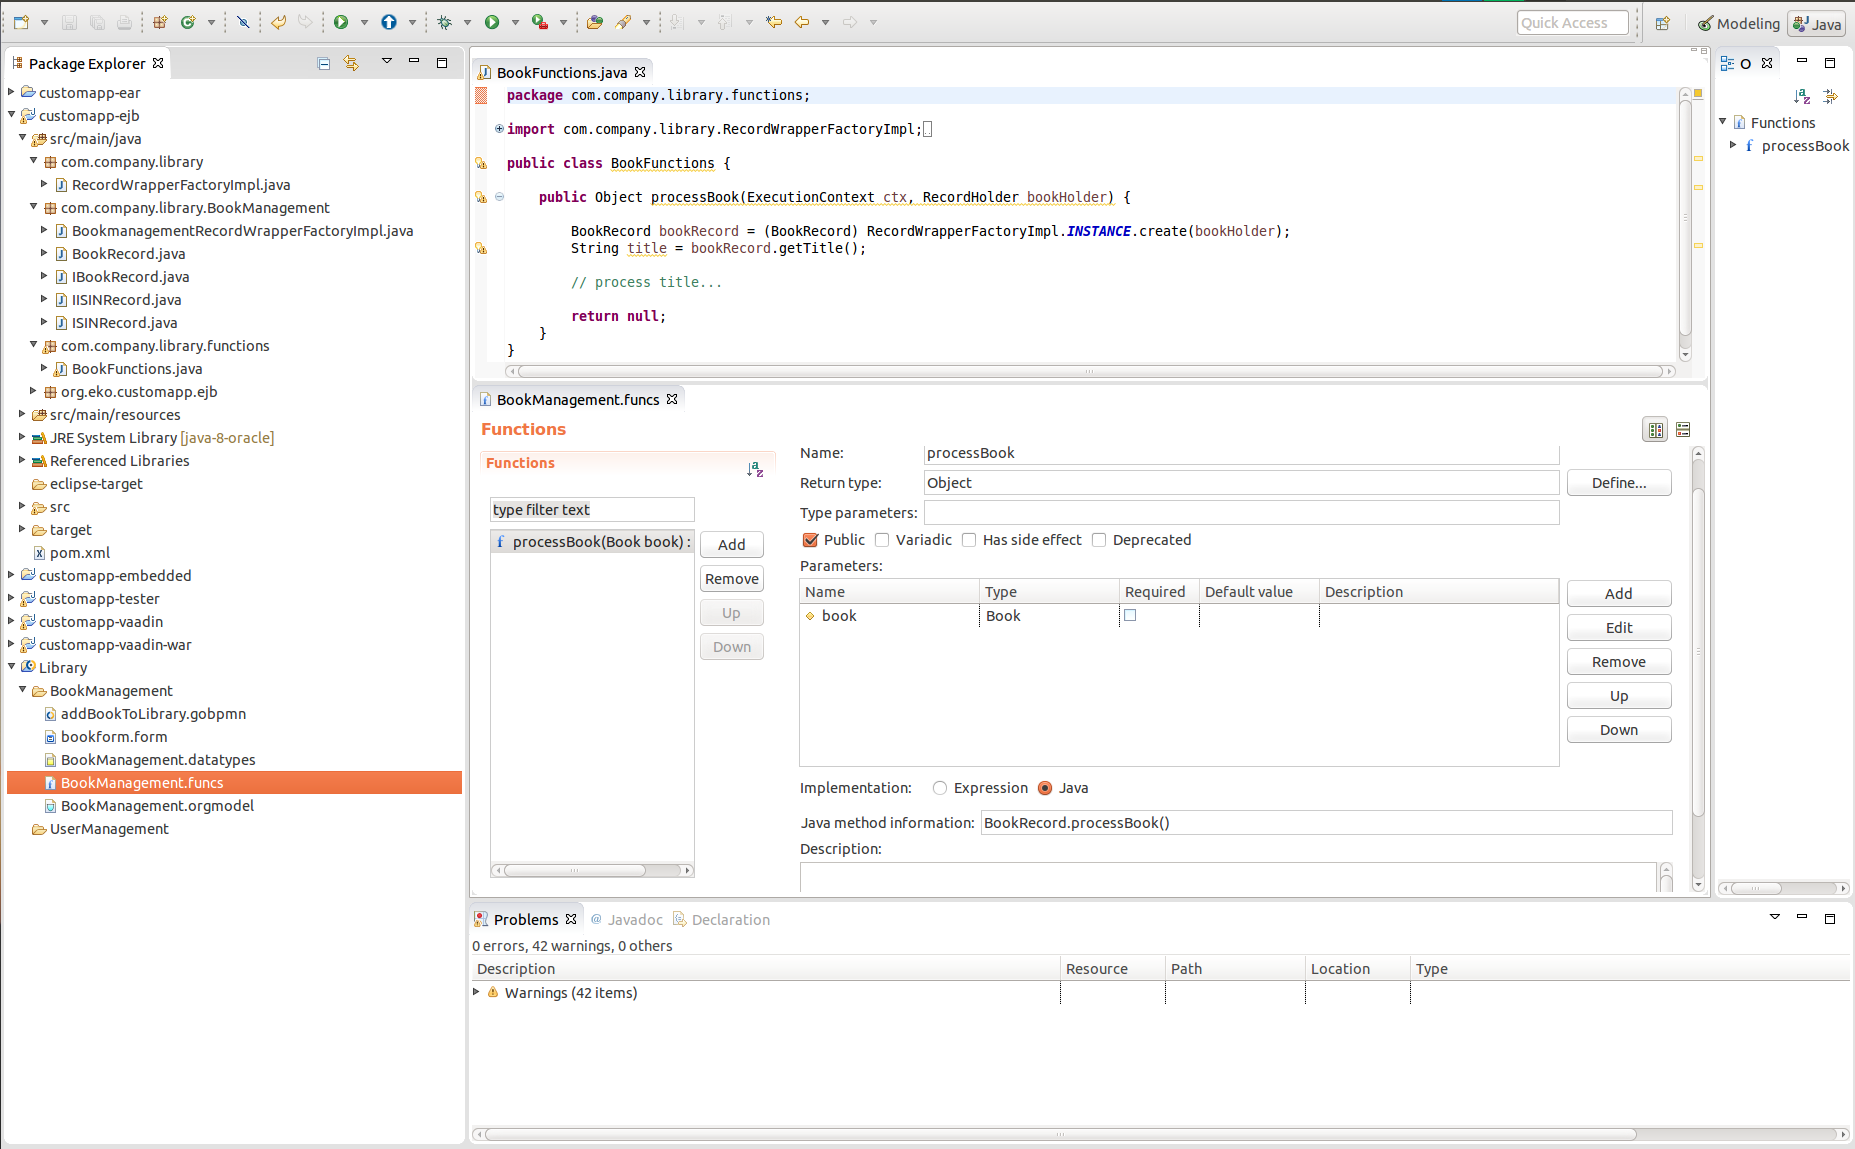
To work more efficiently with elements of your data type model and record instances in the LSPS Application, generate the Java wrapper classes and interfaces for the types and use these classes rather than using the RecordHolder class to work with Records.
Example of difference in coding
// original access via context:
RecordHolder record = ctx.getNamespace().createRecord("core::ConstraintViolation");
record.setProperty("message", msg);

// better with generated Java class for records:
ConstraintViolationRecord better = new ConstraintViolationRecord(record);
better.setMessage(msg);
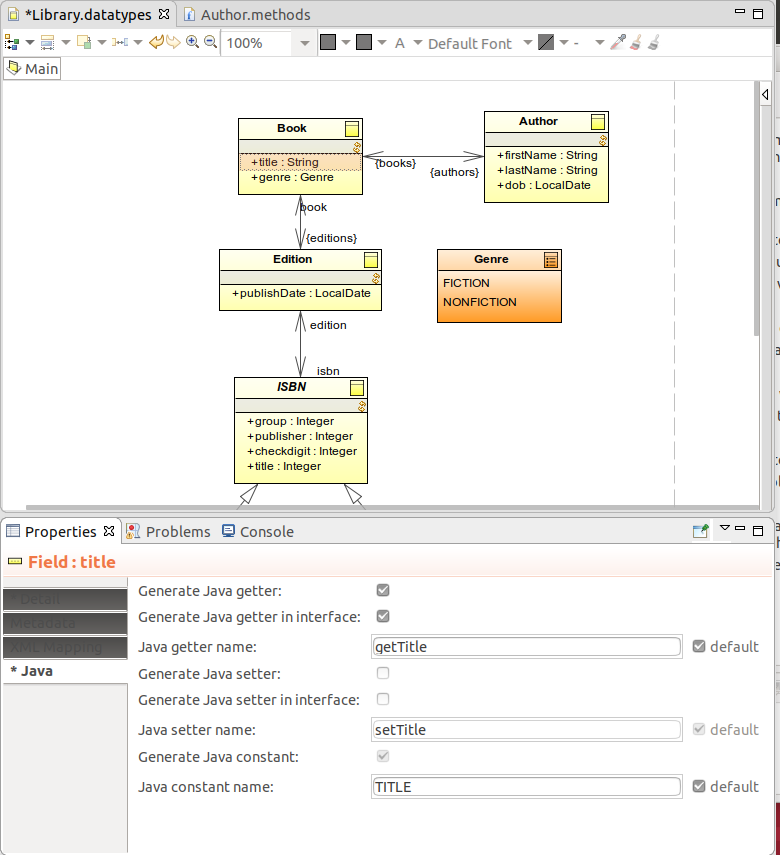
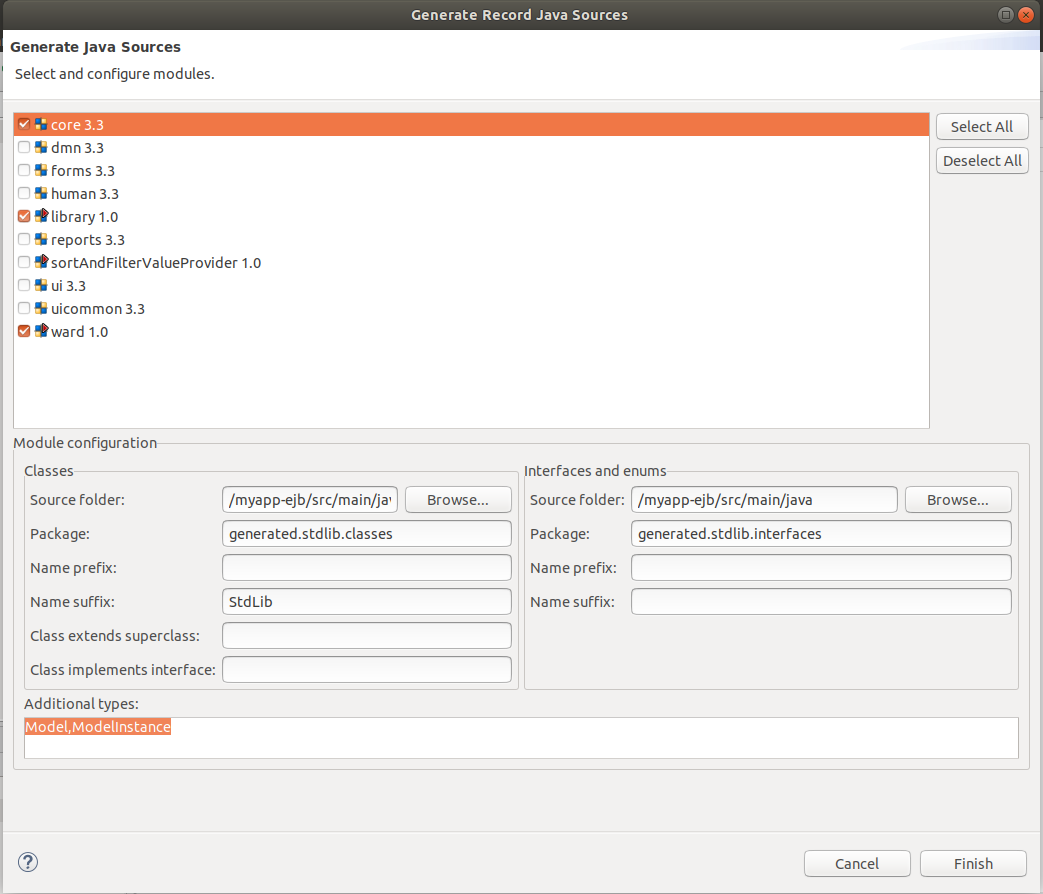
To generate Java classes and interfaces for records, interfaces and enumerations, do the following:
Additional record types: other records that should be included in the operation
The parameter is primarily intended for inclusion of library records.

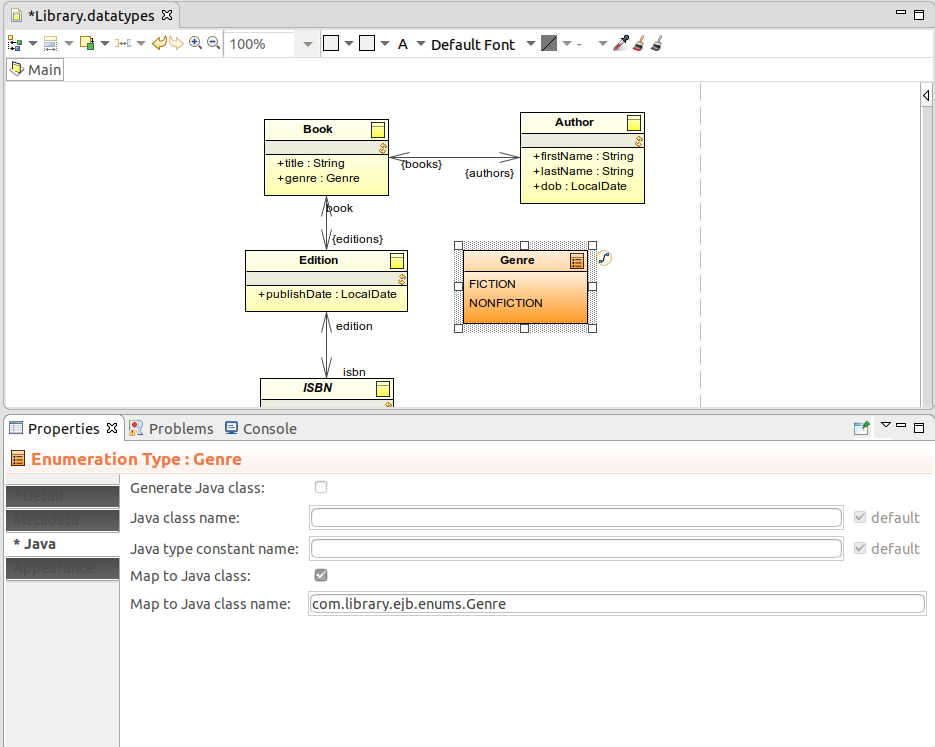
If you have existing Java implementations of your Enumerations, you can map them to the Enumerations in your module to prevent them from being generated when you generate the Java classes of your records:
To work with constraints on a record, use the following methods:
A Signal is a special object used for communication within a model instance or with another model instance.
You can produce signals in your custom object using the server API. To catch signals, use the Signal Start Events or Catch Signal Intermediate Events.
Note: You can also use signal modeling elements to work with signals in your models and signal-related standard-library functions, such as
sendSignal().
You can work with signals as follows:
To send a synchronous signal to the parent model instance of the custom object, use the addSignal() call of the object's context.
Sending a signal to the current model instance from a custom task type
  //start method of a custom task
  @Override
  public Result start(TaskContext context) throws ErrorException {
    Decimal d = (Decimal) context.getParameter("number");
    Integer i = d.intValueExact();
    //adding the signal to the task type context:
    context.addSignal(
       "prime check output:"
       + System.out.println(org.apache.commons.math3.primes.Primes.isPrime(i))
    );
    return Result.FINISHED;
  }
Send a signal with the sendSync() or sendAsynch() method of the CommunicationService bean.
Example sendSync() call from the start method of a custom task type
  @EJB
  private CommunicationService communicationService;
  ...
  @Override
  public Result start(TaskContext context) throws ErrorException {
    long modelInstanceId = 71000;
    String signal = "signal";
    SignalMessage signalMessage = new SignalMessage(
        //sender of the signal:
        Identifier.ofModelInstance(context.getModelInstance().getId()),
        //receiver of the signal:
        Identifier.ofModelInstance(71000), new ObjectValue(signal));
    try {
      //sending the signal:
      communicationService.sendSync(signalMessage);
    } catch (ModelInstanceNotFoundException | InvalidModelInstanceStateException e) {
      e.printStackTrace();
    }
    return Result.FINISHED;
  }
You can throw errors directly from your custom objects.
To catch error, use the Error Start Events or Error Intermediate Events.
To throw an error, do the following:
error(<error_code>) function. 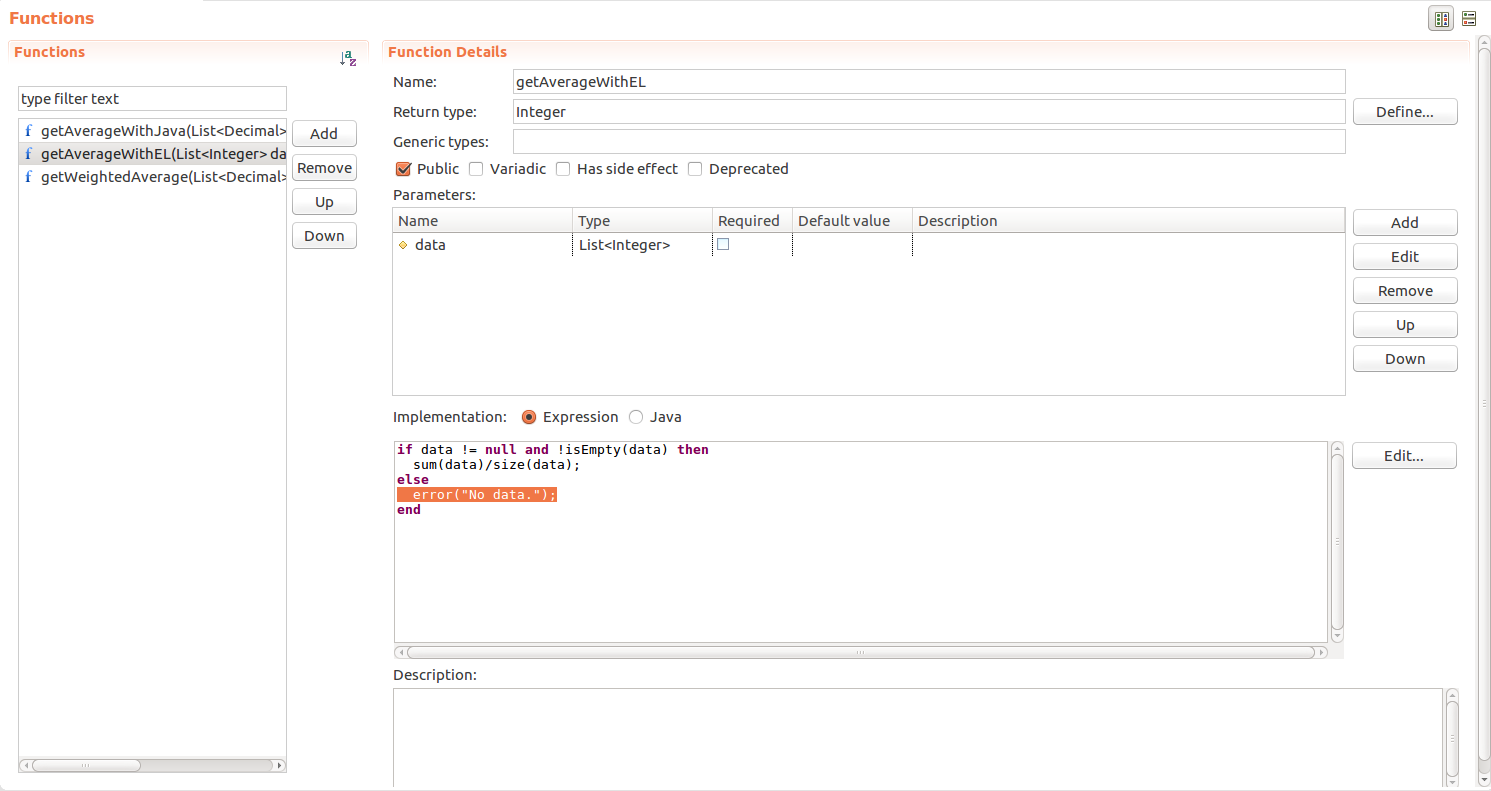
com.whitestein.lsps.common.ErrorException. 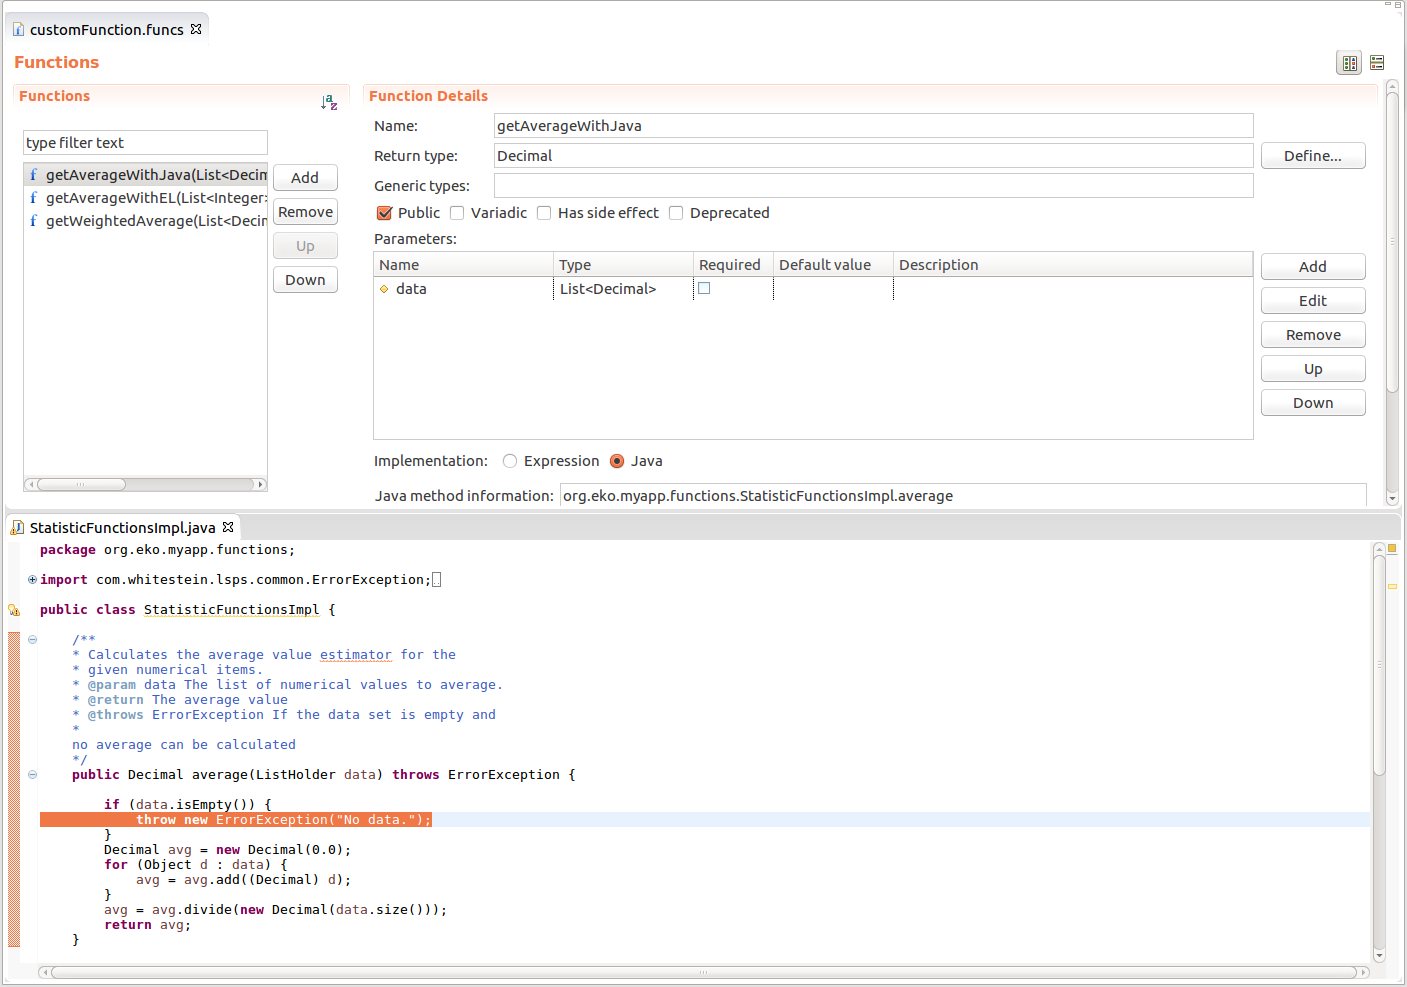
To perform an action always when an instance of a model is created, started, or finished, do the following:
    public class MyModelInstancePlugin implements ModelInstancePlugin {

      @Override
      public void onCreate(CreateCommand cmd, ModelInstanceEntity modelInstance) {
        System.out.println(">>>>>>>>>>>>>>>>>> This is on create hook <<<<<<<<<<<<<<<<");
      }
    ...
      @EJB(beanName = "MyModelInstancePlugin")
      private ModelInstancePlugin myMIPlugin;

      @Override
      protected void registerCustomComponents() {
        register(myMIPlugin, ModelInstancePlugin.class);
      }
To use the command-line tool from a Java program, do the following:
<dependency>
    <groupId>com.whitestein.lsps.mconsolecl</groupId>
    <artifactId>lsps-mconsole-cl</artifactId>
    <version>${project.version}</version>
</dependency>
For details about the console are available in the Management documentation.