LSPS Documentation
When updating a model instance, you proceed usually as follows:
How model update is executed on a running Model instance is defined in a Model update configuration file. This definition file stores mappings between modeling elements of the old and new model as well as all the related update data.
Before creating the definition, make sure your workspace contains both: the source (old) module and the target (new) model.
To create a model update configuration:
Whenever you change the sources (old and new models), refresh the configuration: In the GO-BPMN Explorer, right-click the configuration and select Refresh.
Important: When you generate the model update, the system attempts to map the old elements with changes to the new elements. The proposed configuration might not be accurate and it is strongly recommend to review the file thoroughly.
Once you have defined the update data, that is, transformations and model update processes, you can copy the data and paste it into another model update configuration.
Note that pasting works only if the Module name is the same as the original Module and the type of update data is correct: you cannot paste model update data from variables to data types.
To copy the variables, processes, or data type update data, do the following:
.muc file..muc file and the tab with the model update data.
Model Update Configurations are edited in the model update multi-page editor, which is by default associated with model update configurations (.muc).
The editor opens the configuration with the update rules sorted on the following pages:
Pre-processes and post-processes are displayed in the Outline view.
When the user creates a model update definition (.muc) file, the system automatically maps the elements of the old model with the elements of the new model and compares the models. Based on the comparison, the editor provides options for update rules.
To display the matched data, which is hidden by default, do the following:
 ).
).When the user creates a model update definition (.muc) file, the system maps the elements of the old model with the elements of the new model and performs diff of the models. The automatic mapping might need some manual adjustment.
When changing mapping, you can match only elements with the same parent and of the same type. Recognized element types are start event, intermediate event, task, sub-process, plan, and process.
To change or cancel the mapping of an element, do the following:
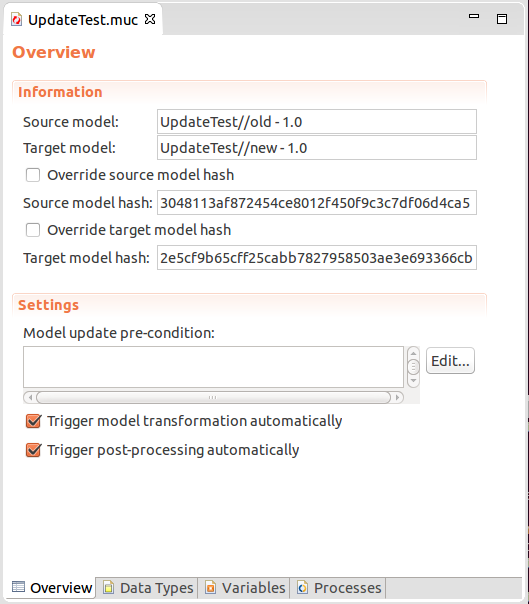
) button, and select Elements without Changes).Model update configuration defines general properties that are used to control the update process, such as, the source and target model, pre-condition, etc.
To change general model update settings of your model update configuration, do the following:
Source (old) and target (new) model
Make sure to refresh the definition whenever the source or target model change.
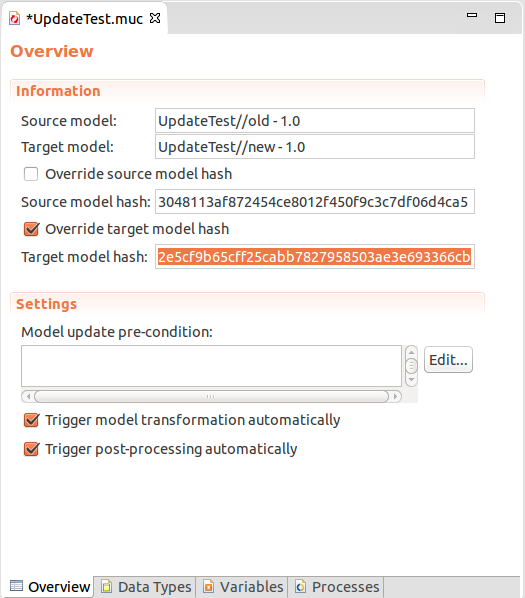
Override source/target model hash
The source and target models are identified by their hash codes, which change whenever a Model is changed. Therefore it is not possible to apply a model update configuration on Model instances of a Model that was changed after the model update configuration was created. If you want to use another hash code, select the option and enter the Model hash code below. You can check the hash code of uploaded modules in the Module Management view.
Model update pre-condition
When a model instance update is triggered, the server evaluates the pre-condition: If false, the model update is rejected and the execution of the model instance continues.
Trigger model transformation automatically enables and disables automatic start of transformation phase of the model update
If false, the transformation phase must be triggered manually by the user.
Trigger post-processing automatically enables and disables automatic triggering of post-processing phase after transformation
If false, the post-processing phase must be triggered manually by the user.
Transformation for added and changed records or fields and changed variables is defined as a transformation expression. When model update configuration is created or refreshed, the system attempts set automatic transformation rules for changed entities. If this is not possible, the entity entry is highlighted.
For details on the concepts behind transformation, refer to Transformation.
To change transformation strategy or expression, go to the entry in you muc file and click the Transformation cell.
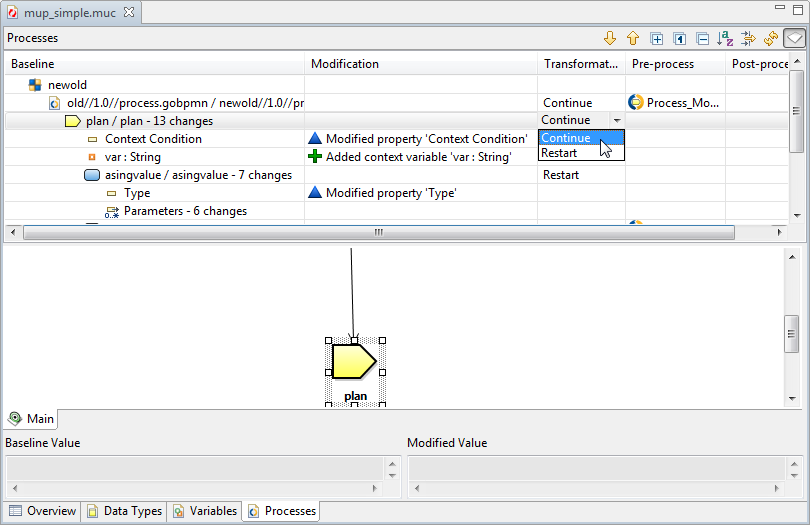
To define transformation strategy for elements, do the following:
Note that if the strategy of a parent element is set to Restart and the child element has the strategy Continue, the Continue strategy will be never applied since the parent element will be always restarted.
The transformation of data types on model update is defined in the model update configuration as an expression that defines how the value of every instance of the old data type is transformed into the new data type value.
Important: It is not possible to define a transformation for the field type of a Shared Record to a field of another type, since such a process requires database migration.
To define transformation expression for data types, do the following:
Example:
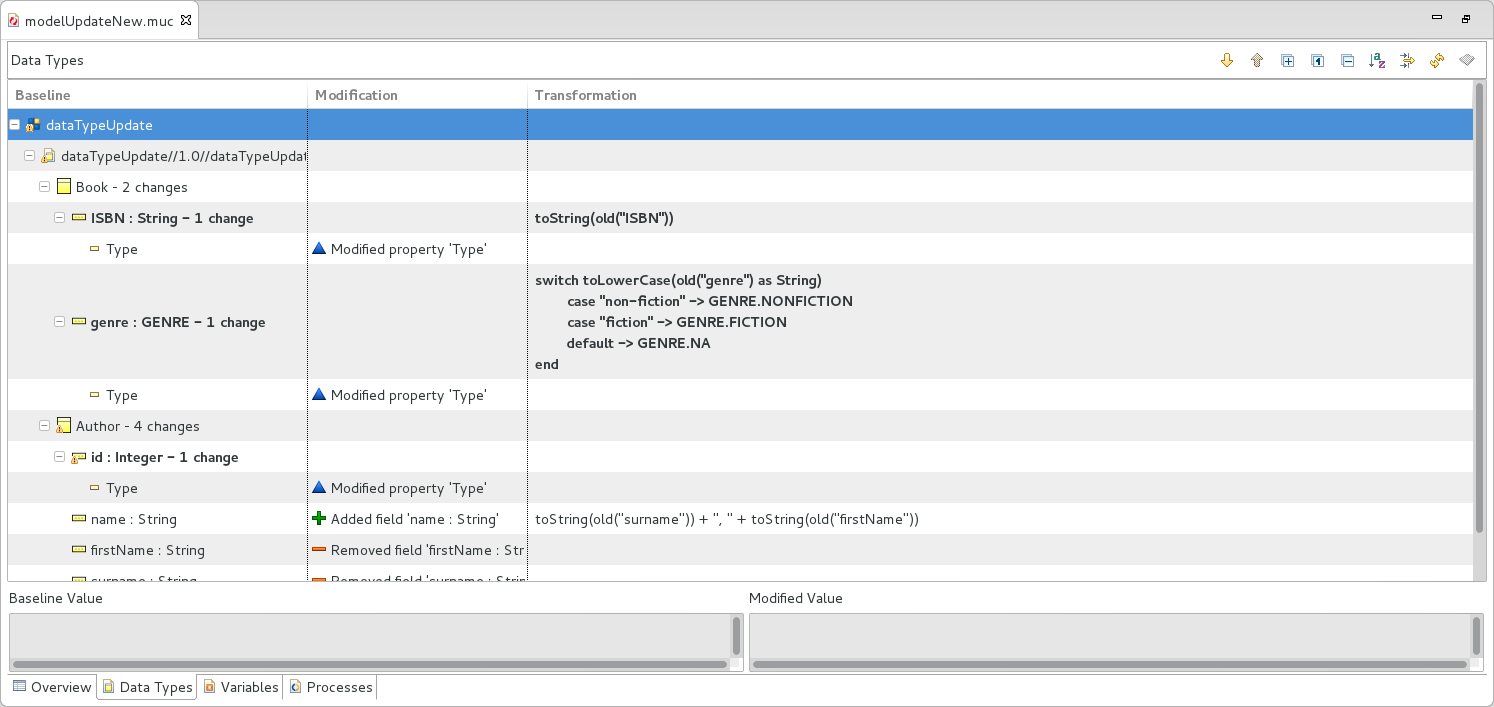 Defining data type transformation
The data type transformation is defined for a Book record:
- The
ISBNrecord field has changed from Integer to String. The old ISBN instances will be transformed with thetoString(old("ISBN"))expression.- The field
genreof the Book record was originally of the String type. In the new model, the field is an Enumeration. Any instances of the field will be transformed to the value with theswitchexpression.- On the related
AuthorRecord, the fieldsfirstNameandsurnamehave been removed and the record field name has been added. The new field will be populated with the concatenated version of the removed fields. Note that the functionold()returns an Object and therefore the call must be wrapped into atoString()function call.
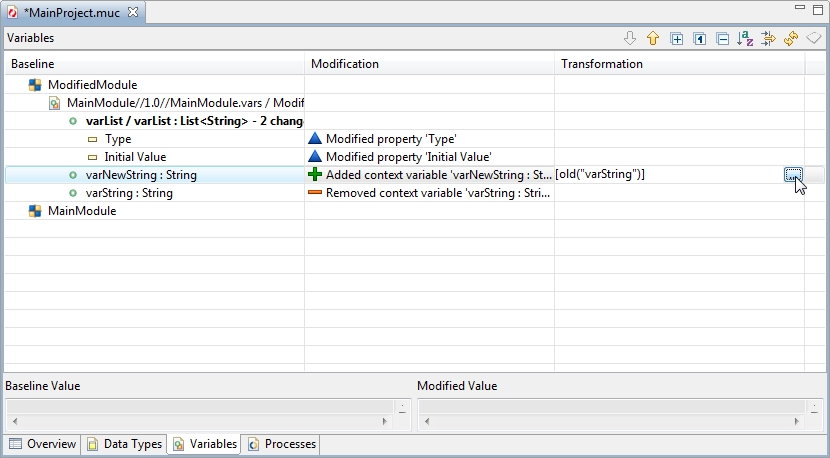
Variable transformation is defined by a transformation expression in the model update configuration as a closure that returns a value of a basic data type evaluated within the context of the old model instance.
To define the transformation strategy for a variable do the following:
In the Transformation Expression Editor dialog box, click Edit and specify the transformation expression in the Expression Editor.
To use a value from the old context use the old() function call.
Model update processes in model update definitions are defined in the model update configuration per relevant process element. They serve to prepare an instantiated element for transformation (pre-processes) and for renewed running of the model Instance after transformation (post-processes).
To create a model update process, do the following:
Model update processes are accessible from the Outline view.
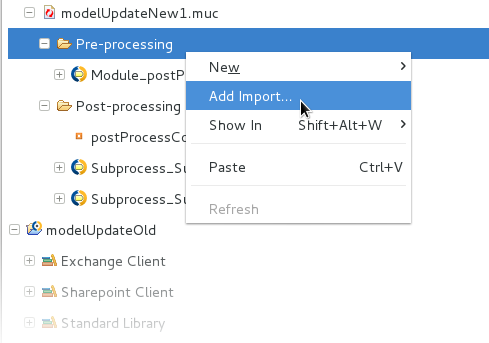
To import a module to all pre- or post-processes of a model update, do the following:
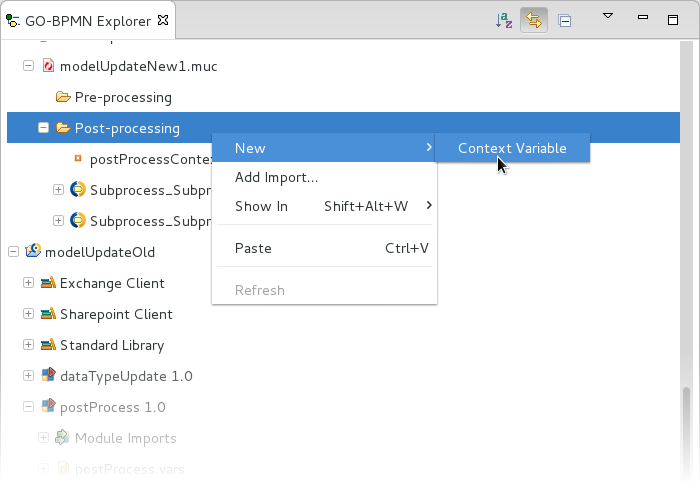
To create a variable in the pre-processes or post-processes of a model update, do the following:
To edit a model update process, do the following:
Alternatively, double-click the model update process in Outline.
To delete a model update process from your muc file resource do the following:
Before updating model instances, make sure the new Model (target) is uploaded. Note that only model instances that are Running, Suspended, Updated, or Update Aborted can be updated. During update, the model instance is suspended and becomes read-only. Such a model instance cannot be resumed manually.
When updating Model instances their IDs are preserved and the rules defined in the Model update configuration are applied.
Note: It is not possible to update a model to a model with a different version of Standard Library.
You can update model instances either from PDS or from the command line with the LSPS cli tool.
To update model instances, do the following:
 ) button in the view toolbar.
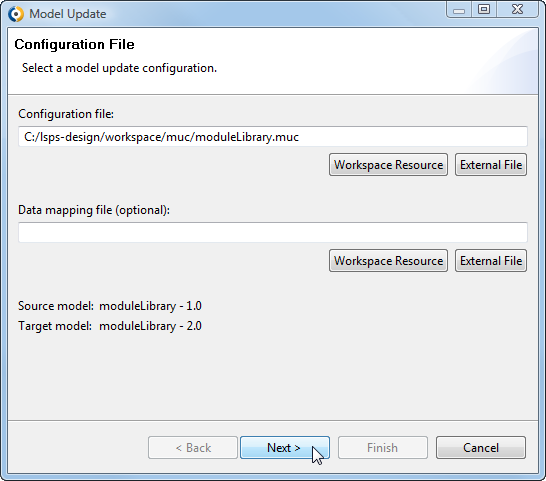
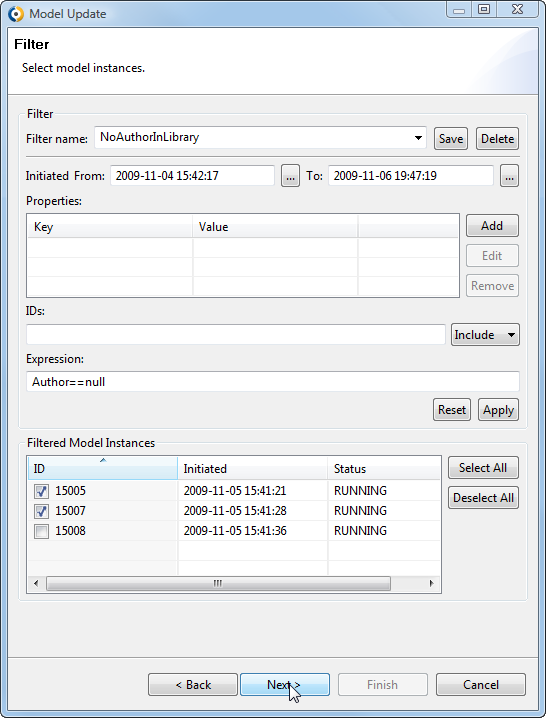
On the Filter page, define the filtering criteria for model instances and click Apply Filter if applicable.
You can apply also a previously defined filter. However, status and model criteria are ignored since the model is defined in the Model Update Configuration.
The selected instances go through the model-update process. Check their detail views and the Model Update Logs view for details. Depending on the model update settings, the update process may be waiting for manual triggering of its transformation or post-processing phase: To resume a model update of a model instance, click the Continue Model Update (  ) button in the Model Instances view in the Management perspective.
After the update has finished, the model instances remain in the status Updated and are still not running. To resume the instances, click Resume in their context menu.
To resume all model instances returned by the Filter of the view, click Resume All Updated in the context menu.
Note: If resuming a large number of instances, make sure the resumed action was applied to all of them. Resume any instances that failed to resume.
You can abort model updates from the Management perspective: Click the Abort Model Update button (  ) in the view toolbar.
The feature is available in the Management Console as well.
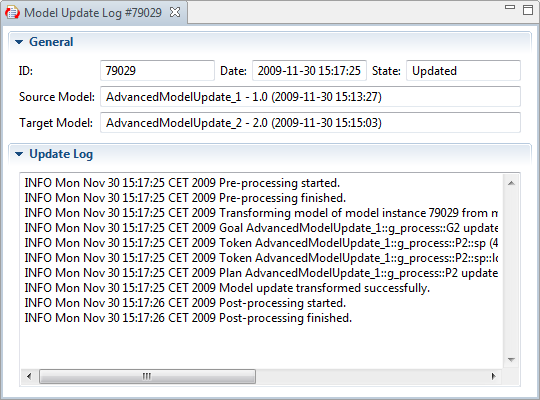
The logs from a model update procedure are available in the Model Update Logs view. The view displays information on source and target models and details on updated model instances (below the list of model updates).
The Model Update Detail view contains details about the update of a model instance.
To display the view, click the model instance ID in the Model Update Logs view.
To download a model update configuration from the LSPS Server, do the following:
 ) button.