LSPS Documentation
Under normal circumstances, record data ceases to exit as soon as the model instance ceases to exist. If you want to persist your data, use shared records.
Shared records and their Relationships are reflected in the database as tables: When you create an instance of a shared record, a database entry is created. Any readings, modifications, and deletions of shared record instances are reflected in their database entry. If it is necessary to postpone persisting of changes on a shared record, you can use a change proxy object.
The data type model is applied on the database when module is uploaded to the server. The way it is applied is defined by the database schema update strategy(Connecting PDS to an LSPS Server) (similar to the hbm2ddl Hibernate configuration):
Mind that if the data type model is already used in production and cannot be dropped and recreated since it contains business data, you will need to migrate the database and potentially update running model instances before using the new data type model.
Important: When you start using shared records, consider using a database-versioning tool, such as, Flyway: This will allow you to track how you change the shared records and their relationship. Failing to use a database-versioning tool, might case a non-trivial effort when updating the data model that is in production later (for details refer to the migration instructions).
The persistence mechanism of shared Records relies on Hibernate: Based on the data models, the system generates the respective tables and a single common Hibernate setting file: as a consequence, if you upload multiple versions of a data type hierarchy in multiple modules, only the last data type model is applied.
Note: Variables of a shared record type must be fetched anew in each new transaction: This might cause performance issues. For further details on model transactions, refer to the Modeling Language Guide.
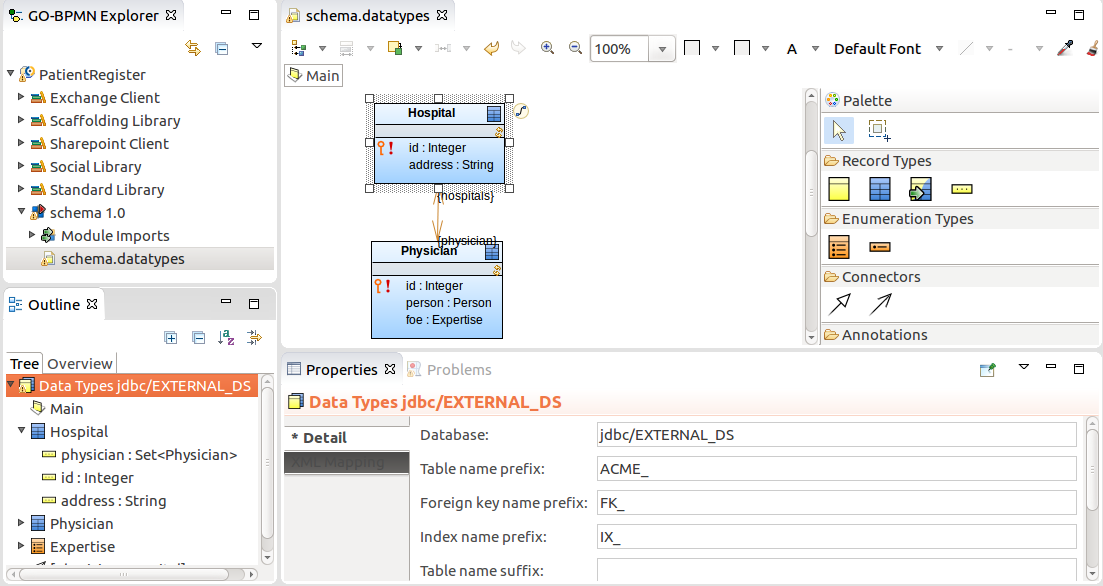
Each data type definition can specify properties that define the database where the tables are persisted. To change the properties of data types in a definition file, such as, target database, table names, foreign key names, and index name prefixes, do the following:
Database: JNDI name of the data source used for the database
This allows you to store the instances of shared Records in another database accessible to your application server.
Table name prefix: prefix used in the names of database tables created based on this data type definition
It is good practise to use a prefix so you can easily find your tables. You can check the prefixed table name for individual records and relationship in their Properties view.
If a data type definition contains shared Records with a common prefix or suffix, foreign key or index names on the DB Mapping tab of the Properties view, you can extract the affixes so that they are set for the entire data type definition.
To extract affixes from a database with shared records, do the following:
To generate a data type model from a database schema, do the following:
In the Generate Types from DB Schema dialog box, select the data source and click Next.
If the data source is not listed, click New and define its properties.
Select the tables and columns to be included in the data type model.
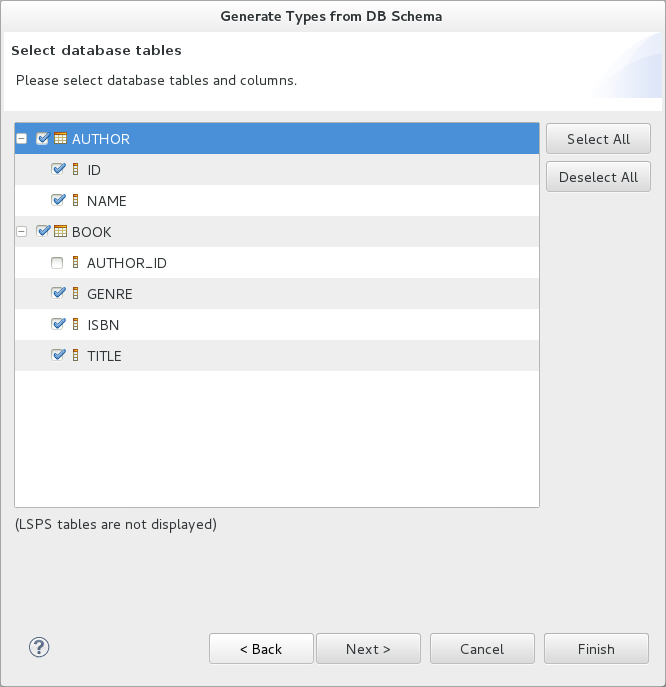
Note the following limitations:
The tool fails to detect that a shared record for a table already exists in the module and generates a new record.
Consequently, if a record that is being generated has a relationship to an already existing record, the relationship is not generated either.
Shared records are defined just like common records with the additional shared flag, which is equivalent to @Entity in Hibernate, and the following properties related to persisting:
Important: If multiple shared records have the same target table and schema, the shared records will be mapped to the same table. This might results in issue due to incompatible Schema incompatibilities. To prevent such issues, consider setting Table name prefix for your data type definition.
Each record to own table: maps each shared record in the hierarchy as its own table
If the record is a child of another record, the inherited fields are stored in the table of the parent.
Important: When working with shared Records that are a target or source ends of a relationship, make sure to define indexes for the foreign keys on the records and their relationship to prevent potential performance issues. Note that you can generate the indexes in the data types file automatically: right-click the canvas of your Record diagram and select Generate Indexes.
To create a Record field in a shared Record, do the following:
Select the field and define its generic properties on the Detail tab of its Properties view.
The type of a shared field should be set to a simple data type. If such a field is of another data type, consider creating a related shared Record to prevent performance issues due to frequent serialization and deserialization.
Note: When writing values into the fields, Decimal fields behave like Java's BigDecimal.
BLOB length: space reserved for the field value in bytes
The property applies to fields of other than simple types that need to be serialized when stored in the database, such as, Record, Collections, etc.
null. If you try to create a recordAuto generated: if true, the field value is generated automatically when the instance of the shared record is created.
The attribute is available only for fields that are simple primary keys with integer values. Depending on the target database, either a sequence is generated, or auto-incrementation is used.
Important: When creating a new record with a specified property that is set as auto-generated over an H2 database, the system will silently ignore the specified value and use the auto-generated value. For example, if a shared Record Book defines the field ID that is auto-generated and you instantiate a new Book as
new Book (id->1), the ID value 1 will be ignored and the auto-generated ID will be used instead. On other databases, such code causes an exception.
The optimistic locking mechanism prevents changes to shared record instances if the record changed since it was loaded.
For example, if you save a to-do that works with a shared record and another user changes the record from another to-do and you attempt to submit the to-do with your changes, the action fails with an Conflict on entity exception and your transaction is rolled back unless the exception is handled.
With optimistic locking, the record instances store their version in a dedicated field: the version field is updated always when the given record instance changes. If you are changing a record instance and the stored version changed in the meantime, the server returns an exception when you try to apply your changes.
To allow some of the record fields to be changed freely without ever causing a conflict, exclude them explicitly from optimistic locking: a change on such fields does not cause an update of the record version nor does it trigger the version check.
To set up locking on a shared Record, create the version field on the record:
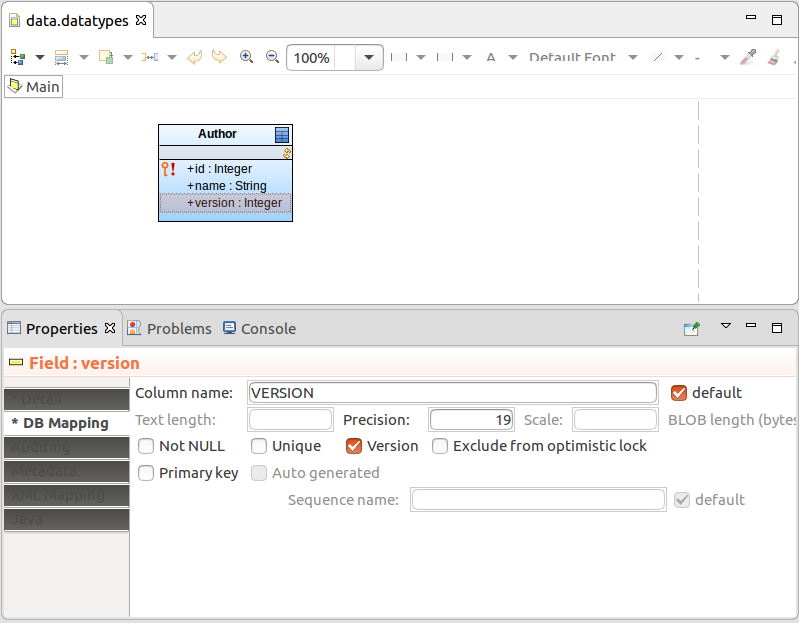
Optionally, exclude record fields which can be changed between their load and save:
On the DB Mapping tab of the fields' Properties view, select Exclude from optimistic lock.
Important: For record relationships with optimistic locking, make sure to name both ends of the relationship so that any of the ends can be used by Hibernate as the owner of the relationships.
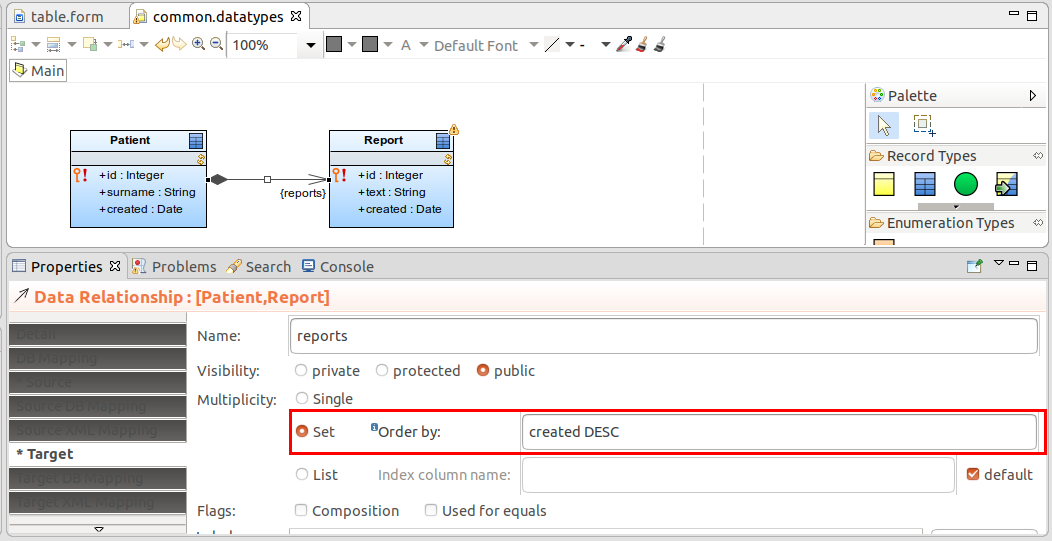
Relationships between shared records establish a relationship between the record tables. Unlike in JPA, the relationship is symmetrical (set on both ends of the relationship) and it is not necessary to make one of the tables the Owner.
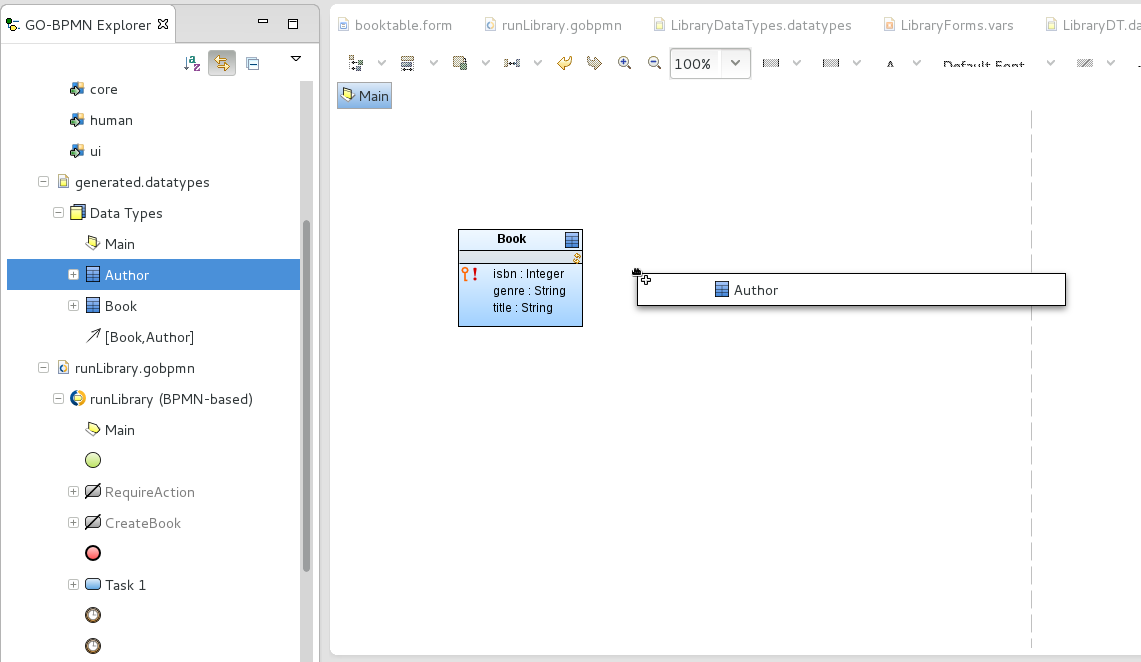
To define a relationship between one or two shared records, do the following:
To allow quick look-up of shared records in relationships, create indexes of foreign keys for the underlying database tables: you can do so directly in the database or you can define the indexes.
Important: The absence of indexes on your shared records can cause performance issues. It is recommended to define indexes to prevent slow search on your database data.
To define indexes for a table of a shared record, do the following:
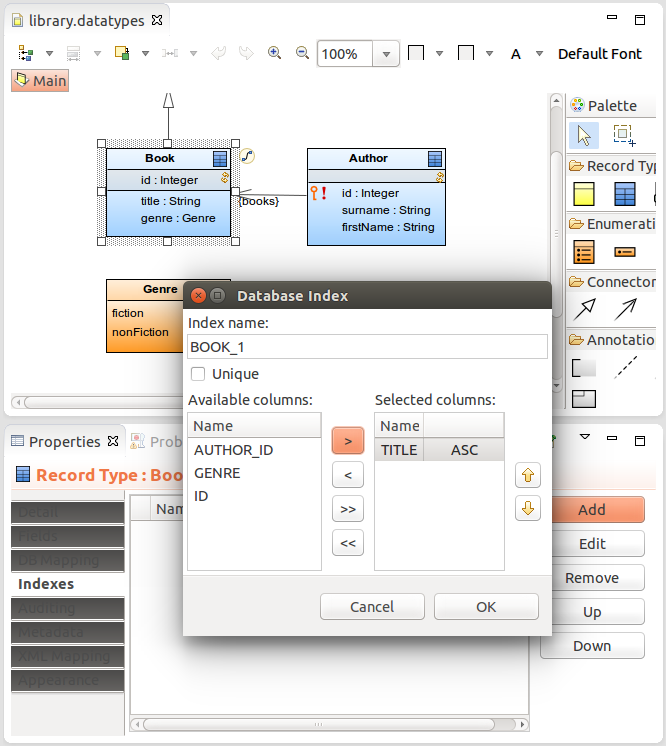
To generate indexes on foreign keys for all shared records that are related to another record in the data types file, right-click the file in GO-BPMN Explorer and click the Generate Indexes button in the Properties view; alternatively you can right-click into the canvas in a Record diagram and select Generate Indexes.
To allow for a more efficient recovery of IDs of related shared records, you can define the foreign key of the relationship end as the column name of the record:
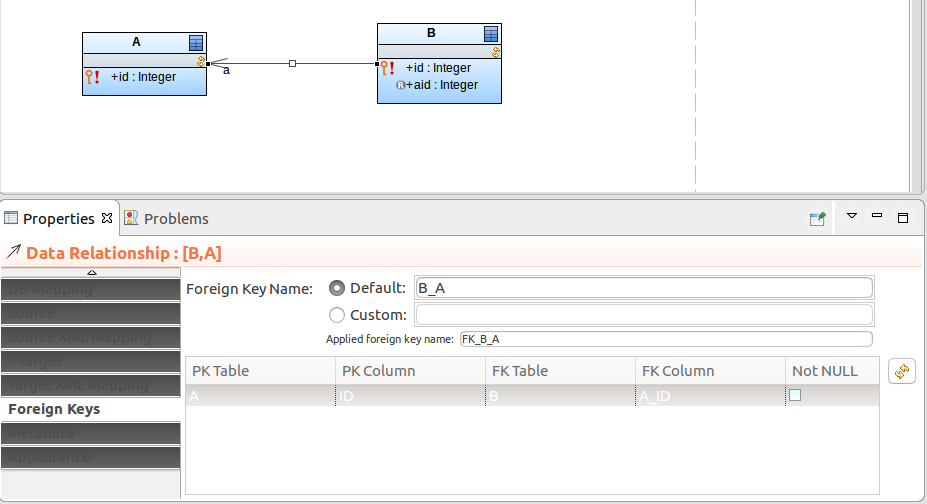
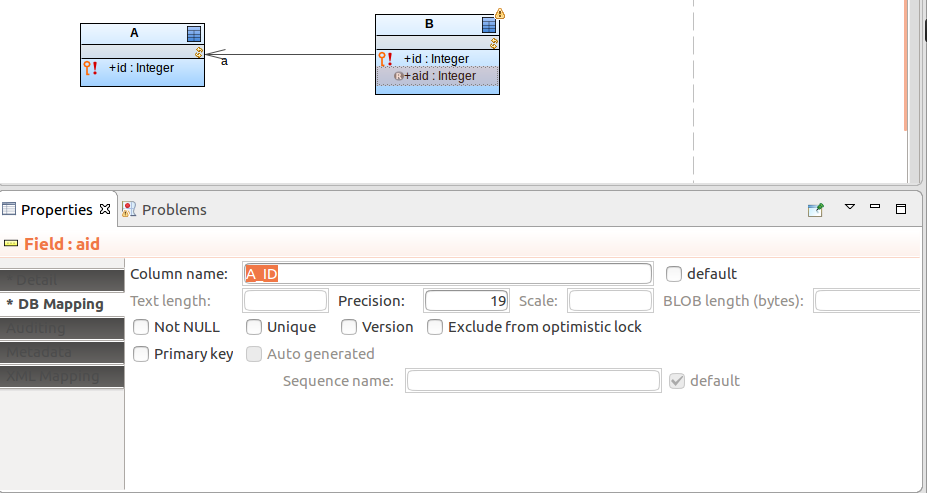
Now you can access the primary key of the related shared record using the read-only field.
Such foreign key fields, if set as primary keys, are set automatically when the related record is assigned. For example, if Parent has a relationship to Child and one of the Child's primary-key fields is mapped to the primary key of Parent, the field is automatically filled with the Parent id:
def MyParent p1 := new MyParent();
def MyChild c1 := new MyChild(id -> 1, parent -> p1);
Note that you need to make the relationship with the parent object: do not assign the foreign key directly as, for example, new MyChild(id -> 1, parentId -> p1.id);
The auditing of shared records refers to storing of all versions as the record instances as they change, thus providing a version-control mechanism.
When you change instances of an audited Record in a transaction, the auditing mechanism creates a revision entity with a "snapshots" of the changed records in the auditing table of the record. Optionally, it enters the Record name and revision ID for each changed record into the entity name table so you can look up any other audited records that were changed in that transactions as well.
Example: Book is an audited record with the field title and you create a new book and edit an existing one:
> new Book(title -> "Something Happened"); // record id is 2
> getBookByTitle("Catch 22").title := "Catch-22"; //record id is 1
Auditing will perform the following:
- Create a revision entity of the Revision Entity type, for example, with the ID
1.- Record the changes on the Book instances: auditing adds two entries, one for the new book and another one for the changed book with the following details:
- record ID
- revision ID set for both to
1- type of change
- title of the book as after change
- Optionally, the entity name table records for each change a new entry with the record type: Hence two entries with record BOOK and the revision ID
1are created.
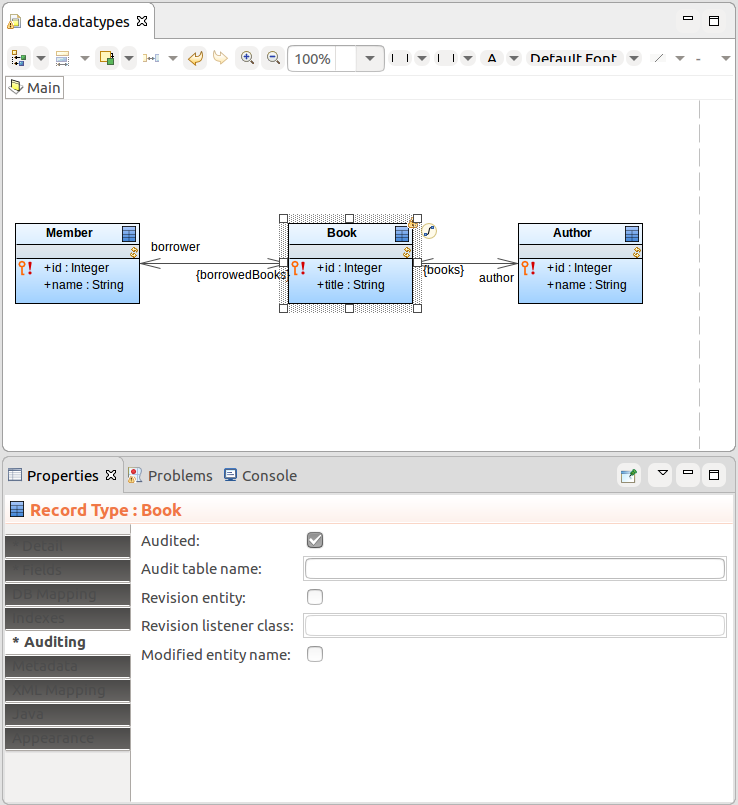
To set up auditing, do the following:

Note: By default the Revision Entity uses the LSPS implementation of the Revision Listener to enter revision data into the database table. The listener enters the id of the revision and optionally the timestamp into the database table. If you want the system to enter further data about the revision, you need to implement your own Revision Listener that will extend the LSPSRevisionListener class (refer to Customizing Entity Auditing).

Important: Only one revision entity record and modified entity name record can exist on an LSPS Server.
To enable auditing of a shared record, do the following:
Note: Make sure that you have uploaded the Revision Entity shared Record to your server: the LSPS database will contain the ENTITY_REVISION table.
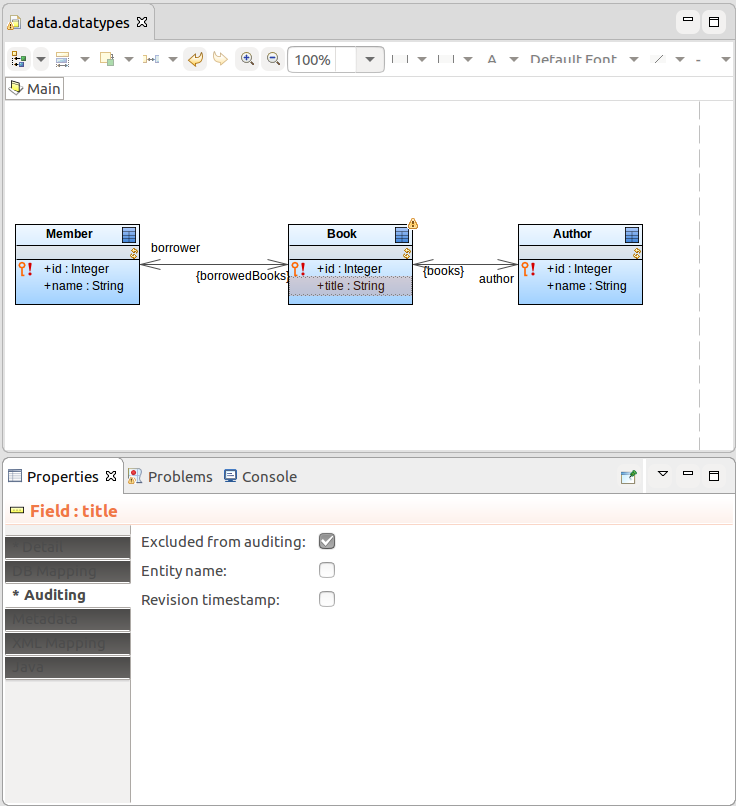
If you want to exclude a Record Field from auditing, open its Properties and on the Auditing tab, select the Excluded from auditing option.
By default relationships between audited records are audited as well.
To exclude a relationship end from auditing, open the relationship Properties and on the tab for the relationship end, either the Source tab or the Target tab, select the Excluded from auditing option.
Important: When auditing a record relationship with one-to-many multiplicity, both ends of the relationship must be named.
The caching mechanisms for shared records reduces the load on the underlying databases. It ensures that shared records that might be required by the same model instance, user, as well as other users and transactions are kept in memory.
LSPS applies first-level caching within individual transactions, that is, any data is cached within a transactions. The cache regions implement second-level caching that is applied on shared records. The cache exists regardless of the transaction or model instance life.
Note: LSPS applies first-level caching within individual transactions, that is, any data is cached within a transactions. The cache regions implement second-level caching that is applied on shared Records. The cache exists regardless of the instance transaction or model instance life.
The caching is defined by cache regions, which are added to the LSPS Server cache on module upload.
To define a cache region, do the following:
Database: JNDI database name on which the cache region is applied (for example, jdbc/my_database)
If undefined, the LSPS system database is used.
To disable the LSPS system cache regions, define the disabled cache regions in the <YOUR_CUSTOM_APP>-ejb/src/main/resources/cache-regions.properties file of your custom LSPS application.