LSPS Documentation
A to-do represents a piece of work that an end user needs to accomplish before the execution can continue: it is generated by the User tasks, a type of task provided in the Standard Library.
When the execution flow of a process instance enters the User task, the task generates a to-do (To make a User task generate multiple to-dos, use the looping of the task). The to-do has the status Alive and can be seen by a set of users, called assignees. At this point, the to-do assignees are a set of persons based on the Performers property of the User task referred to as initial performers.
If the Performers property returns a set of Roles or Organization Units and the administrator or the system re-assigns the Roles or Organization Units, the performers of the to-do changes accordingly.
The set of performers can change throughout the life of the todo by other mechanisms, such as escalation, rejection, etc.
The to-do is displayed in the To-Do lists of the Application User Interface of the performers. The moment one of the performers opens the to-do, it becomes locked: the to-do is no longer available to other assignees. The performer accomplishes the to-do, which becomes accomplished and the execution of the underlying task continues. The to-do becomes accomplished when the performer submits the to-do.
However, the performer might release the to-do by delegating, reset, rejecting, cancel rejection, or activate substitution: as a result of these actions, the assignees of the to-do change.
Important: The to-do management mechanisms are provided as a showcase for custom to-do management features and under no circumstances to be considered production-ready.
Under some circumstances, such actions can leave a to-do to with no assignees. Such orphaned to-dos require the attention of an administrator: in Management Console, the administrator can search specifically for such to-dos.
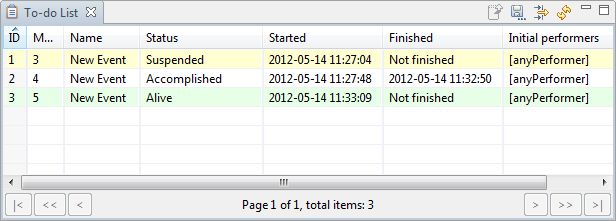
To manage to-dos in the Management Perspective, use the To-Do List view.
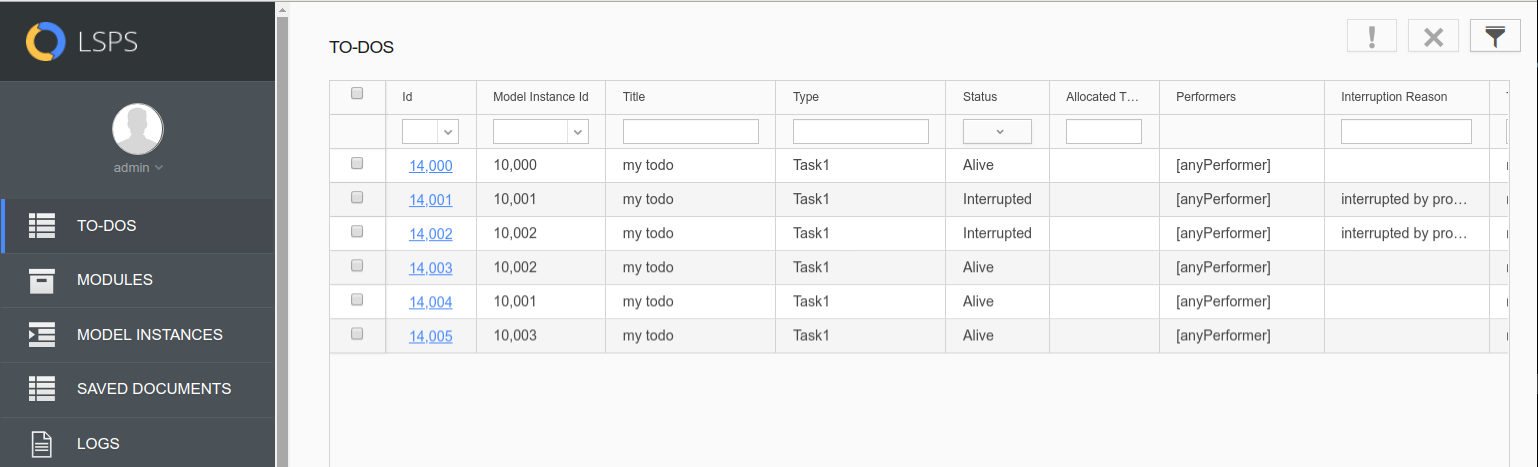
To manage to-dos in Management Console, go to the To-Dos page.
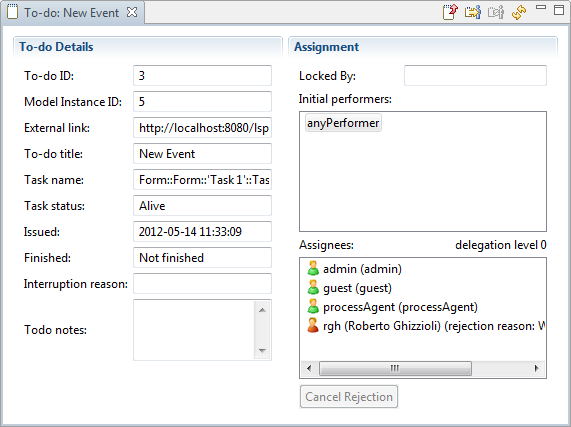
A To-Do Detail view contains detailed information about a particular to-do and allows you to perform further actions available for the to-do, such as delegation, undo delegation, and cancel rejection.
To open a to-do detail view in the Management perspective, double-click a to-do entry in the To-do List view.
To open a to-do detail view, double-click the to-do id on the To-do List page.
Important: The built-in delegation mechanism is provided as a base for custom mechanism.
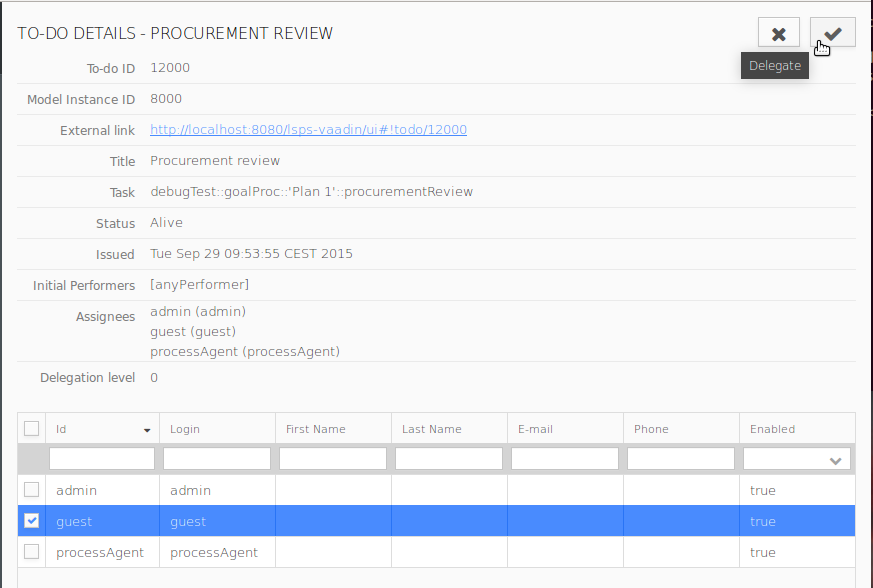
Delegation enables users to assign an alive to-do to other users, for example, to ask for assistance or simply because they know better. When a user delegates a to-do, locked or unlocked, the to-do disappears from the to-do lists of all current assignees and appears in the to-do list of the selected users–delegates.
A delegate can delegate the to-do further–delegation can take place on several levels.
To delegate a to-do from the Management perspective, In the toolbar of the To-Do Detail view, click the Delegate (  ) button and define the delegates.
To undo delegation, click the Undo Delegate  button in the toolbar of the respective To-Do Detail view.
To delegate a live to-do to another user, do the following:
Activate the respective to-do detail (To-dos To-do ID).
Only live to-dos can be delegated.
 button.
Filter out the relevant users using the filter in the column of the table header.
Wildcard usage is supported; to display all possible substitutes, type *.
Select delegates from the table and click the Delegate button.
Delegation can be undone so the to-do is assigned to the previous users.
Delegation can be undone only for live to-dos.
To undo delegation of a to-do, do the following:
 button.
Delegation is undone and the delegation level decreases. Repeat the process to undo delegation on several levels.
To-do escalation provides a mechanism that sends a special type of Signal, to the server. The underlying Model is expected to catch the signal and process it as appropriate. The signal can be caught and processed by a catch event. If escalation handling and catching of a particular signal is not handled within the model instance, escalation takes no effect. The unconsumed Signals remain in the signal queue of the model instance.
Important: The escalation mechanism described below is deprecated. Use the escalation mechanism instead; for example, call the
throwEscalation()function on a button component and process the escalation with Catch Escalation elements.
Escalation sends an escalation Signal. The underlying Model is expected to catch and process it as appropriate with a Signal Catch Intermediate Event or Signal Start Event.
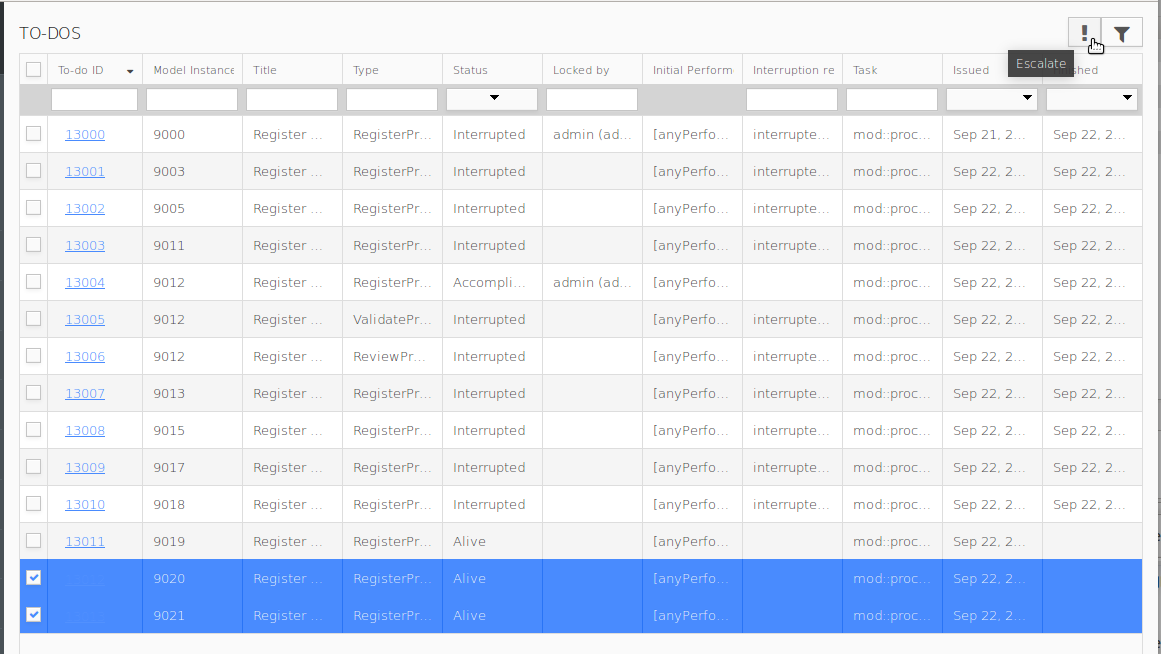
To send such an escalation signal from a to-do from the Management perspective, click the Escalate (  ) button in the toolbar of the To-Do Detail view or select the to-dos in the To-Do List and click Escalate.
Note that this escalation mechanism is not related to the Escalation of the GO-BPMN Modeling Language.
To escalate one or several to-dos, do the following:
Select the to-dos you want to escalate.
Only live to-dos can be escalated.
 .
.
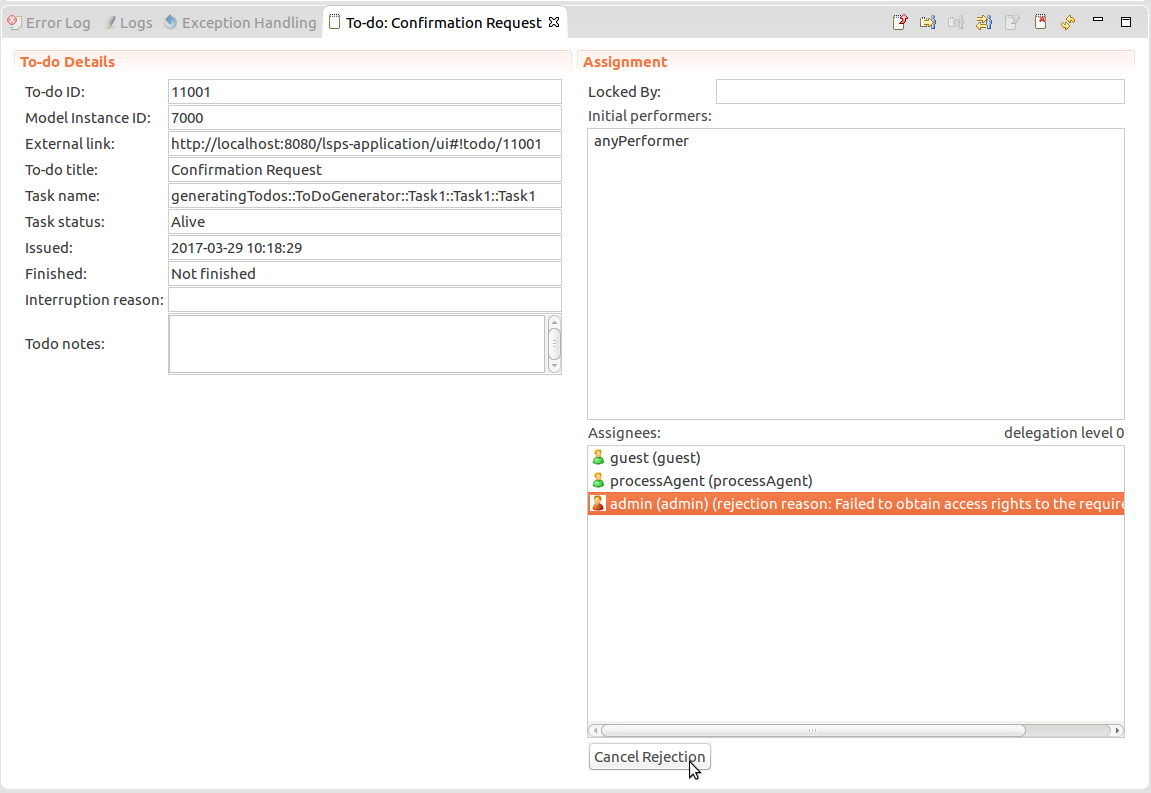
Rejection allows a front-end user who is an assignee of a to-do to exclude herself from the assignees list and have the to-do removed from their to-do list. You can cancel the rejection, so if the to-do is not locked by other users, it will reappear in their to-do list.
To cancel rejection, open the to-do detail view and, in the Assignees box, located the assignee, who has rejected the to-do. The rejection reason provided by the assignee is shown next to their icon and name. Select the assignee and click the **Cancel Rejection* button below. it will reappear in their to-do list.
To-do reset (  ) erases the data in a saved to-do while the to-do remains locked by the given user. This feature is useful if the data used by the saved to-do have changed; typically on model update. Note that the reset to-do remains locked by the user.
To reset a to-do and lose any save to-do data, click the to-do reset button at the top of the to-do detail view.
To reset a live to-do and lose any saved to-do data, do the following:
 button.
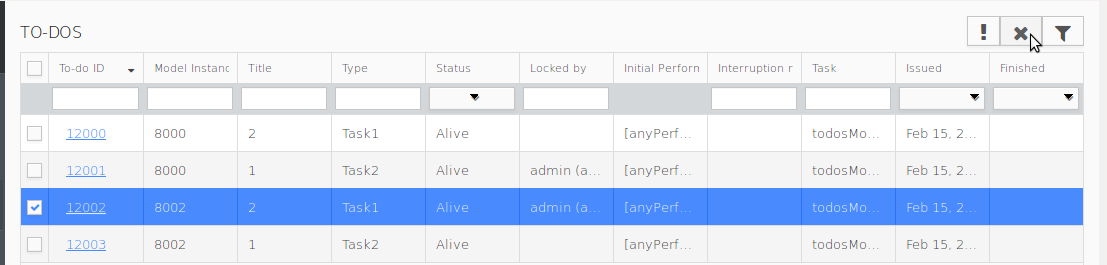
Important: The built-in reassignment mechanism is provided as a base for a custom mechanism and is by no means production-ready.
Reassignment enables an administrator to change the set of initial performers of a to-do. It changes the current set of performers of an Alive to-do to the new set of initial performers. The to-do disappears from the to-do lists of the current assignees and appears in the to-do lists of the new assignees. The information on original assignees are lost.
Important: Reassignment cannot be undone.
Click the to-do reassign  button at the top of the to-do detail and define the roles and persons who should become the new initial performers.
Reassignment enables an administrator to assign an Alive to-do to other users, who become the initial performers.
Note: Reassignment cannot be undone.
To reassign a to-do, do the following:
 button in the view toolbar.
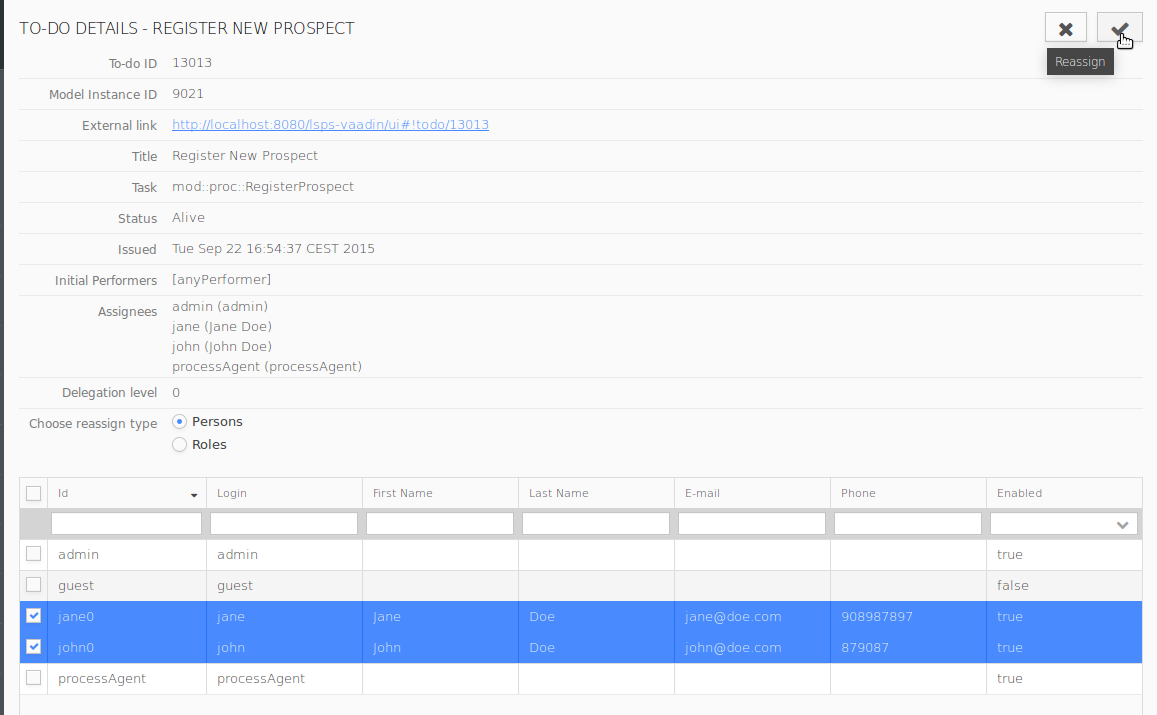
If you want to modify the data of a saved to-do that are not persisted, you can do so directly in the raw XML of the model instance: Export the to-do into the raw XML, modify the data, and import the new XML back to the server.
If you modify XML data that is persisted, the persisted data remain unchanged.
Only users with the Todo:Write_All security right have access to this feature.
To export or import the model instance XML with the to-do data, do the following:
Important: Importing a corrupt XML can result in corrupt to-do state and in turn failure of model instance execution.
To export or import a to-do state, do the following:
Important: Importing a corrupt to-do state can cause the system to fail to work with the to-do.
To export the state of a saved To-Do as an XML file run the savedTodoExport command.
| Long Option | Short Option | Description |
|---|---|---|
--host* | -h | host URL |
--username* | -u | user name |
--password* | -p | password |
--todoId* | to-do id | |
--location | output location prefix (todo id will be appended) |
* required parameters
To import the state of a saved To-Do into an existing To-Do, run the savedTodoImport command.
| Long Option | Short Option | Description |
|---|---|---|
--host* | -h | host URL |
--username* | -u | user name |
--password* | -p | password |
--todoId* | todo ID | |
--file* | file with to-do state |
* required parameters
An orphaned to-do is a to-do, which cannot be seen by any front-end application user, possibly as a result of escalation, delegation, etc., for example, when a to-do was rejected by all assigned persons, or delegated to persons with insufficient security rights.
You can search for such to-dos from the To-Do List view: the view toolbar, click Filter  , and select Orphaned to-dos only.
To display orphaned To-dos in the table of the To-Do view, click the Filter  button in the view toolbar; in the displayed dialog, select the Orphaned to-dos option and confirm.
