LSPS Documentation
Decision tables serve to define business rules, which are then used to adapt the behavior of models. The tables can be modified on runtime.
Note: The LSPS implementation of Decision Model and Notation (DMN) is based on the industry standard for decisions established by OMG, DMN version 1.1.
Decision tables are defined in a dedicated editor in PDS as part of a module. The module can then evaluate a rule on runtime and be designed to behave differently depending on the rule outcome.
A decision table is considered a shared record. To evaluate a rule use the evaluation() call with the input expressions on the record: The call checks which input entries fit the table input values and returns their output values.
A decision table can be modified by users from their process application in their browser: They are made available by the Decision Table components in form definitions.
To design a decision table, do the following:
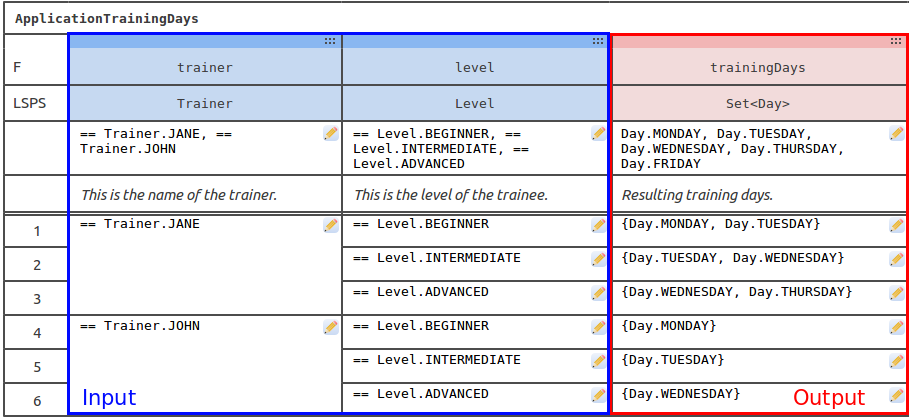
dmn module with the decision-tables-related resources.TrainingDays.LSPS.< 1000, in 1..1000Define the input parameters as blue columns:
::: icon in the title of a blue column and in the context menu, select the required action. 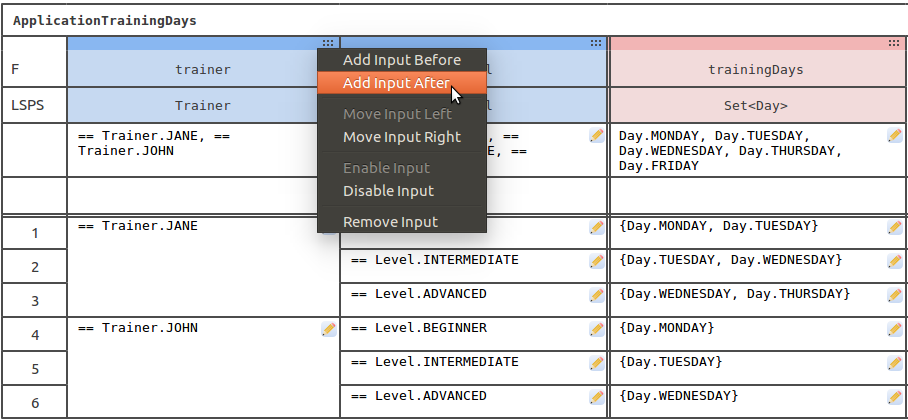
 button and use the displayed dialog.
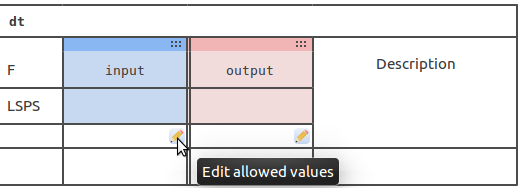
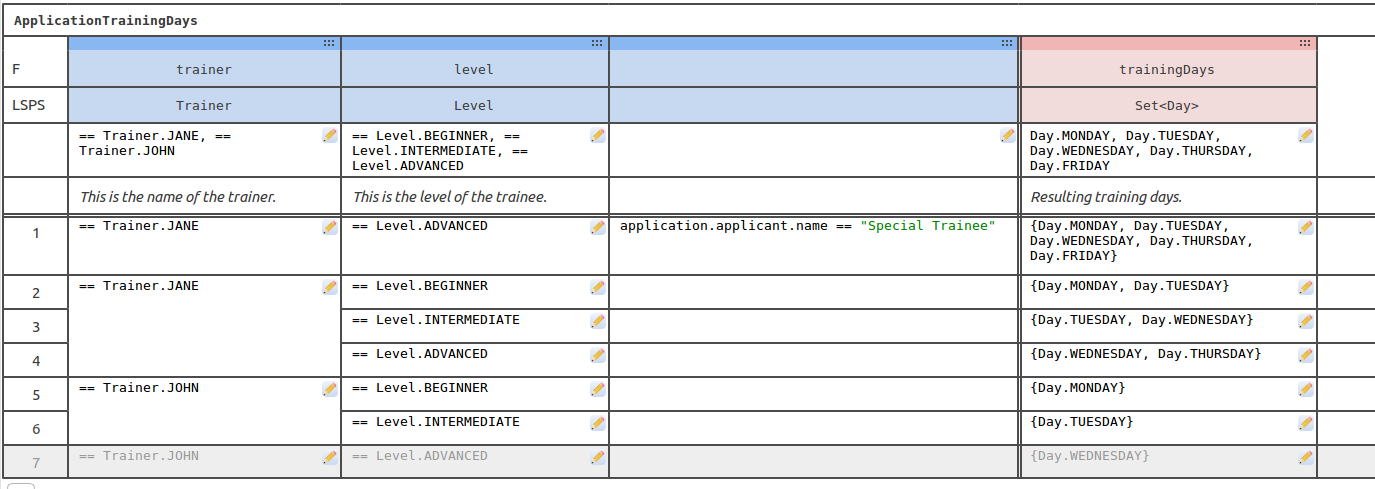
income you can use it in an expression, such as, getIncomeInEur(income) > 1000.Note that while output columns can make use of input columns, input columns cannot see the output columns.
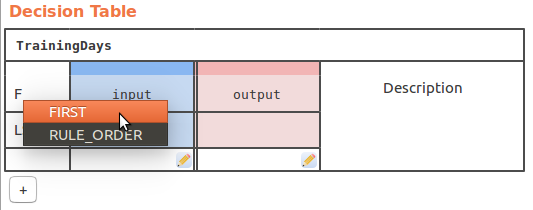
::: icon in the label cell of a red column and in the context menu, select the required action. button and use the displayed dialog.FIRST: the output of the first satisfied condition set is returned as the result.
The return value is one instance of the outputs.

setHitPolicy(), addInput(), addOutput(), addRules(), and others. Refer to the dmn documentation.Now you can use the decision table in your model to evaluate a rule and add it to a form so it can be edited from the Process Application.
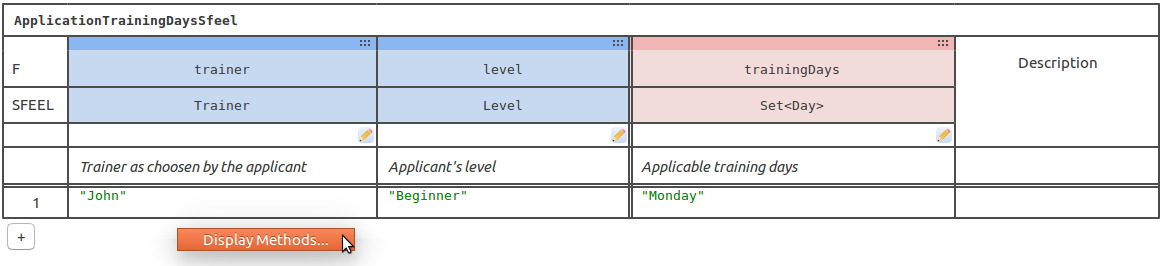
To check the constructor and methods of the decision table, including the evaluate() method which you call on a decision table with input arguments to get the output value, right-click below the table and select Display Methods.
SFEEL is a simple expression language in which you can define the business rules in a decision table. However, mind that the rules must not have any side effects; they can use only basic data types and simple unary conditions with no external resources. If you require more complex expressions in your decision table, use the LSPS Expression Language.
Even if you set your decision table to use SFEEL, the input and output data types on decision tables are defined as their LSPS equivalents:
| Original SFEEL | LSPS SFEEL | Example |
|---|---|---|
| boolean | Boolean | true, false |
| number | Decimal or Integer | 11.0001, 12 |
| string | String | "hello" |
| days and time duration | duration(string_literal) | duration("P2DT3H4M30.1S") |
| year and months duration | duration(string_literal) | duration("P1Y10M") |
| time | time(string_literal) | time("10:00") |
| date | date(string_literal) | date("2012-12-24"), date("2012-12-24+09:00") |
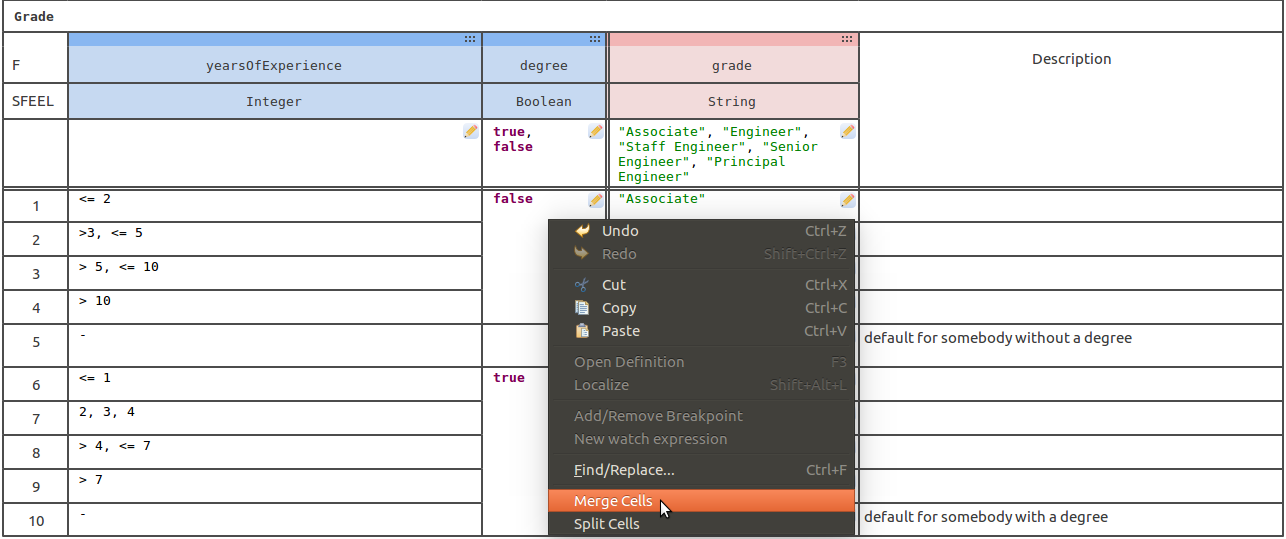
To merge a cell with the cell below in your decision table, right-click the cell and select Merge Cells. You can split a merged cell into the individual cell analogously: select Split Cells from the context menu.
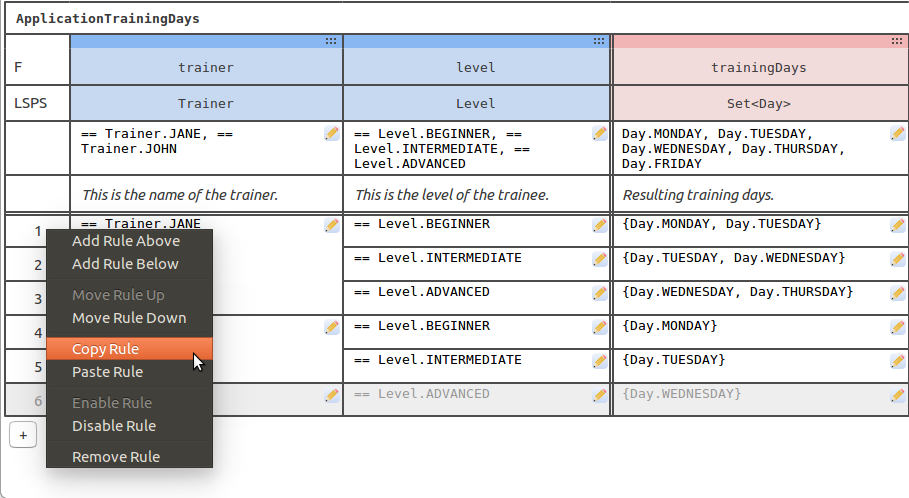
To copy a rule in your decision table, click its row number and select Copy Rule. To paste it, click the row number of the row under which you want to insert the rule and select Paste Rule.
You can create a new decision table instance with the constructor with the argument true: <Constructor>(true) will construct the table based on the definition.
If you want to use the same decision table on multiple occasions, for example, from different process instances, you can persist it and load it later.
You can save a decision table with the save(<StringID>) method of the decision-table instance. To load a decision table, create its uninitialized instance and then call the load(<StringID>) method on it.
<Constructor>(false) will only create the decision table without values so you can load a saved table into it using the load() call. Example loading of a decision table if it exists These calls enable you to save and load a decision table from the Process Application via the Decision Table component. Note that you can change the decision table definition in the component as well.
To find a saved table, call findDecisionTableIds(<IdPattern>) or findDecisionTables(<IdPattern>).
Note: You will not be able to check the return type of an evaluate() call on design time for tables acquired with the
load()method call since the tables could be edited on runtime and their input and output parameters might change.
You can check the logic in the methods of the decision table (right-click below the table and select Display Methods).
When you want to make a decision based on the rules of a decision table, perform an evaluate() call on an instance of the table; to obtain a decision table, you can either create a new instance of the table or load a previously persisted table with the save() call. The evaluate() call evaluates the input conditions of the rules as defined in the table and returns one or multiple results in which all conditions are true or null; Mind that the number of results, that is, whether results only from one row or all matching rows is returned, depends on the hit policy setting.
To evaluate a rule in a new instance of a decision table, create the instance and call evaluate() on it. Note that in this scenario, the data types returned by the table are explicitly stated:
Important: PDS and the LSPS Server do not check the type of the decision table: hence, if a variable is of a type of a particular DecisionTable and you assign it another type, it does not cause any exception. This allows editing of the DecisionTable structure on runtime from the Process Application.