LSPS Documentation
With LSPS repository installed, you can generate the LSPS Application
Before you generate or import an LSPS Application, make sure you have met the following requirements:
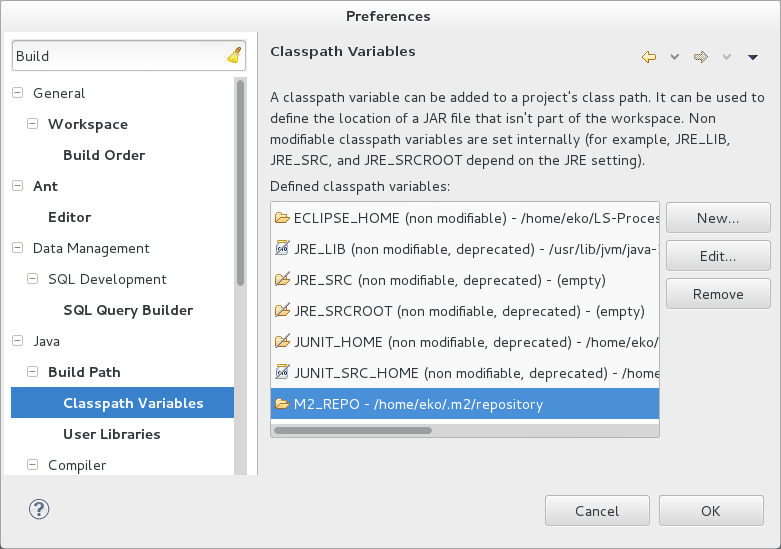
You can check the path to the LSPS Maven repository in <Designer_HOME>/tools/settings.xml. To create and set the M2_REPO variable, go to Window > Preferences; then Java > Build Path > Classpath Variables; click Add and define the M2_REPO variable.
<Designer_HOME>/documentation/apidocs directory and in the newest minor version online.
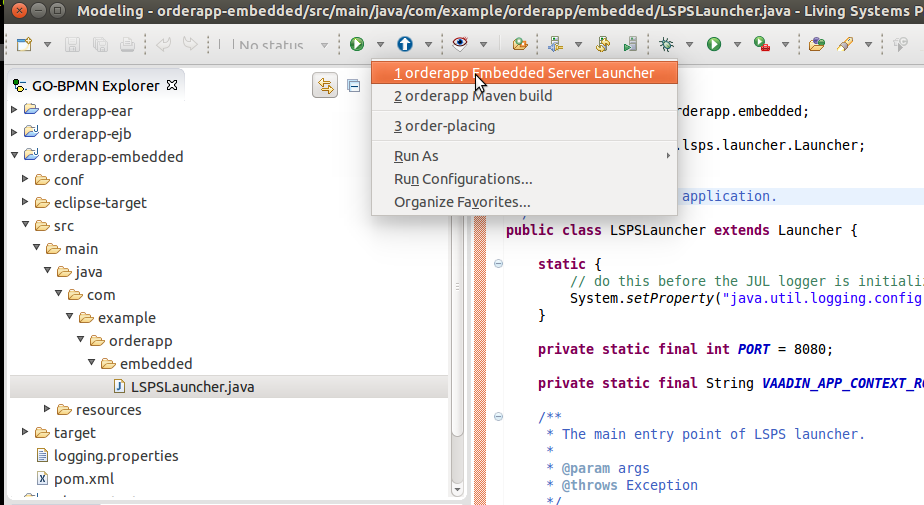
The Designer allows you to generate the LSPS Application–sources of the Application User Interface that expose its API, an SDK Embedded Server, build and launch configurations, and the structure for your business model based on the resources of the LSPS Maven repository: You can modify the sources and check the changes using the SDK Embedded Server,
Important: The SDK Embedded Server with its generated run configuration
<YOURAPP> Embedded Server Launcher; is a different server form the Designer Embedded Server.
To generate the application and resources in Designer, do the following:
unzip lsps-repo-<VERSION>.zip ~/.m2/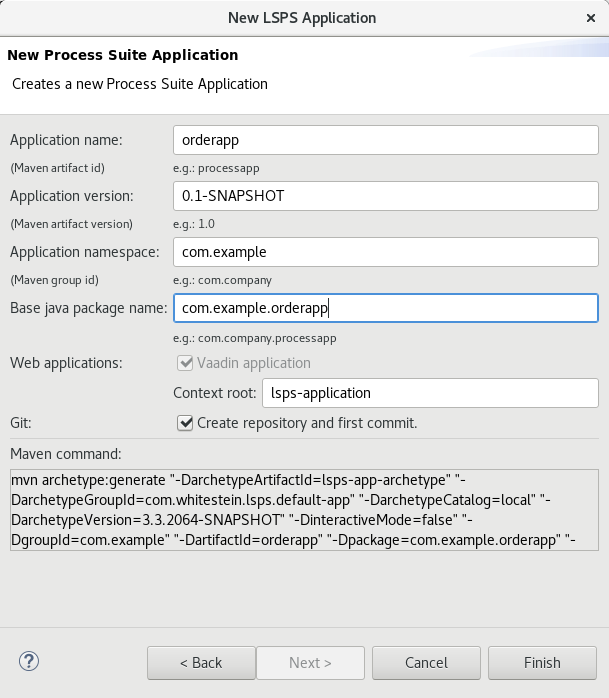
Generate the lsps-app-archetype maven artifact.
To get an example of the maven command, open Designer, go to File > New > Other and locate LSPS application in the popup. Note that the custom archetype is not available in the central maven repo: it is either in your local repo or in the LSPS maven repo depending on what maven repository location you defined during Designer installation.
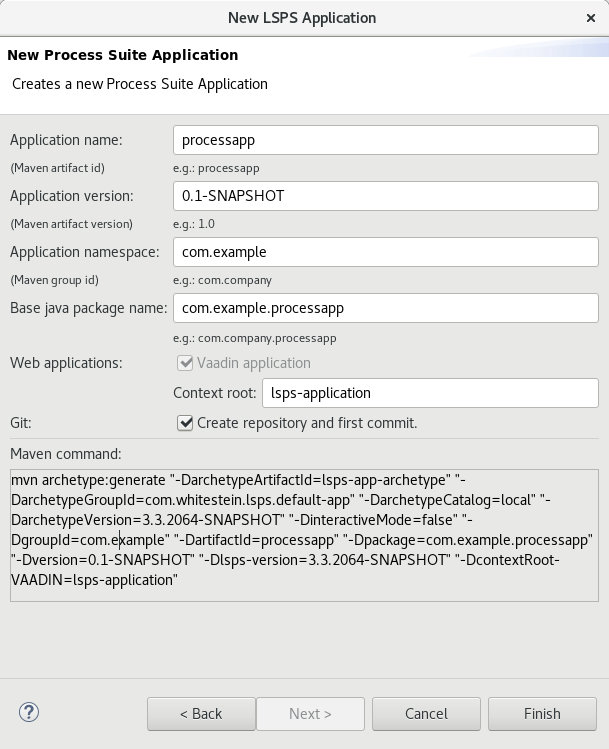
$ ~/LSPS-Enterprise-3.3/tools/mvn.sh archetype:generate "-DarchetypeArtifactId=lsps-app-archetype" "-DarchetypeGroupId=com.whitestein.lsps.default-app" "-DarchetypeCatalog=local" "-DarchetypeVersion=\<VERSION\>" "-DinteractiveMode=false" "-DgroupId=sk.my" "-DartifactId=processapp" "-Dpackage=sk.my.processapp" "-Dversion=0.1-SNAPSHOT" "-Dlsps-version=\<VERSION\>" "-DcontextRoot-VAADIN=lsps-application"git init..project to the .gitignore file in the application directory: The directories are generated by maven and differ depending on the environment. Note that is not the case for .project directories in modules: these are not generated by maven and must be under version control.Create an initial commit, for git, git add * and git commit -m "init":
In the future, when migrating to a newer version of the application, you will apply all commits starting from the next commit on the new application version: this will allow you to use a new version of the application with your customization changes added on top (refer to Preparing Upgrade of the Minor or Major Version).
$ ./mvn.sh clean install eclipse:eclipse.