LSPS Documentation
When creating forms, you will typically do the following:
To define form parameters, do the following:
In the GO-BPMN Explorer, right-click the form and select New Parameter.
Alternatively, you can open the form properties in the Properties view and click Add on the Parameters tab.
When the form is then called, the call can provide arguments that can be used inside the form.
Form variables are initialized when the form is displayed, that is, when an InitEvent is fired. In your forms you should prefer form variables to global variables so as to keep your presentation Data separated from the business data.
To define a form variable, do the following:
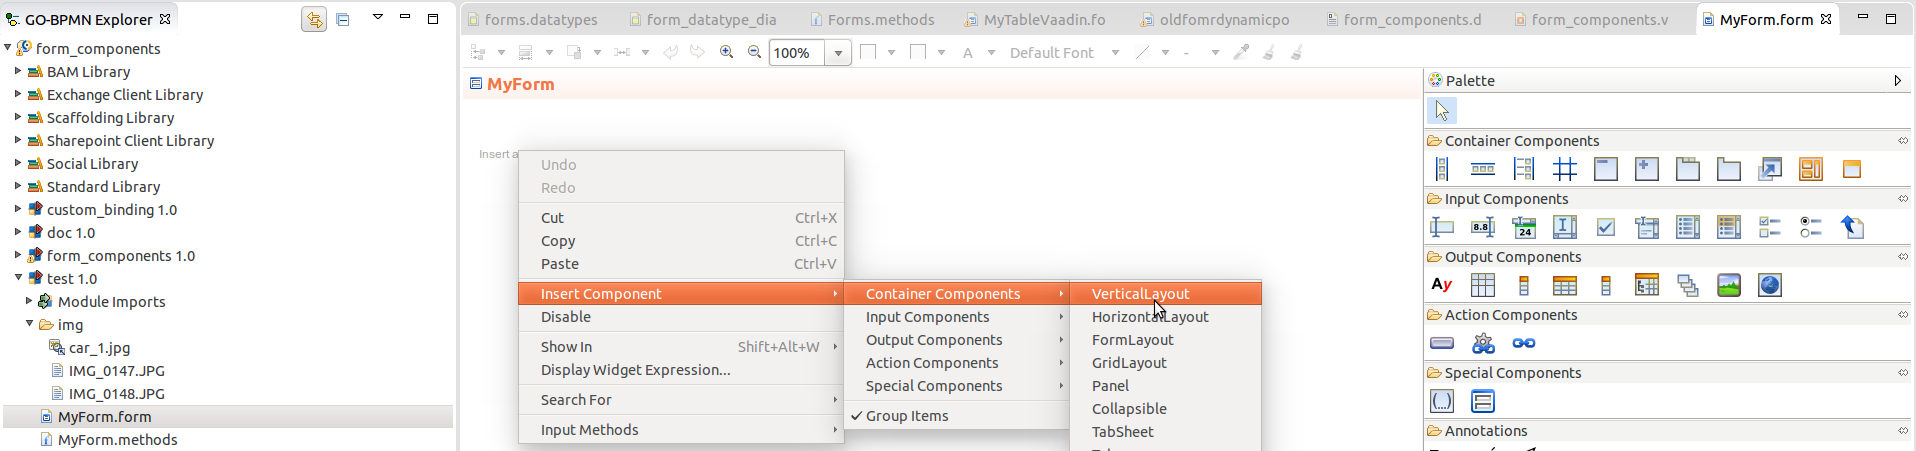
To create the content of your form, open the form definition file (double-click it in the GO-BPMN Explorer). Then either click the required component in the palette and then click into the canvas to insert it, or right-click the canvas, go to Insert Component and select the component from the context menu.
Note: You can create forms also with the dynamic-gui functions, such as createAndAdd(). However, these functions are not maintained and will not be enhanced.
Once you have created your form or while doing so, you can do the following:
You can select one or multiple form Components and wrap them with another components in the Form graphical editor.
To insert such a parent form component over another component, do the following:
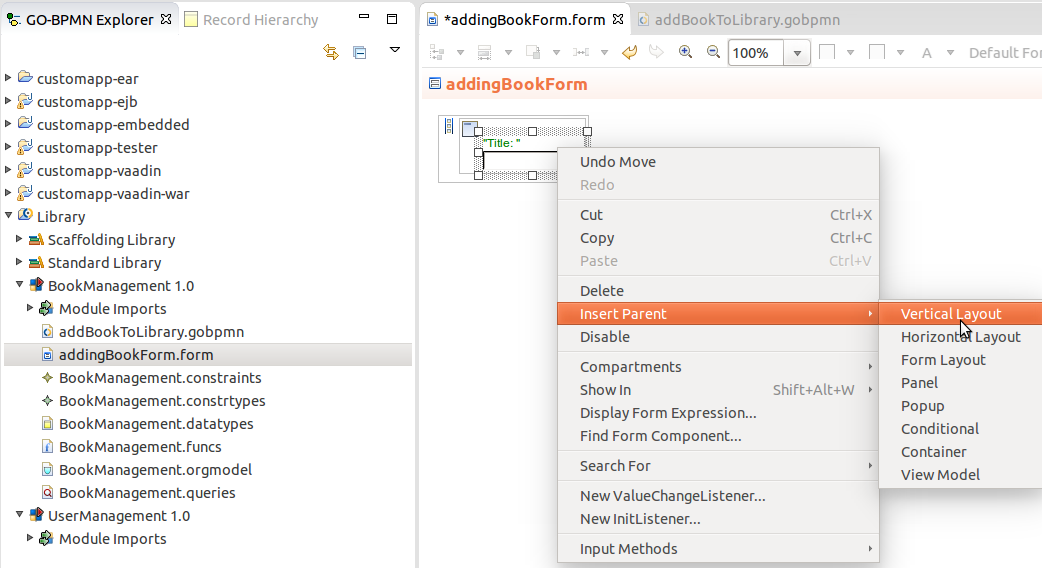
To delete a only a parent component and preserve its child components, right-click the parent component and click Shift Children Up.
Note that the option is only available if the children can be accommodated in the form after the deletion; for example, it is not possible to delete a Vertical Layout with multiple child components if it has a Panel component as its parent.
While creating a form, you can display its preview in the browser.
Make sure a local LSPS Server is running.
When displaying a form preview, the server runs a persisted instance of the model that contains the form definition (global variables are initialized, the Form parameters are initialized, the form screen context is created). The model instance is persisted.
To display preview of your form in your web browser, do the following:
In the Management perspective, you can delete any model instances that you triggered as form previews in the Model Instances view: right-click anywhere into the view and click Remove All Form Preview Model Instances.
Since forms are defined as functions and their components as variables of the respective record type on the level of the Expression Language, you can display their source in the Expression editor:
If an error on a form component occurs during runtime, the server returns an error message with the modeling ID of the form component. To find the form component, do the following:
Every form component can define its context menu. The menu and its content is defined as a component property. When the user right-clicks the component, the context menu with its items is displayed. The user can then click a context menu item. On click, a MenuEvent is produced. The MenuEvent has the id of the clicked menu item as its payload so the form can define the MenuListener that will trigger the respective actions.
The context menu can be defined as static or dynamic: A static context menu is calculated only once before the form is rendered, while a dynamic context menu is recalculated on every right-click. This might cause performance issues since it could require accesses to server on every right-click.
If you define both a static and a dynamic context menu on right-click, the displayed context menu will contain the static menu items on top and the dynamic menu items below.
To define a context menu on a component, do the following:
[new MenuItem(
            caption -> "Open the Detail",
            htmlClass -> "contextmenu",
            id -> 0,
            submenu -> [new MenuItem(
                    caption -> "Open in a New Tab",
                    htmlClass -> "contextmenu",
                    id -> 1),
                    new MenuItem(
                    caption -> "Open in This Tab",
                    htmlClass -> "contextmenu",
                    id -> 2)
                    ]
            )
]
You can define listeners on any form component; however, every component type allows only listeners for events it can actually produce; for example, a Button component can define only an Action listener, which is fired when the user clicks a button. It cannot define a ValueChange listener since there is no value to be changed on a Button. On the other hand, a component might produce various events: A button produces just like all components an InitEvent when it is created: An ActionListener on the Button will ignore the event: it catches only the events of a particular type on its component.
Note: To listen for an event on another component, you can do one of the following:
- To listen for events from child reusable forms or to listen on events from parent forms, use Container interface with public listeners and registration points.
- Produce an application event.
To create a listener on a form component:
Note that if a tab contains a change, its tab label is bold.
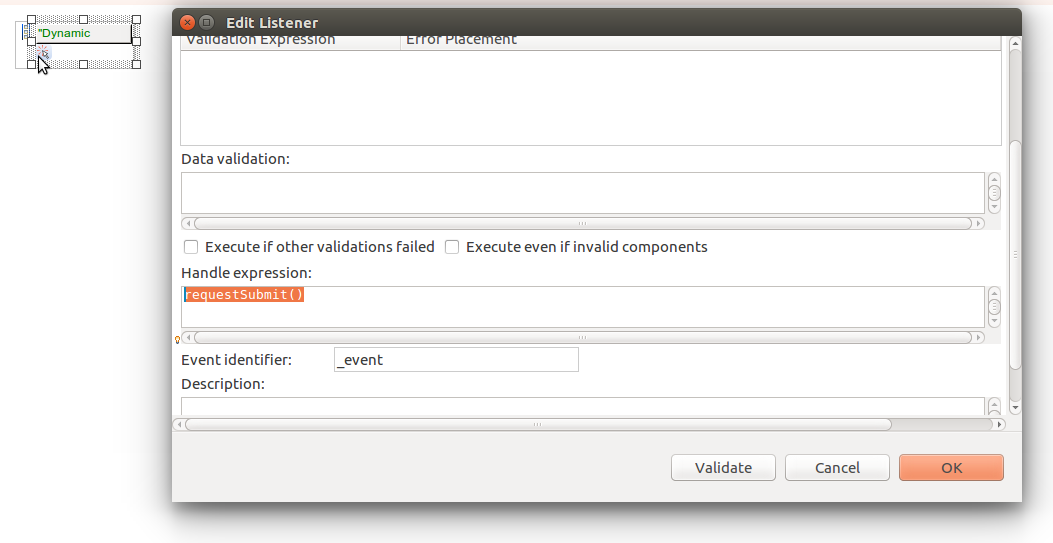
To filter out an event so the listener does not catch it, use one of the following listener properties on the Advanced tab:
true. if ((_event as ApplicationEvent).payload as Integer) = 1 then true else false end
Note: An event might not be processed also if the validation process fails.
If you want to ignore some queued ValueChangeEvents when a listener is triggered, define on the listener the Process component property: the property defines a list of form components whose ValueChangeEvents are included in the event-processing cycle. Any other ValueChangeEvents remain in the queue.
For example, let's assume a table with column A and column B. Both columns contain input components that are not-immediate and buttons used to submit the values from the given column. When the user changes values, ValueChangeEvents from both columns are kept in the event queue. Then the user clicks the submit button in column A. The value change listener must define as its Process component only column A. If it defines as its Process component column B as well, all the ValueChangeEvents will be processed.
To disable a listener, open its properties and select Listener is disabled on the Basic tab.
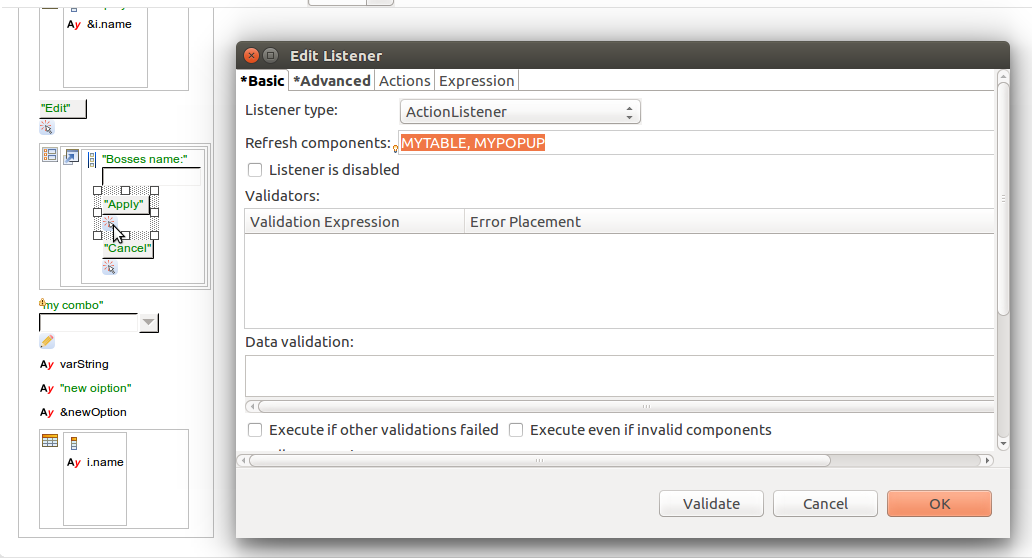
To refresh the content of form components, do the following:
Alternatively, you can call the refresh() function from the handle expression (for example, refresh([MYTABLE, MYPOPUP])).
To persist the base context of a document or to-do base as part of the event handling, enable the Persist action on the respective listener: the data in the process components and the to-do or document remains open with the underlying process remaining in unchanged status.
Note that the scope of data that is persisted depends on the Process components setting: if this setting defines a set of form components, only the data of these components is persisted.
The Persist action is performed after the merge to the screen level before the transaction is committed.
Below the Persist checkbox, define a persist action, which is performed immediately after the persist, if applicable.
Alternatively, you can call the persist() function from the handle expression.
To save the state of the to-do or document for later editing, define the Save action on a listener. The action is identical to clicking the Save button on a to-do or document in the LSPS Application User Interface. Note that the save action does not persist the data, therefore make sure to activate the Persist action if required.
Note: A saved document is persisted in the system database as a SavedDocument record. If saved repeatedly, the same record is overwritten; hence only the last saved document version is available. On submit, the persisted document is removed.
The Save action expression is a closure that has the saved to-do or document as its input parameter. It serves to further process the saved document or to-do; for example, store the to-do or document in your own data source.
To implement this feature, you will need to define the following:
Note that by default, the save action does not save Column states (width and collapse state). To save these, process as described in Saving Column Width and Collapsed State.
When the user submits the document or to-do, the data is saved, typically in the underlying DB via shared Records, and; in the case of documents, the model instance ceases to exist, and, in the case of to-dos, the user task finishes.
Note that the document will remain available in the list of documents since the list contains the types of documents, not their instances: Unlike To-Dos, documents availability does not depend on a Task; they are available as long as the definition of the document is on the server and their instances are created on request.
To define, when the document or to-do is submitted, do one of the following:
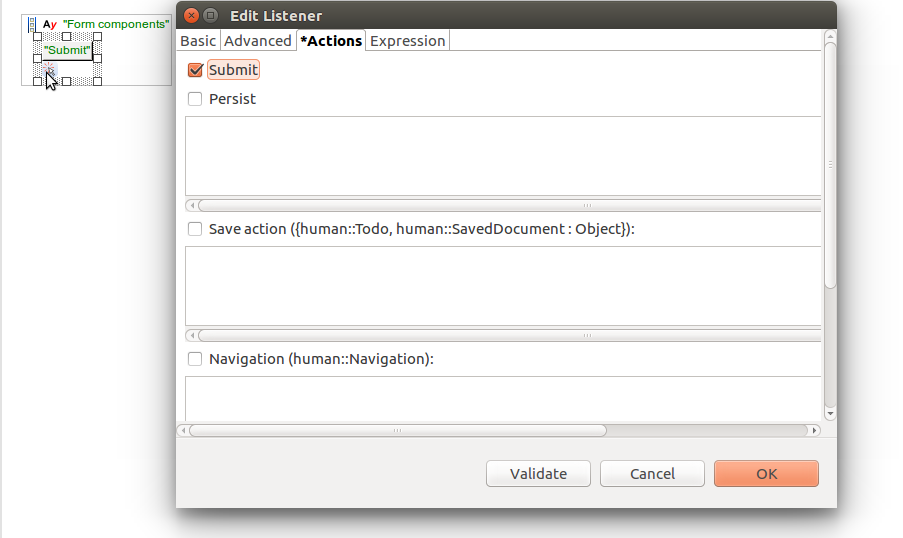
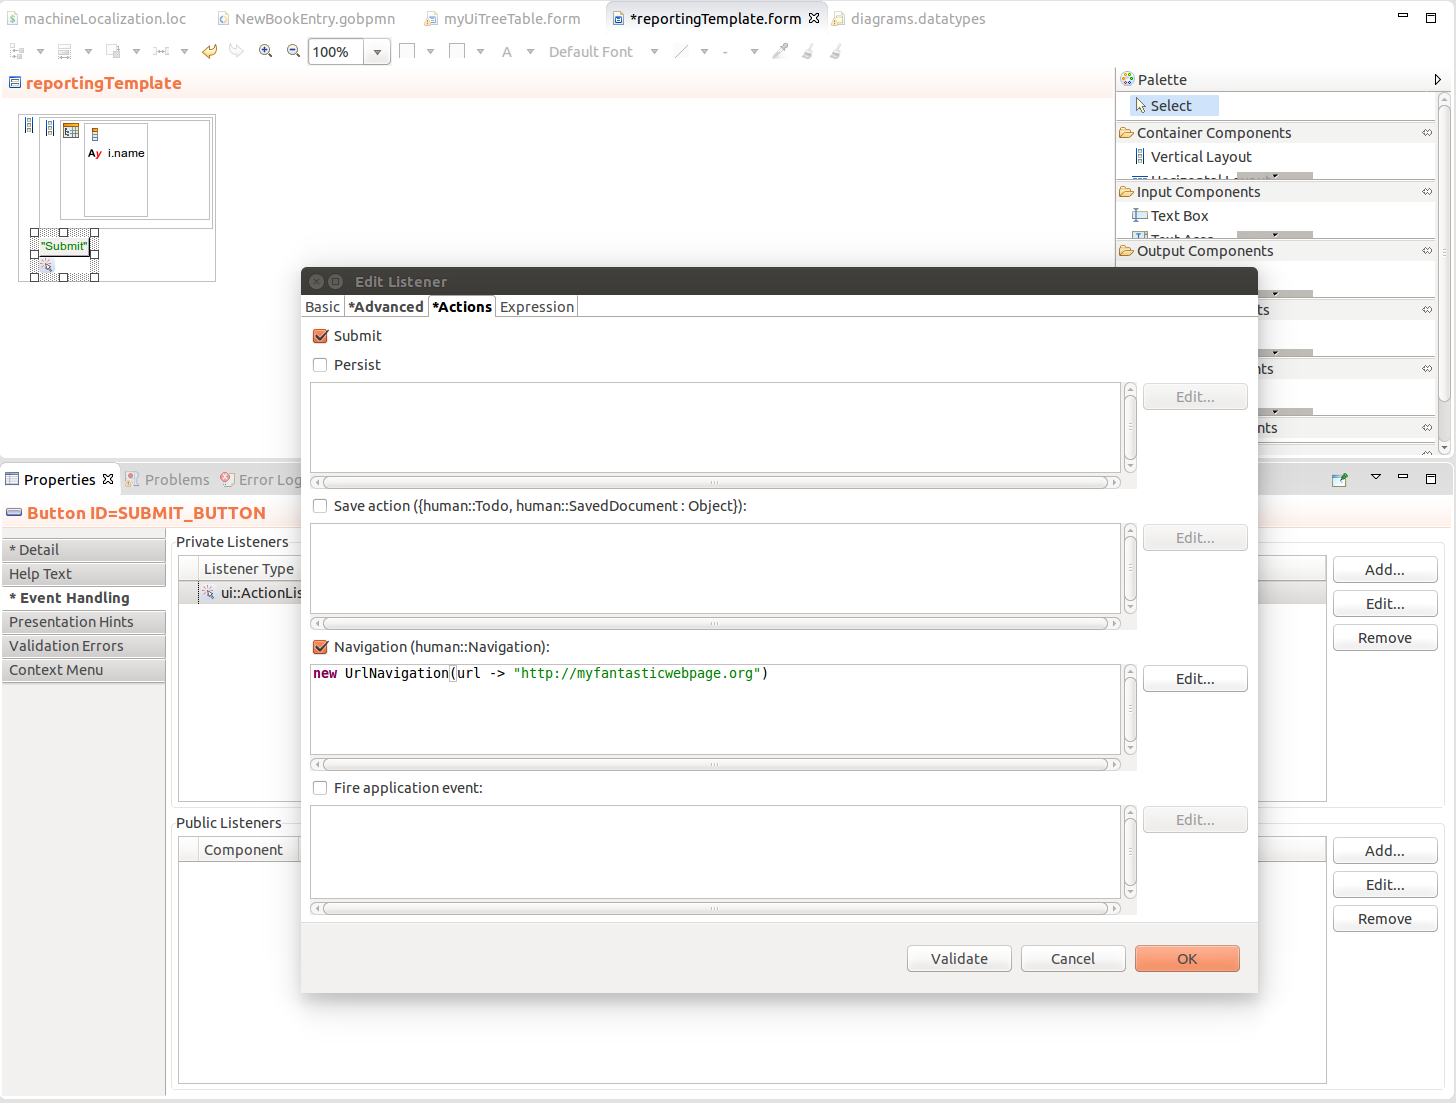
To navigate to a location when the form is submitted or saved, define the Navigation on the Action tab of the listener: you can navigate to a to-do or document, URL, custom application page (refer to the descriptions of data types defined in the human.navigation.datatypes resource in the Standard Library).
Note: You can define a Navigation also on the document definition: This Navigation overrides the Navigation defined on the form (that is, if you define a button that submits the form, the form will navigate as defined in the Navigation closure on the document; not in the navigation of the submit component).
Navigation expression
Note: Navigation expression is evaluated right after persisting, which allows you to use the persisted data in the navigation expression. However, the action is taken only after the submit or save action is performed.