LSPS Documentation
Once you have designed a module, you can upload it to an LSPS server and run it. Note that only a module that is executable can be used to create a model instance.
To upload modules from PDS, first connect PDS to a server with LSPS Application Once you have established the connection, you can upload a model to the server and execute it.
From PDS, you can run your model in debug mode on the server you are connecting to presuming the underlying JVM runs in debug mode and check performance using profiler.
You can use also the command-line console as well as the Management Console to deploy and instantiate your model. However, you need to export your Model as a deployable bundle first.
When you upload a module with a data model that contains persisted data structures (shared Records), the tables for the related data is created in the database. If you modify the shared Records and pertinent relationships, and upload the module with the same name and version again, the already existing tables need to be adjusted. Therefore, whenever you are uploading or running a module, you need to define, how such situations are handled:
Important: The Database Schema Update Strategy setting does not impact LSPS runtime information, such as, data on uploaded models, model instances in the current execution status, persons details, etc. and the data remains unchanged regardless of the setting. Only tables based on module data models are subject to the strategy.
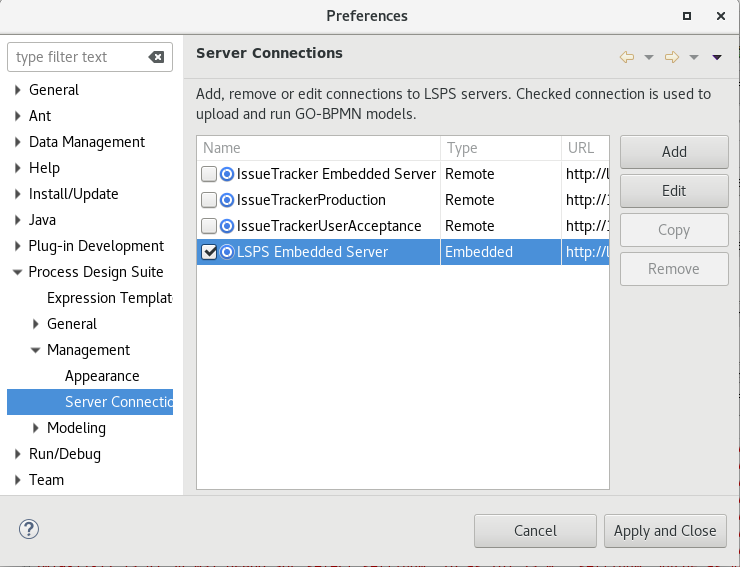
PDS connections to LSPS servers are set under Server Connections > Server Connection Settings. The connections to PDS and SDK Embedded Server are added automatically when the servers are generated: For the PDS Embedded Server, when first started and for SDK Embedded Server, when the LSPS Application is generated. Other connections must be configured manually.
To connect PDS to a server with LSPS Application other than the PDS or SDK Embedded Server, do the following:
http://localhost:8080)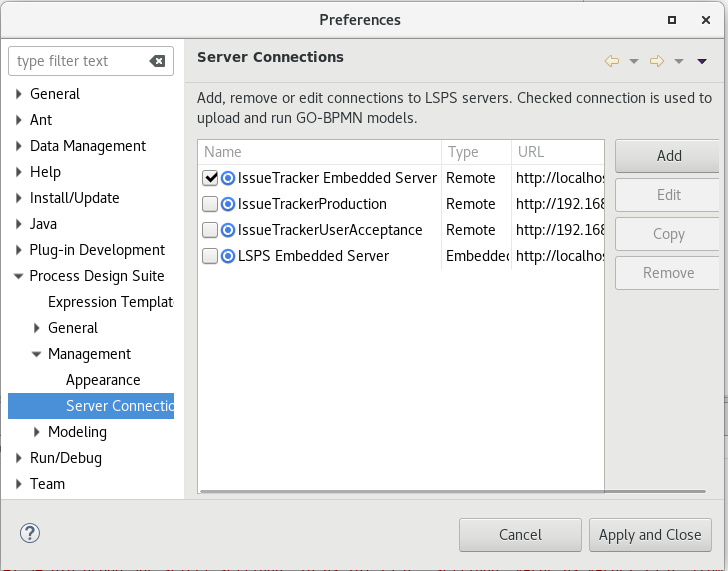
To use a proxy server to connect from PDS to an LSPS Server, do the following:
Manual: as defined in Proxy entries below
You can define in the Proxy bypass table, the hosts that should be excluded from the proxying.
PDS Embedded Server is a locally running server installed in the current workspace with the LSPS Application already deployed and an embedded database.
To install and launch PDS Embedded Server, and to connect the Process Design Suite to it, do the following:
 ) button on the main toolbar.
The server is installed in the .LSPSEmbedded directory of your workspace. To reinstall it, delete the directory and start the server again.
The content of the LSPS database includes the runtime information, such as uploaded models, model instances in the current execution status, persons details, etc. Before you reset the database consider exporting it so you can load it if necessary. When resetting the database, all data is lost.
To save, restore, or reset the LSPS Embedded Server database, do the following:
Important: If a database is restored, the current database goes lost.
For configuration of mail sessions for PDS Embedded Server, which is a WildFly server, use the server web console at localhost:9990/ (if you have not done so yet, create a user using add-user.sh or add-user.bat in <WORKSPACE>.LSPSEmbedded/wildfly-<VERSION>/bin).
How to configure mail servers for your deployment environment is documented in the Deployment and Configuration guide: locate the information within the section for your server and for your SDK Embedded Server in the LSPS Application Customization guide.
When you upload a module, the module and all its imported modules are uploaded to the LSPS Server of the server to which PDS is connected. An uploaded module is identified by its name and version and if a module with the given name and version is already present on the LSPS Server, its is replaced.
You can upload your modules to your LSPS Server from the Modeling perspective or from the Management Perspective. The upload is performed based on the upload configuration: when you are uploading a module for the first time, PDS automatically creates an upload configuration, which is then used for upload.
When uploading a Module from the Modeling Perspective, the target server is by default the Embedded LSPS Server. To change the target server, go to Server Connections > Server Connection Settings and in the dialog select the default LSPS Server.
To upload a module for the first time, do the following:Note: Ensure that the server with LSPS Server is running and your PDS is connected to it (Information on the current connection is in the line at the bottom of PDS).
 Address line with connection established
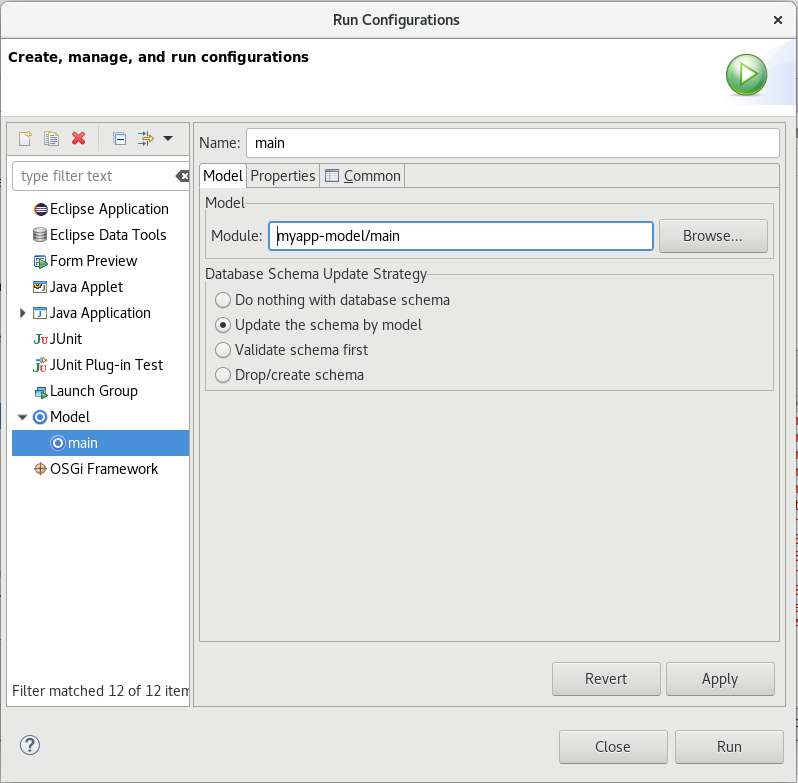
This creates an upload and run configuration, which is used for the next upload and run of the module from the Modeling perspective: To adjust the configuration, do the following:
To upload a module to the LSPS Server to which your PDS is connected, do the following:Note: Ensure that the server with LSPS Server is running and your PDS is connected to it (Information on the current connection is in the line at the bottom of PDS).
Address line with connection established
 ) and click Module Management).
 ) button.
You can check the list of uploaded Modules in the Module Management view.
Once you uploaded an executable module with its module imports to an LSPS Server, you can run it as a model instance.
Typically, you will create model instances from Management Console or Management perspective, but PDS allows you to upload and create model instances directly from your workspace.
When you create a model instance, the LSPS Server creates a runtime version of the model. Each model instance is created with a unique ID and optionally a set of initialization properties in the form of key-value pairs. These can include a special property, process entity, which is an id of a shared record and represents the data that the model instance works with.
For information on Model instance lifecycle, refer to the GO-BPMN Modeling Language User Guide.
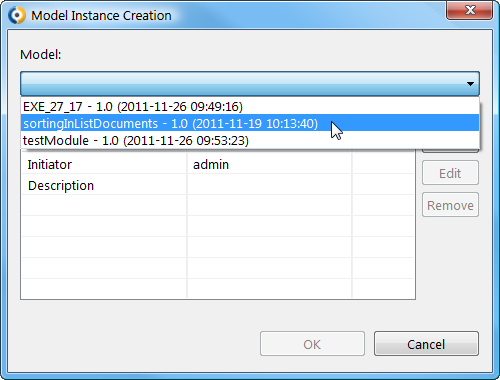
To create a model instance of an uploaded Model from the Management perspective, do the following:
) button and select Model Instances. ).Note: If a Model instance remains in the status Created, check the Error Log for errors. Error Log may contain also error entries of the server if these were caused by a Process Design Suite feature, which appear primarily in the Console view.
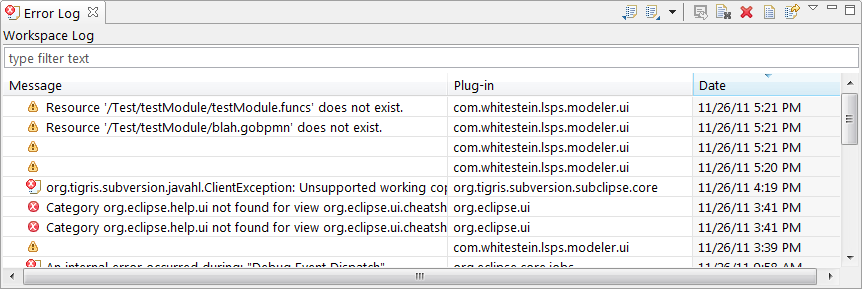 Error Log with error entries
To instantiate a model of a module for the first time, do the following:Note: Ensure that the server with LSPS Server is running and your PDS is connected to it (Information on the current connection is in the line at the bottom of PDS).
Address line with connection established
This creates an upload and run configuration, and instantiates the module. Next time you run the module from the Modeling perspective, the created configuration is used.
To adjust the configuration, do the following: